One of the frequent questions I receive concerns namespace design. I had previously covered this in my series Migrating Exchange from 2003 to 2010. However, with the recent restrictions on SSL certificates, I felt it necessary to revisit this topic with a dedicated article.
So, let’s get started!
What’s in a name
Namespace is very important.
Not only does namespace govern services like Outlook Web App, or, ActiveSync, but it also governs items such as the distribution of the Offline Address Book, or, the Autodiscover service.
A correct namespace design is key.
Out of the box, Exchange configures its internal URLs to match its internal hostname.
Due to recent restrictions, 3rd-party certificate providers can no longer put internal hostnames on certificates. This is actually a good thing! Otherwise, you are exposing the internal names of your servers to the internet.
However, if our certificate does not match our internal hostname it will give our users a security warning.
“So how do we combat this?”
Simple. In Exchange, we copy and paste our external URLs over our internal URLs. That way there is no certificate mismatch.
Then we use split-brain DNS to resolve those newly pasted addresses to the internal IP of our CAS server.
Split-brain keeps all the traffic on the local LAN. Without it, all local traffic would try to go out the firewall only to try and come back in later. Most firewalls will block this kind of behavior.
Reconfigure those URLs
Okay, let’s change those Internal URLs.
- Open the Exchange Management Console.
- Expand Microsoft Exchange On-Premises (server name)
- Expand Server Configuration
- Select Client Access
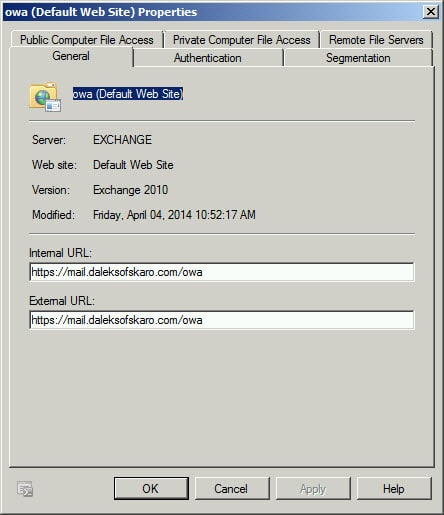
- In the lower-right pane, under the Outlook Web App tab, double-click OWA (Default Web Site).
- Under the General tab, copy the contents of the External URL and paste over the content in the Internal URL field.

- Click Ok.
- Repeat steps 6 and 7 for the Exchange Control Panel, Exchange ActiveSync, and Offline Address Book Distribution tabs.
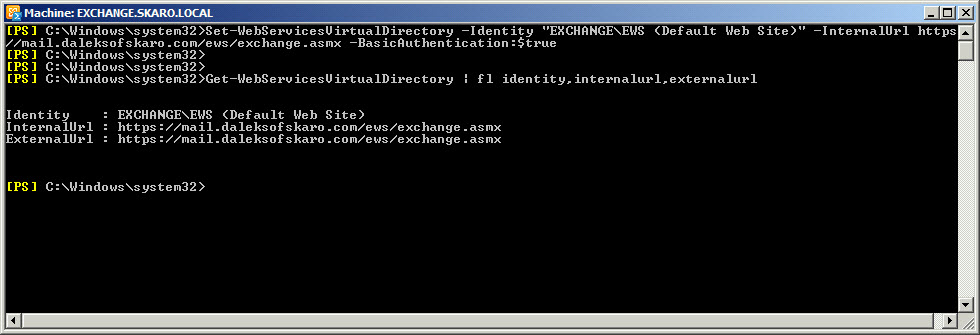
We also need to make changes to two additional namespaces. Autodiscover and Exchange Web Services (EWS). These are not in the GUI. For this open the Exchange Management Shell and issue the following commands.
Note: Be sure to change EXCHANGE on both these commands to the hostname of your internal server.
C:\> Set-WebServicesVirtualDirectory -Identity “EXCHANGE\EWS (Default Web Site)” -InternalUrl https://mail.daleksofskaro.com/EWS/Exchange.asmx -BasicAuthentication:$true
To confirm the change.
C:\> Get-WebServicesVirtualDirectory | fl identity,internalurl,ExternalURL
And now for Autodiscover.
C:\> Set-ClientAccessServer -Identity EXCHANGE –AutoDiscoverServiceInternalUri https://autodiscover.daleksofskaro.com/Autodiscover/Autodiscover.xml
To confirm this change.
C:\> Get-ClientAccessServer |fl identity,autodiscoverserviceinternaluri
Split-Brain DNS
Alright, let’s get our split-brain DNS configured next. Our DNS Servers will hold non-authoritative zones for our external namespace. This will only be used by our internal users.
- On your DNS server open DNS Manager.
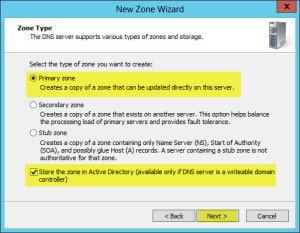
- Right-click on Forward Lookup Zone and select New Zone… from the context menu.

- Click Next.
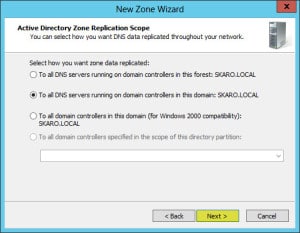
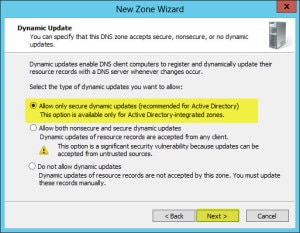
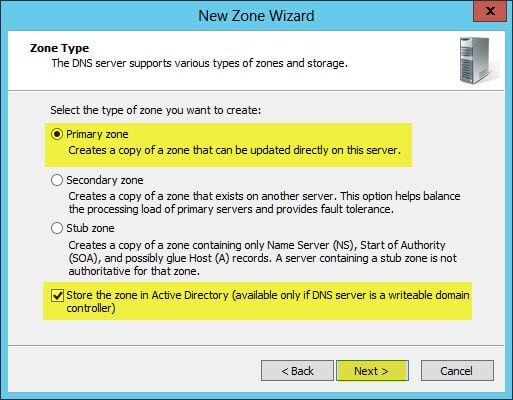
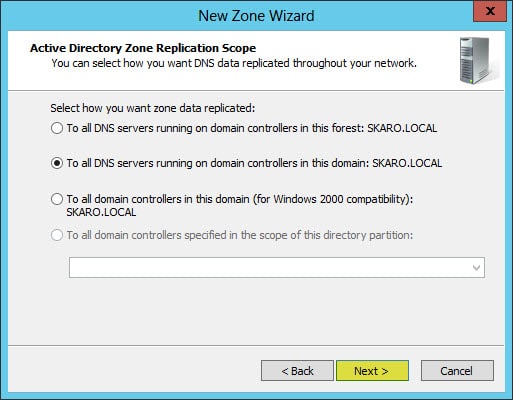
- Keep all the default settings. Click Next.
- Keep all the default settings. Click Next.
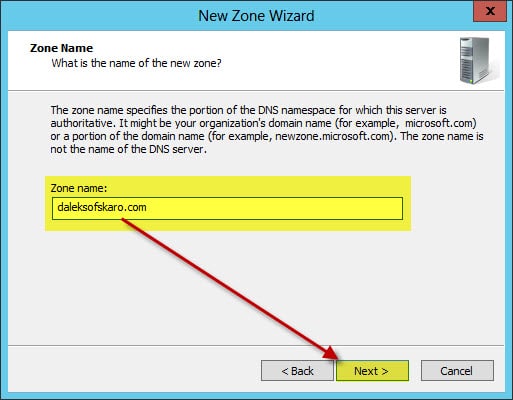
- In the Zone Name field enter your public domain name (in our example daleksofskaro.com).

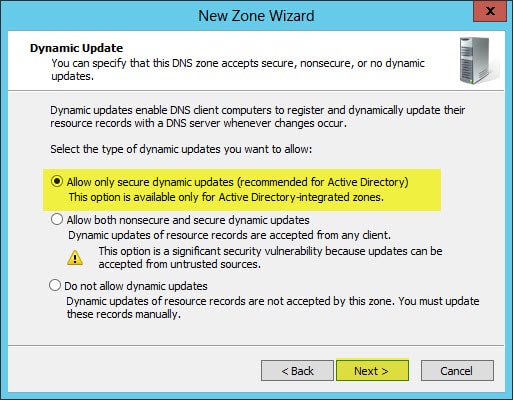
- Keep all the default settings. Click Next.
- Click Finish.
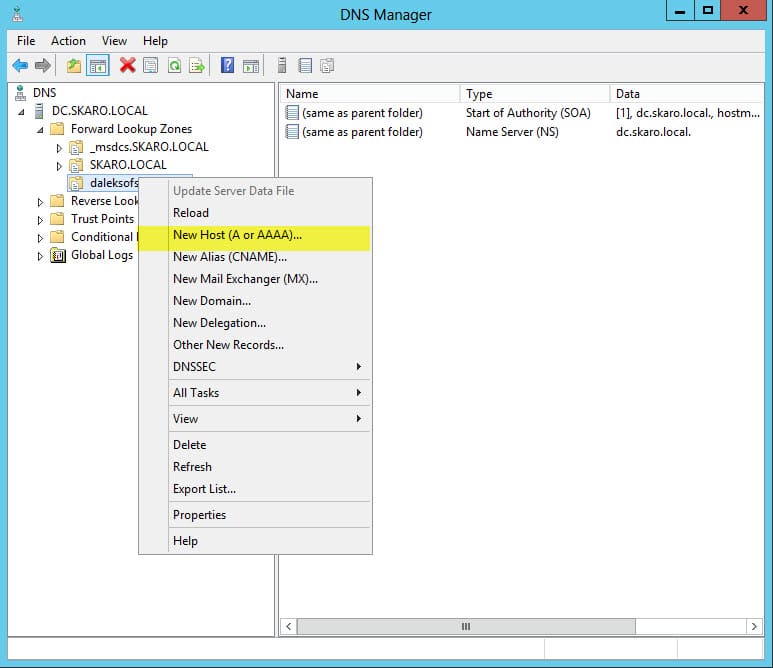
- Expand Forward Lookup Zones.
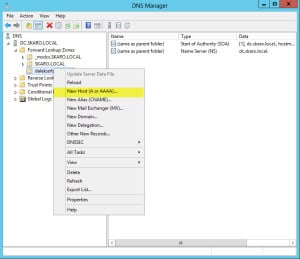
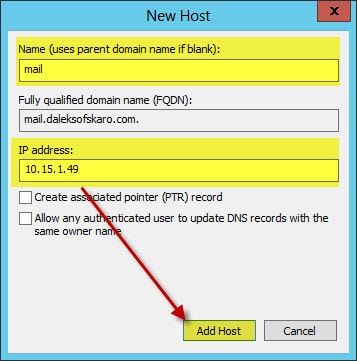
- In the left pane, right-click on daleksofskaro.com zone and select New Host (A or AAAA) from the context menu.
- In the Name field type the first name on your certificate. In the IP address field type the internal IP of your Client Access Server. (In our example it is 10.15.1.49).
- Click Add Host

- Repeat Steps 10-12 for all other names on your certificate.
- The end result should look similar to this.
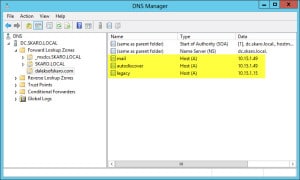


Note: You will also need to repeat Steps 10-12 for any resources you have on the Internet. For example, if your website is www.daleksofskaro.com, you will need to create a www host A record and point it to the public IP address of your hosting provider.
Certificate Requirements
Now let’s get our certificate generated for our new namespace.
One of the greatest improvements in Exchange 2010 was including a brand new Certificate Generation Request wizard in the EMC.
This wizard takes all the guesswork out of what kind of certificate you will need to purchase.
Let’s get started.
- Open the Exchange Management Console.
- Expand Microsoft Exchange On-Premises (server name)
- Select Server Configuration
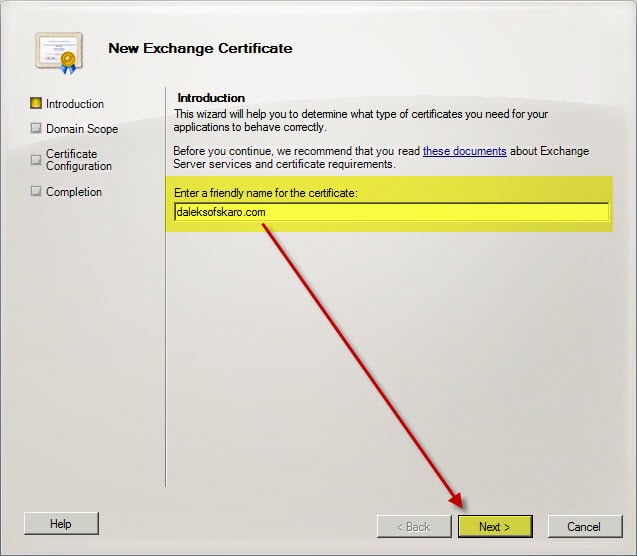
- In the far-right Action pane, click the link for New Certificate Request…
- In the Enter a friendly name field, enter your certificate name. In our example, we will make this mail.daleksofskaro.com. Click Next.

- Do NOT check wildcard. Leave this unchecked and click Next.
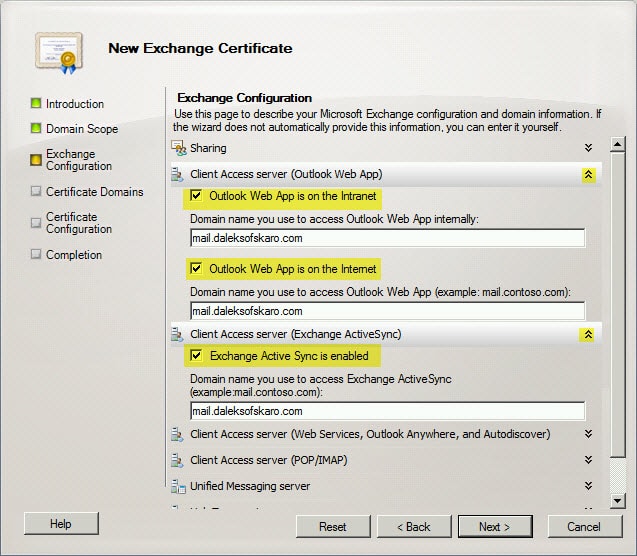
- This next page will help us determine all the namespaces we need on our new certificate.
- Expand Client Access Server (Outlook Web App).
- Check Outlook Web App is on the intranet.
- Check Outlook Web App is on the internet.
- Make sure our external URL is the only address in both Domain name fields. In our case mail.daleksofskaro.com.
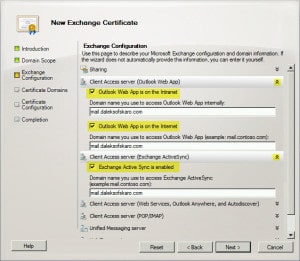
- Expand Client Access Server (Exchange ActiveSync).
- Check Exchange Active Sync is enabled.
- Make sure our external URL is the only address in the Domain name field. In our case mail.daleksofskaro.com.
- Expand Client Access Server (Web Services, Outlook Anywhere, and Autodiscover):
- Check Exchange Web Services is enabled.
- Check Outlook Anywhere is enabled.
- Make sure our external URL is the only address in the External hostname field. In our case mail.daleksofskaro.com.
- Check Autodiscover used on the Internet
- Check Long URL (Example: autodiscover.contoso.com)
- Make sure our autodiscover URL is the only address in the Autodiscover URL to use field. In our case autodiscover.daleksofskaro.com.
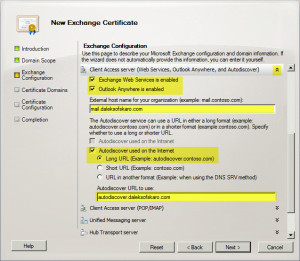
- Click Next.
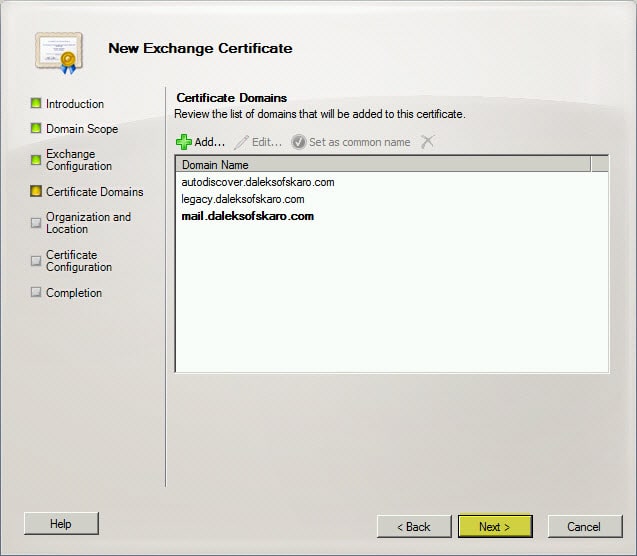
- The next screen should list all names you just created in DNS. If not, you can also add them here. In our example, we also made sure mail.daleksofskaro.com was Set as the common name (in bold).
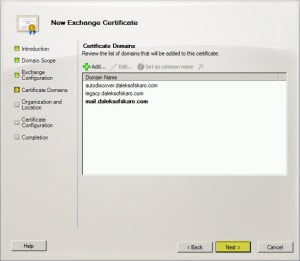
- Click Next
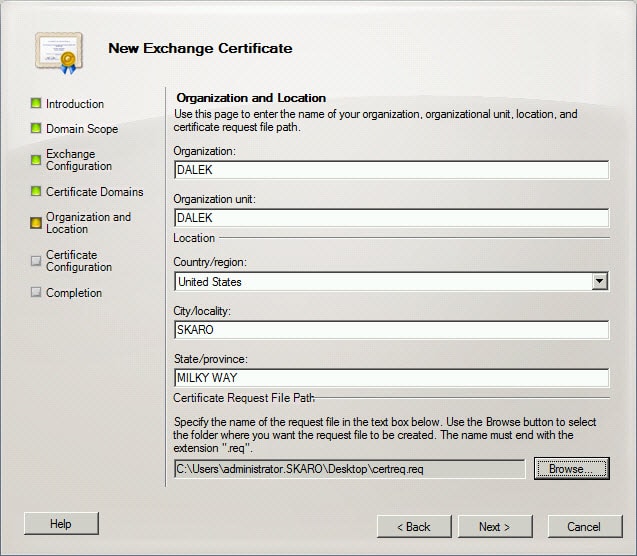
- Fill out your Organization and Location information.
- Click the Browse button and save the Certificate Request file to the Desktop.

- Click Next
- Click New
- Before you click Finish, review the three steps. You will notice in Step 1, it has identified you need a UC certificate. This is also known as a SAN certificate. Click Finish.


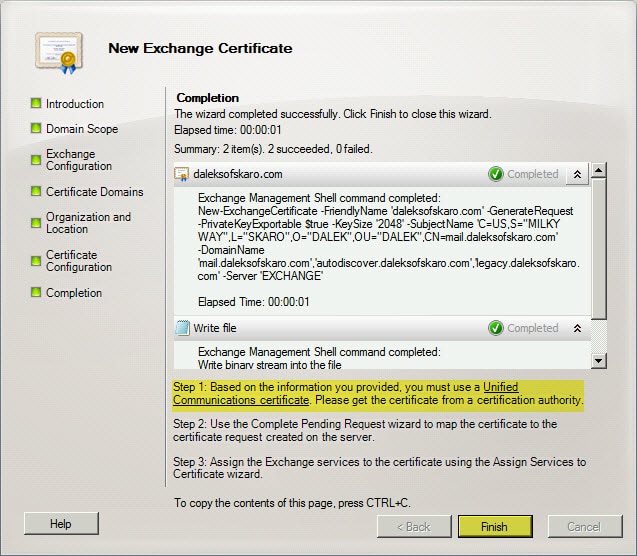
This should have created a certificate request file on your desktop. Open this file with Notepad and copy the entire contents, including the BEGIN and END lines.
Now you will need to purchase a UC / SAN certificate from a 3rd party source. There are many out there. I highly recommend Digicert.com (affiliate). Once the certificate has been processed and you have downloaded and unpacked your ZIP file we need to complete the certificate request.
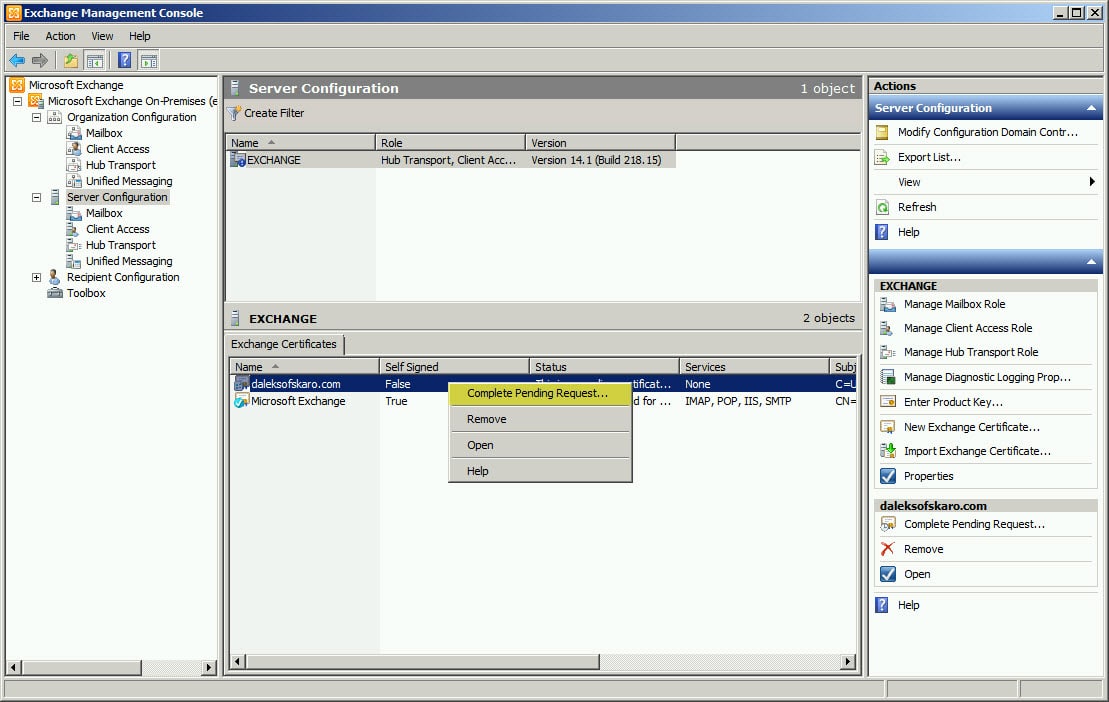
- In the lower-right pane, right-click on the name of our certificate (mail.daleksofskaro.com) and select Complete Pending Request from the context menu.
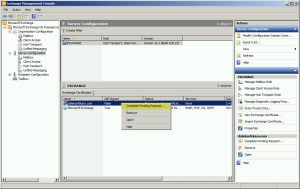
- Click the Browse button and locate the certificate from DigiCert (affiliate).

- Click Complete.

Exchange Web Services are still assigned to your old certificate. Let’s get these switched over to the new certificate.
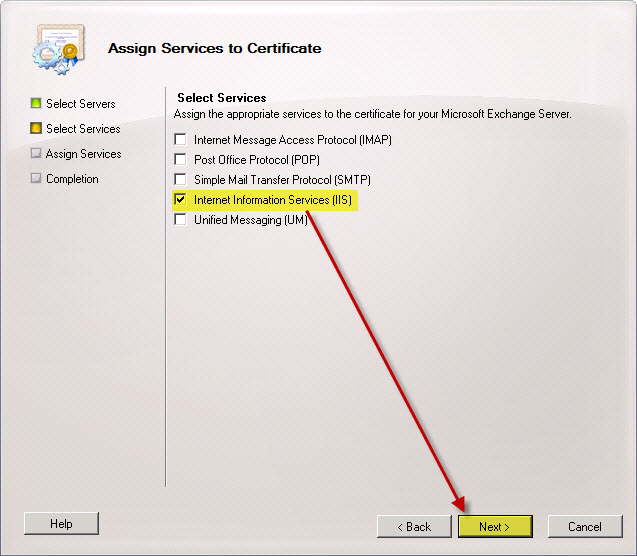
- In the lower-right pane, right-click on the name of our certificate (mail.daleksofskaro.com) and select Assign Services to Certificate from the context menu.
- Select Internet Information Service (IIS).

- Click Assign
- Click Finish
Now that we have our new certificate installed, we need to test to make sure it is working properly.
The easiest way to check is to enter your external URL (https://mail.daleksofskaro.com/owa) into a web browser.
Test from both an internal and an external source.
Make sure there are no certificate errors.
Tip: I recommend testing with the Microsoft Remote Connectivity Analyzer. https://testconnectivity.microsoft.com/
Test results all good? Then you are all done!
Was this article helpful to you? Leave us a comment and let us know how we are doing.

Hi Gareth,
I would appreciate if you could shed some light into the problem I have.
We have an Exchange 2007 SP3 Rollover 22 in our office. The local domain is company.pvt and we had the email set to company.com . We decided to “change” the domain to company.org since we are a non-profit organization. In real life we added company.org to our Exchange server and set the .org email address as the default for all users but they could still receive email under .com
We had a certificate from godaddy for company.com in place when we added company.org . The certificate was good for 3 years so we put up with the name mismatch in the outlook client every time we used outlook outside the organization. Very recently that certificate expired. As we pretend to move to office365 with the non-profit pricing we thought that we could avoid to buy another certificate just to continue the moving to o365 (we just started the move). So we created a certificate in our private CA to put in place. However, we cannot get the clients to connect over http. The CN in the certificate matches the CertPrincipalName on the outlookprovider (company.com) and the SubjectAlternativeNames include owa, mail and autodiscover for company.com and company.org. Also company.pvt and exchange.company.pvt are included in the certificate. We are unable to put it to work over http, even connected to the domain. Otherwise it works fine.
Thank you for your help.
I recommend staying away from using internal certificates with Exchange for the reasons stated. Sounds like your clients do not trust the certificate that is being handed out.
Do you still have your GoDaddy certificate? The time and effort making the cert from the private CA work usually outweighs the cost of renewing the GoDaddy cert for a single year until you get to Office 365. Plus if you Google GoDaddy promo codes you can typically get your order 33% off, unless you already get special non-profit pricing.
You may also want to look at a free certificate from Let’s Encrypt. https://letsencrypt.org/
Hi Gareth,
I do not have the GoDaddy certificate anymore neither I heard of letsencrypt.org before. I will give it a try. I appreciate your help. Thank you !!!
R
Hi Gareth,
Just to let you know. I ended using the website ZeroSSL which uses letsencrypt to generate the certificates and got it done. Thank you very much for pointing me in the right direction.
Awesome. Thanks for letting us know how it went. I have never used them myself but I know others speak highly of them. Good luck with the rest of your project.
Hi, i havean exchange 2010 server which has one mail domain running on it and it is secured by a ssl wildcard cert. I have followed your instructions upto point 8 and am struggling with the two additional name spaces. I know the name of my server but not sure what internalurl should point to? Can you confirm where i would get this info? Thanks.
I see one mistake with this post, under your autodiscover section, you put the InternalUri as https://autodiscover.daleksofskaro.com/Autodiscover/Autodiscover.xml but then in your Get, it shows https://mail.daleksofskaro.com/autodiscover/autodiscover.xml (this is correct, the first code is wrong). Just wanted to point this out to help other users when they read this, otherwise, super post, thanks!
Thanks JR. Looks like I had the wrong screenshot in place.