The Kemp Load Balancers are a fantastic series of products. Just this month, Kemp announced that it is offering a free virtual load balancer.
The free load balancer is great for a lab, proof of concept, or, small production environment. Be sure to check out our review here.
Given this fantastic offer–and the fact we were already huge Kemp fans–we decided to start a series on configuring Kemp load balancers for Exchange.
In part one, we look at how to deploy the free virtual load balancer from an OVF template. We will deploy this to our standalone ESXi 5.5 environment. In the second part of our series, we will configure the load balancer for Exchange 2013.
Disclaimer: I need to point out that I am not sponsored by Kemp in any way. However, this document does contain some affiliate links.
Deploy the OVF
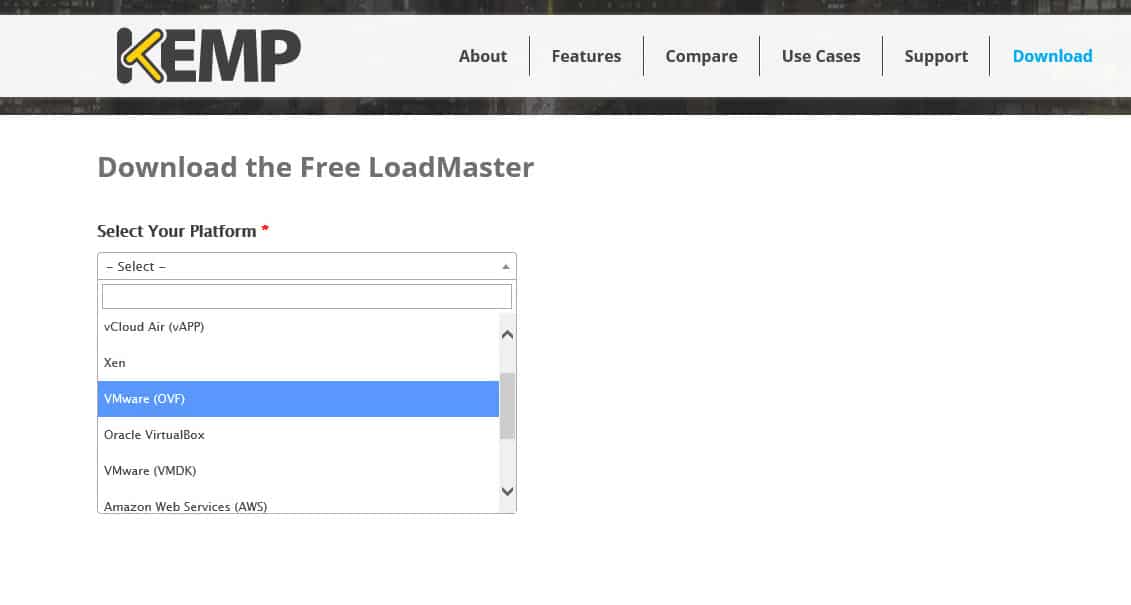
To get your free virtual load balancer, visit, https://freeloadbalancer.com/. Once at Kemp’s site, you will need to register for a Kemp ID (if you don’t already have one). Also, be sure to confirm your email address from the activation message.
Once logged in, you will be asked to Select Your Platform. We are going to deploy to ESXi 5.5, so let’s pick VMware (OVF).
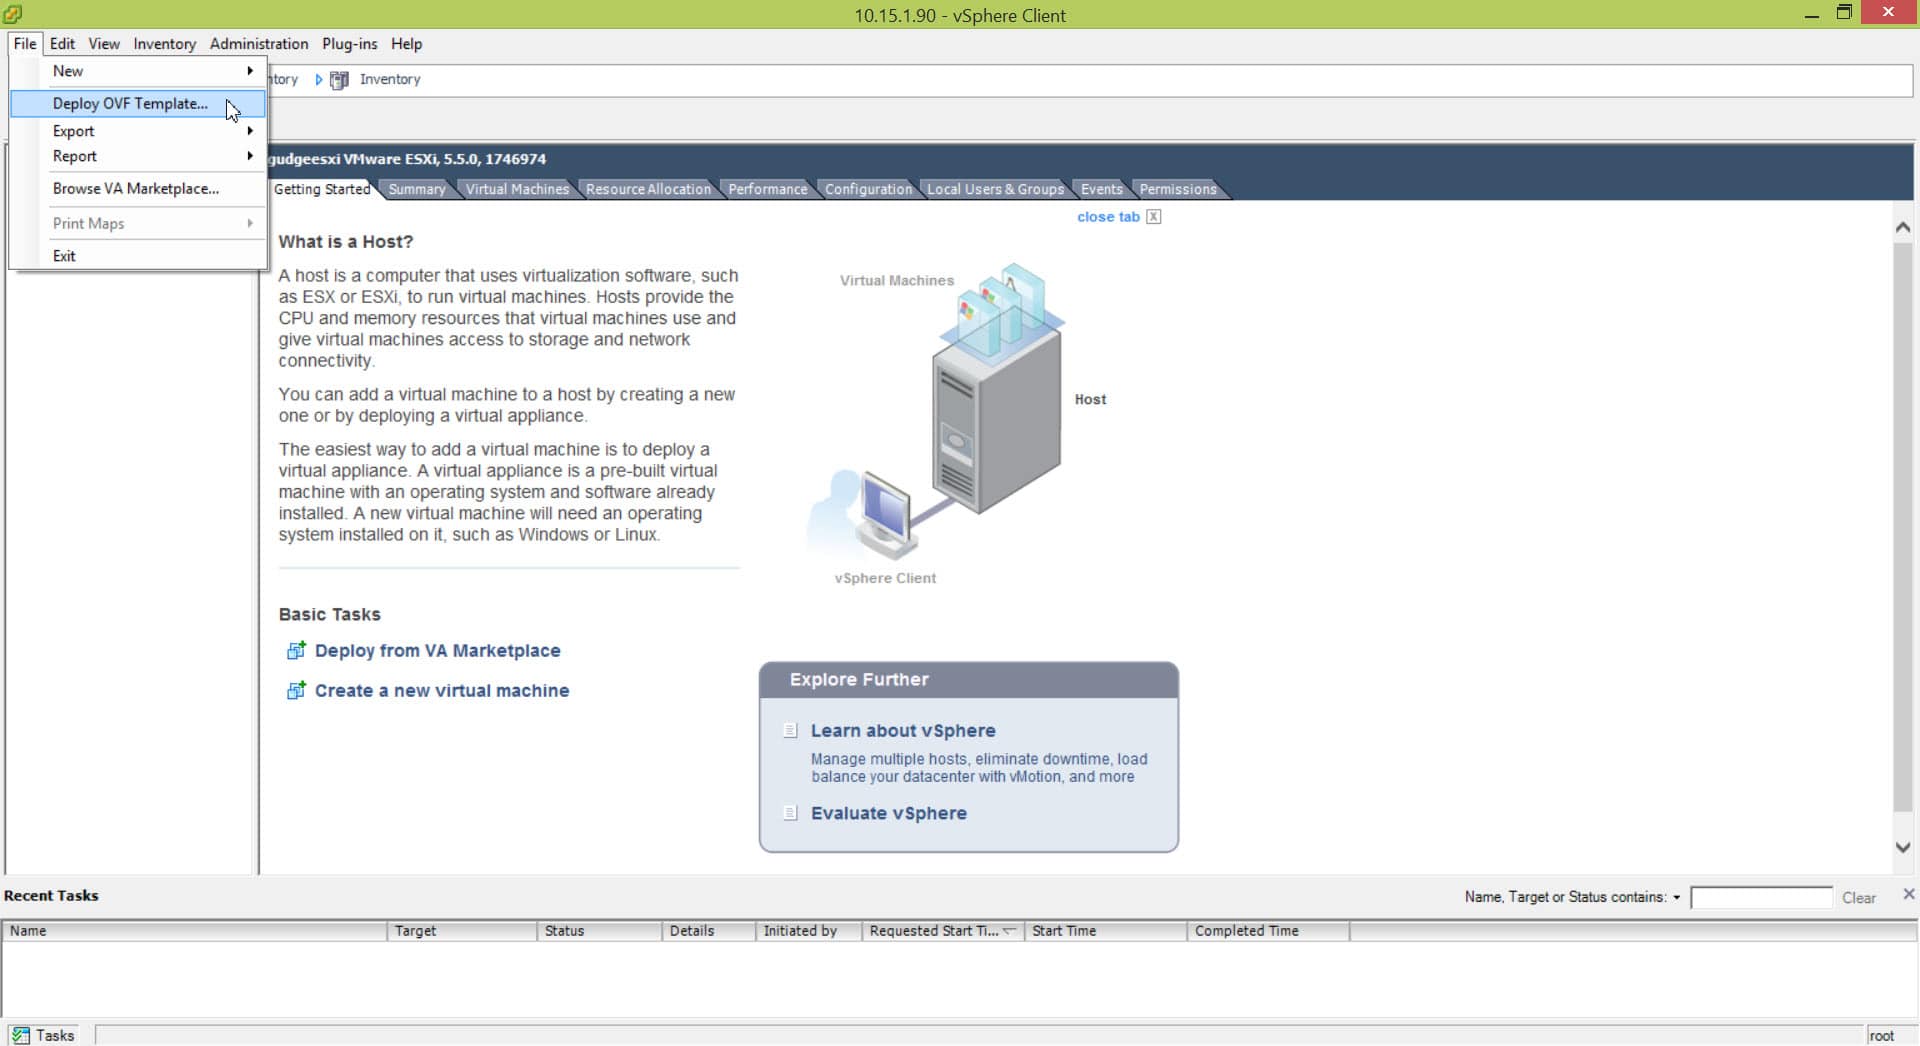
Download and extract the ZIP file to a convenient location. Inside this archive, you will find 4 files. The OVF and VMDK files are the ones we will import. To do this, connect with your VSphere Client, select the File menu and click Deploy OVF Template.
In the Deploy OVF Template dialog box, click Browse and select the OVF file.
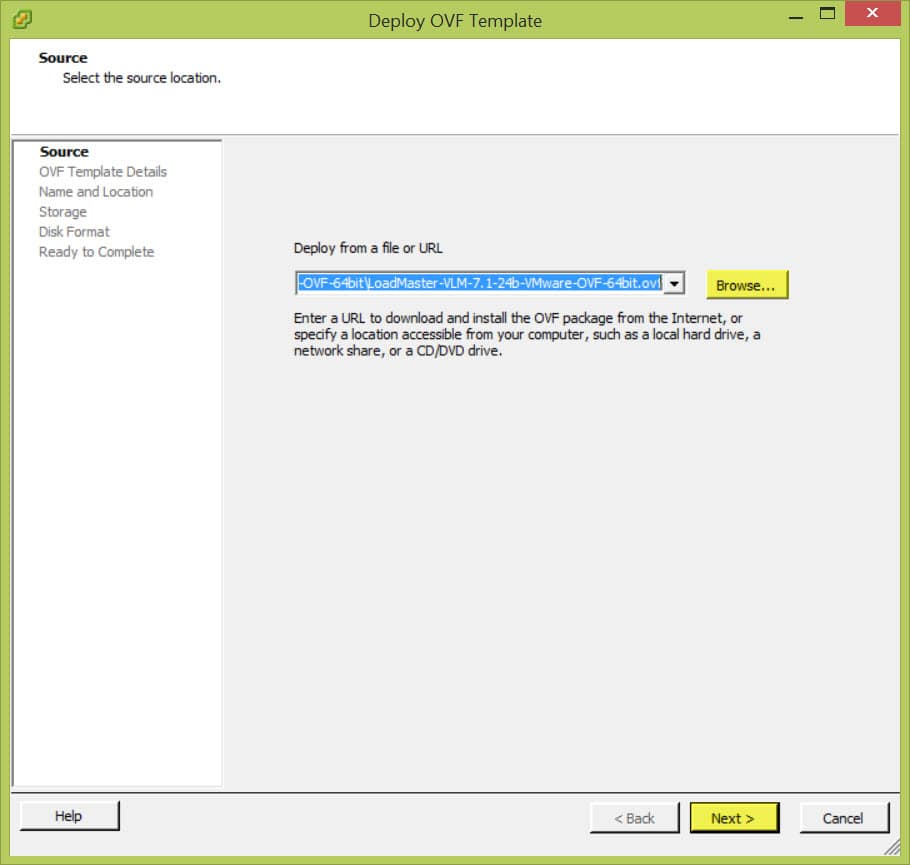
Click Next.
On the OVF Template Details page, click Next.
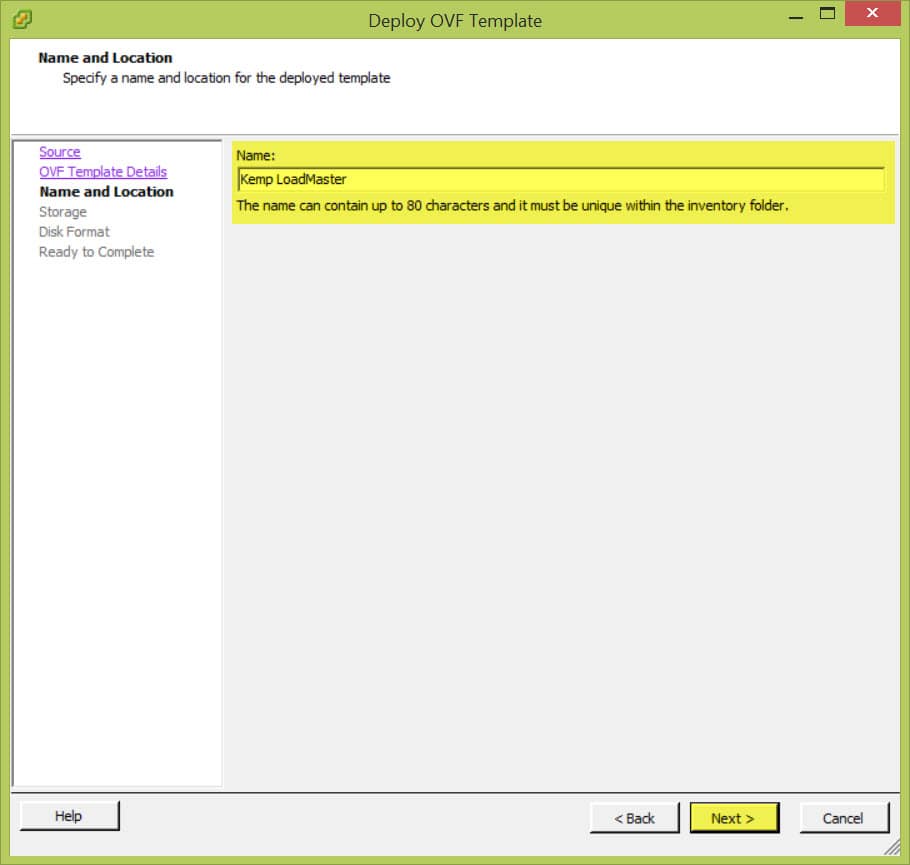
On the Name and Location page, specify a Name and click Next. This will be the name you see in Inventory.
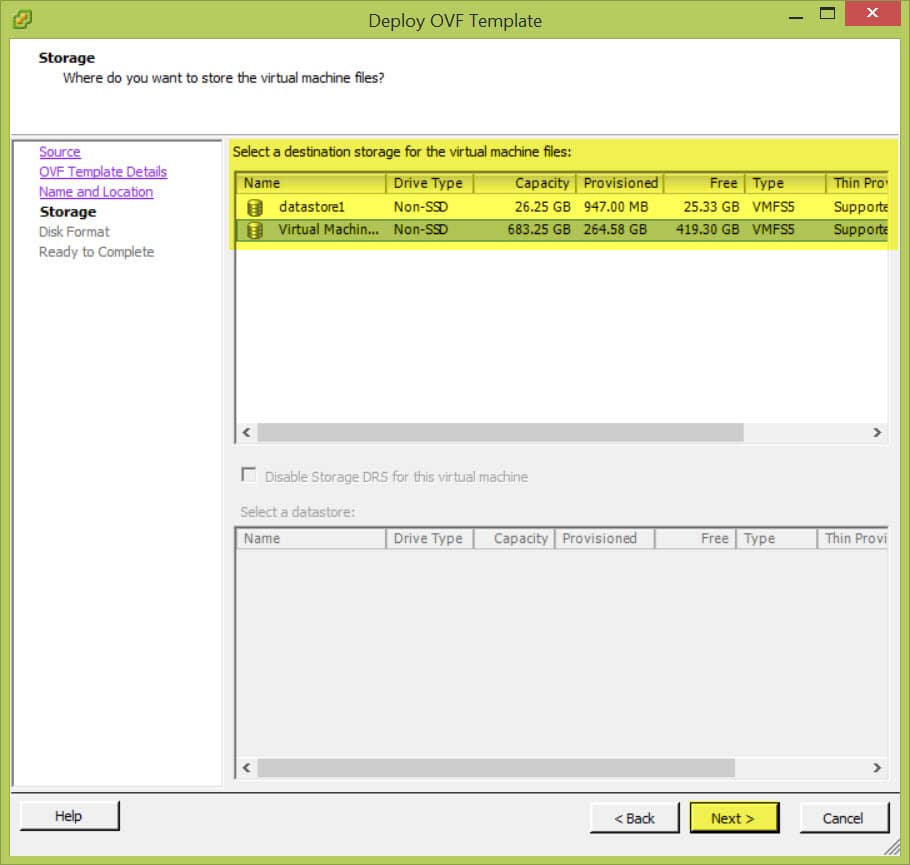
On the Storage page, pick a storage destination and click Next.
On the Disk Format page, leave the defaults and click Next.
On the Ready to Complete page, click Finish.
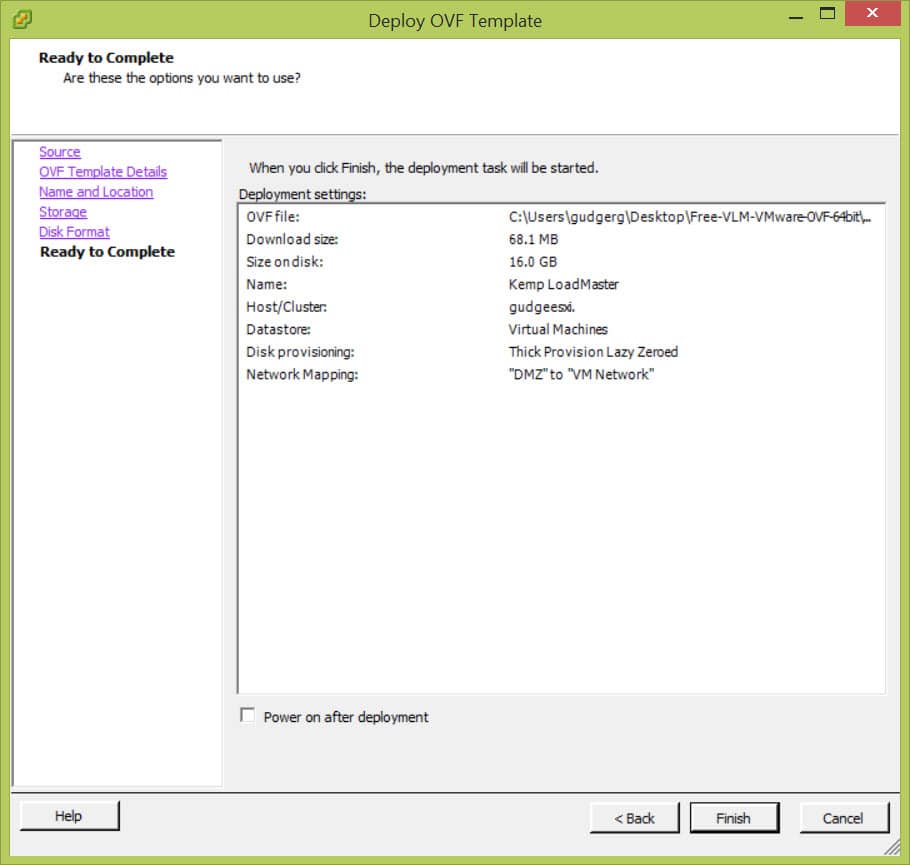
The OVF and VMDK files are uploaded. Click Close on the Completed Successfully dialog.

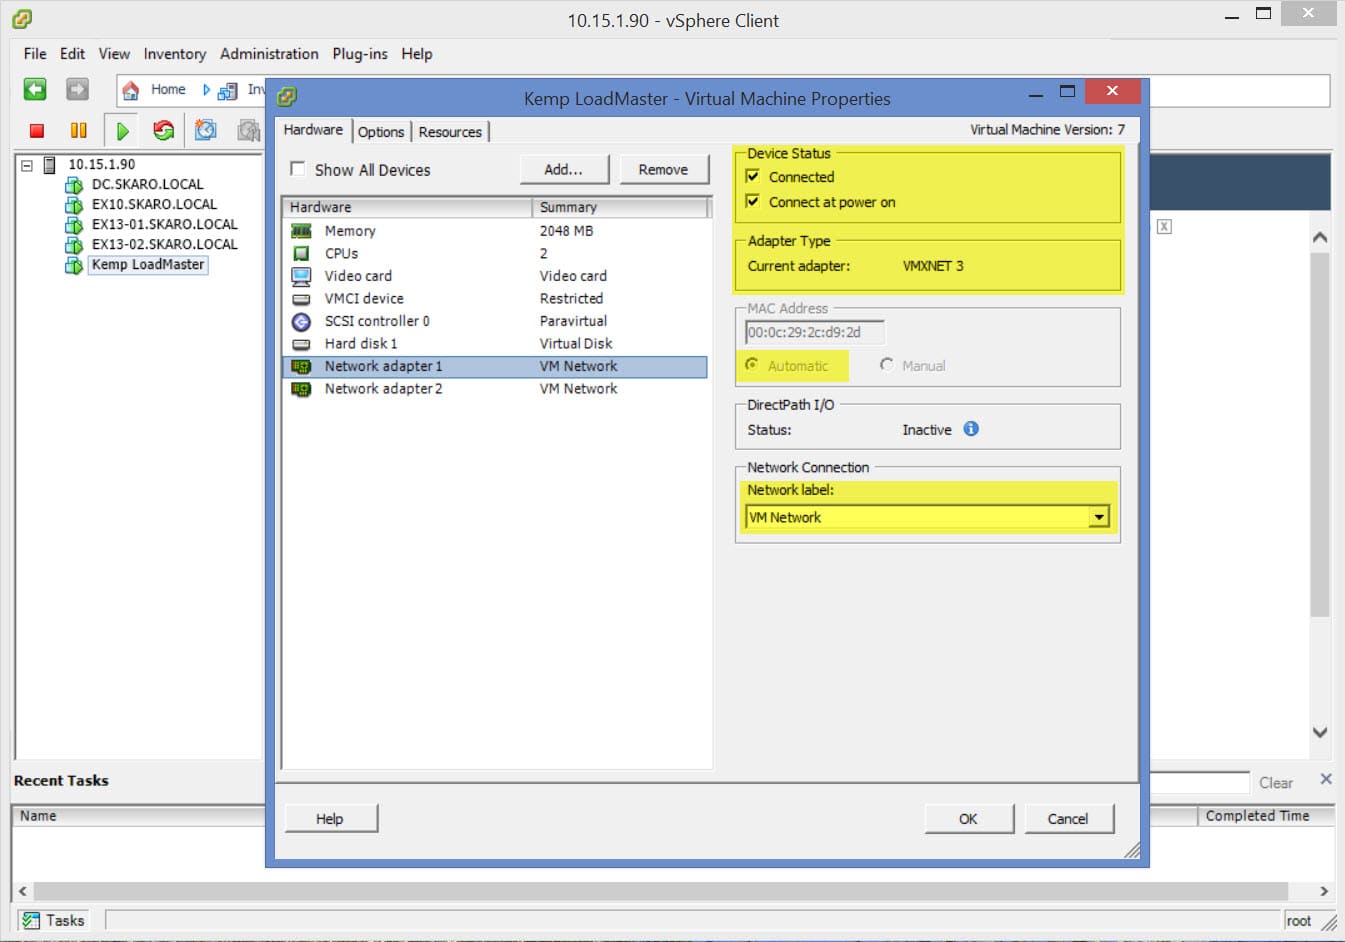
Right-click on the Kemp LoadMaster in Inventory and select Edit Settings from the context menu.
Select each network adapter and confirm the following settings:
- Connected at power on.
- Adapter type is either E1000 or VMXNET3.
- Mac address is Automatic.
- Network label is correct.
All good? Right. It’s time to power on!
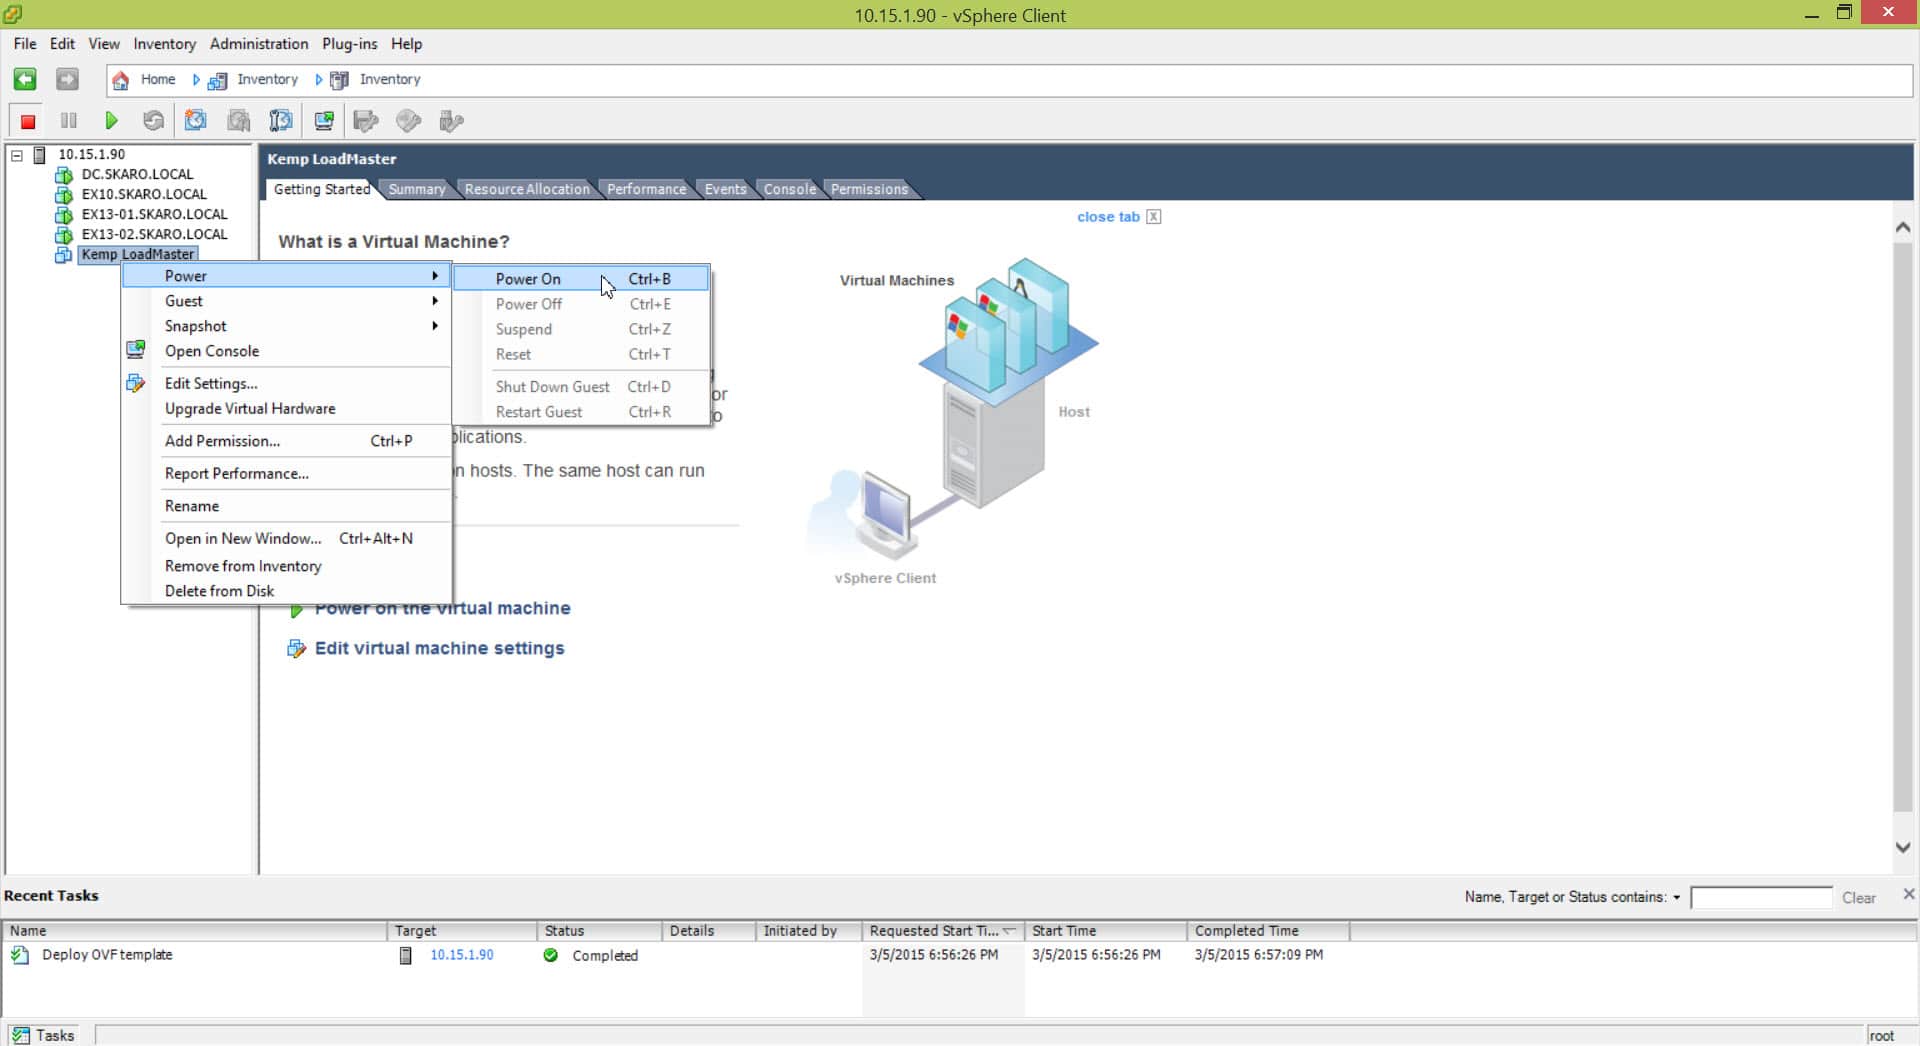
Powering on
Right-click on the Kemp LoadMaster in Inventory and select Power > Power On from the context menu.
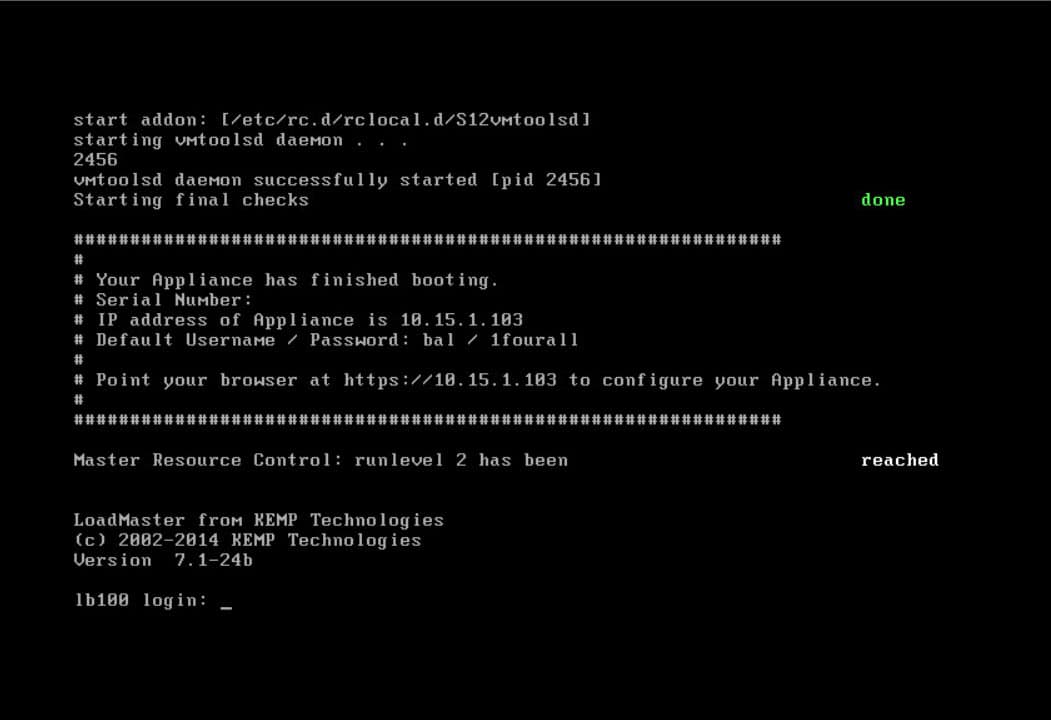
It will just take a few moments for the Kemp Load Balancer to boot. When fully booted, you will see an LB100 login prompt. On this same screen, the load balancer will indicate what IP it has obtained. It will also display the default username and password (bal / 1fourall). You will use this information to log into the web portal, where we will complete the initial configuration.
Completing the install
Type the IP into your web browser with an https:// prefix.
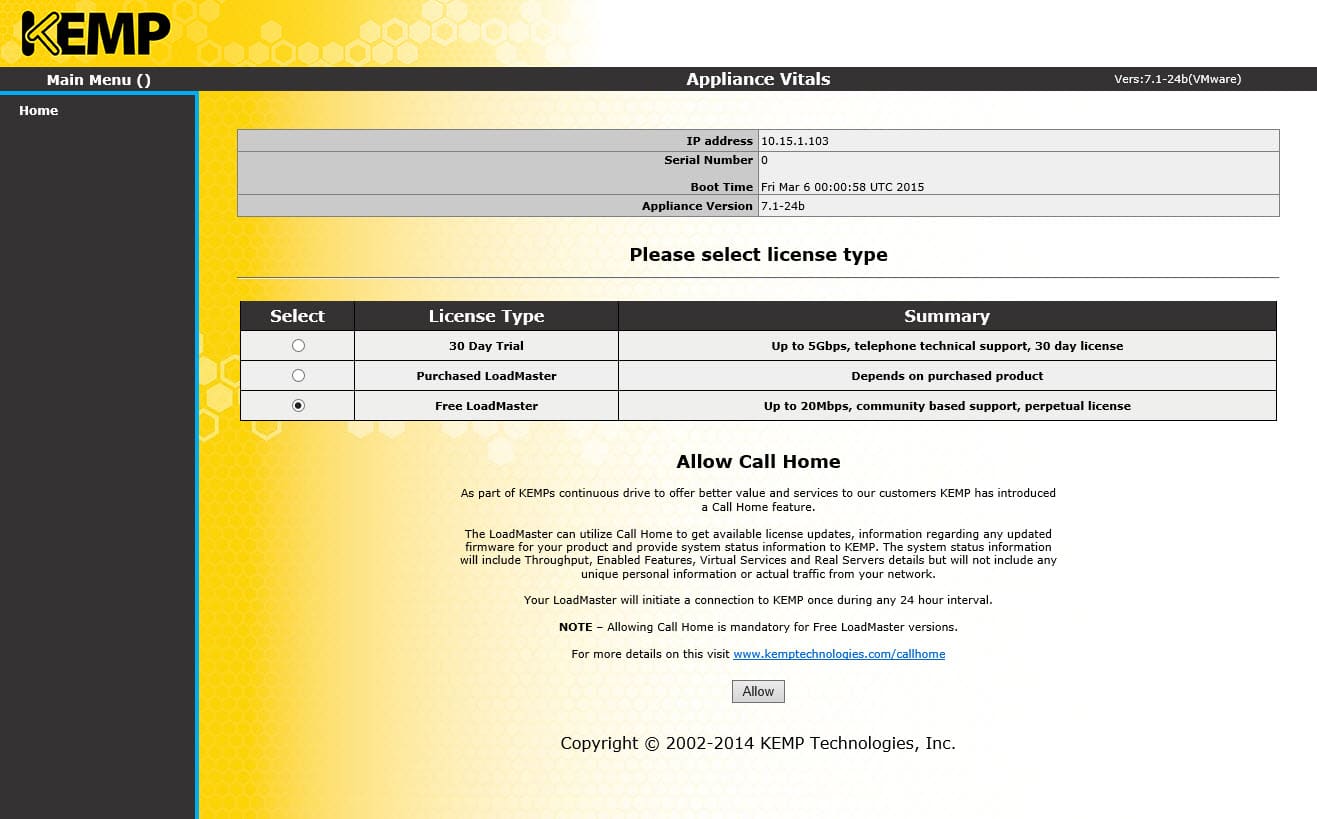
You will be prompted to accept a license agreement.

Select Free LoadMaster under License Type. Under the Allow Call Home section, click the Allow button (this is a requirement for the free license). You will not be able to proceed if you do not click Allow.
You will now be prompted to enter your KEMP ID and password. Click License Now.
Tip: If your credentials fail here, make sure you completed the steps in the activation email.

You will receive a confirmation that the license was successfully applied. Click Continue.
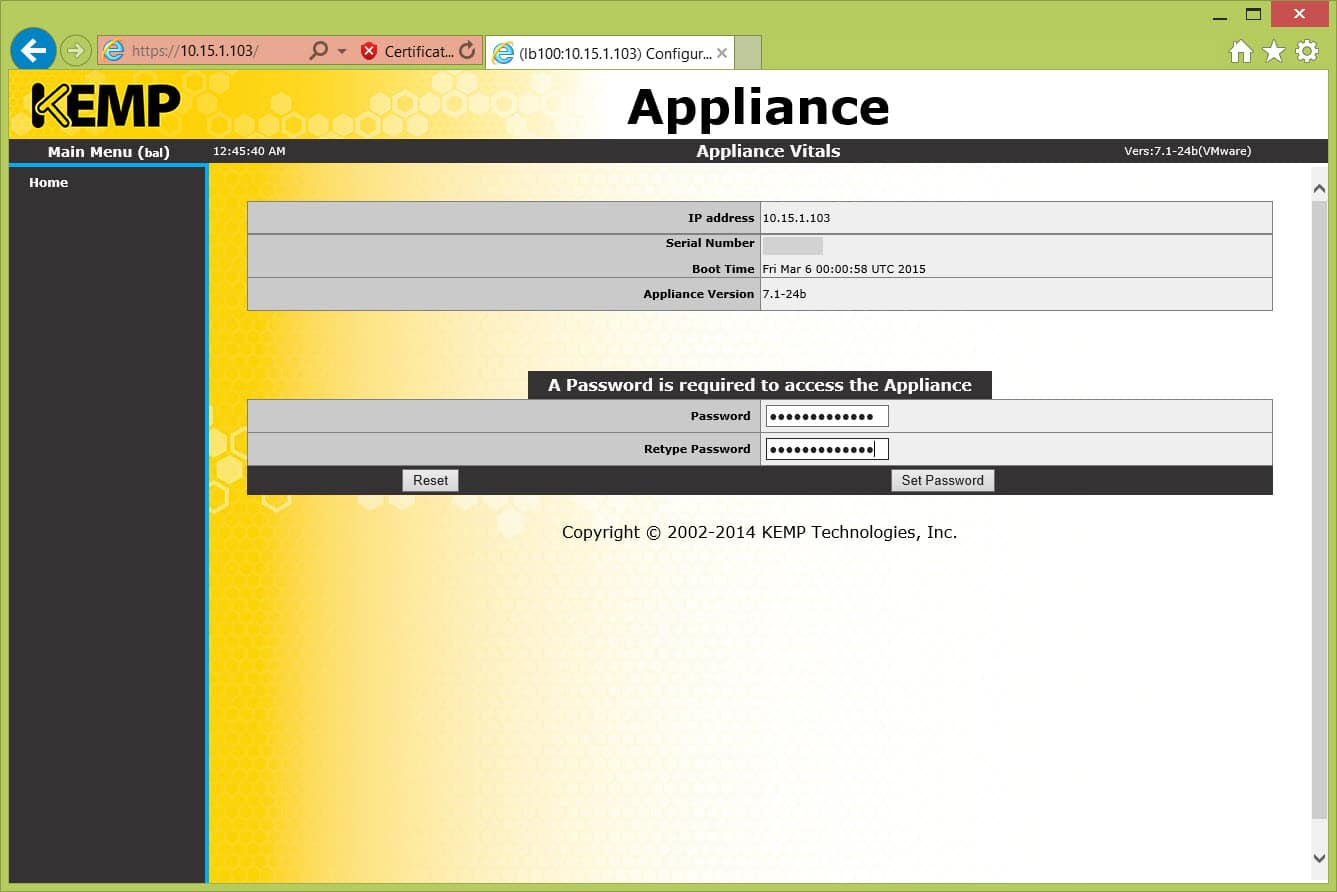
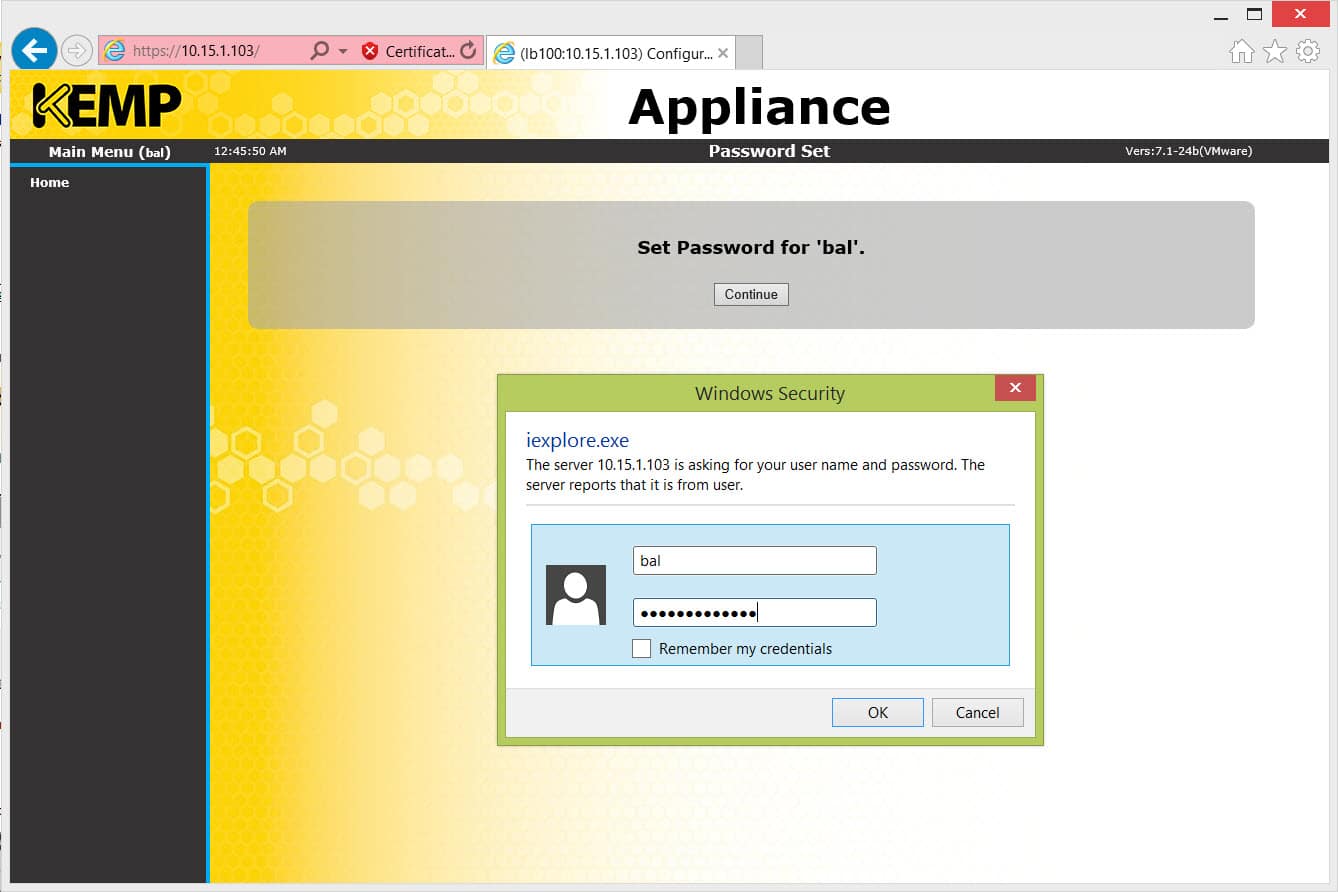
You will be prompted to change the password for bal. Enter your desired password twice and click the Set Password button.
You will receive a confirmation the password has been reset. Click Continue.
You will then be asked to re-authenticate. Enter your new credentials.
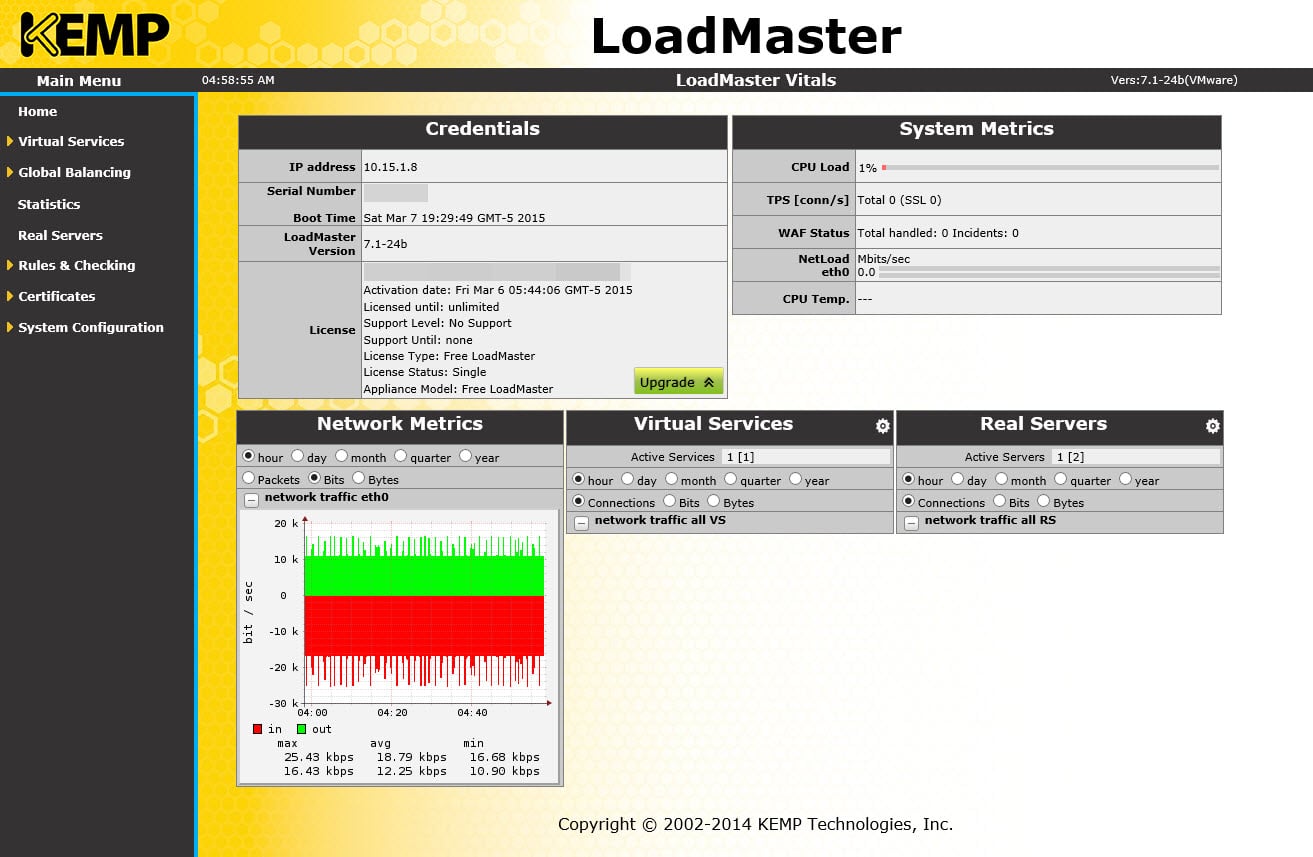
You will be directed to the Home screen. We are almost there!
Changing the IP address
Chances are your load balancer is still on a dynamically assigned IP address. Let’s switch that to something a little more permanent.
From the left navigation, expand System Configuration and select eth0.
Under Interface Address, specify a new permanent IP address and click the Set Address button.
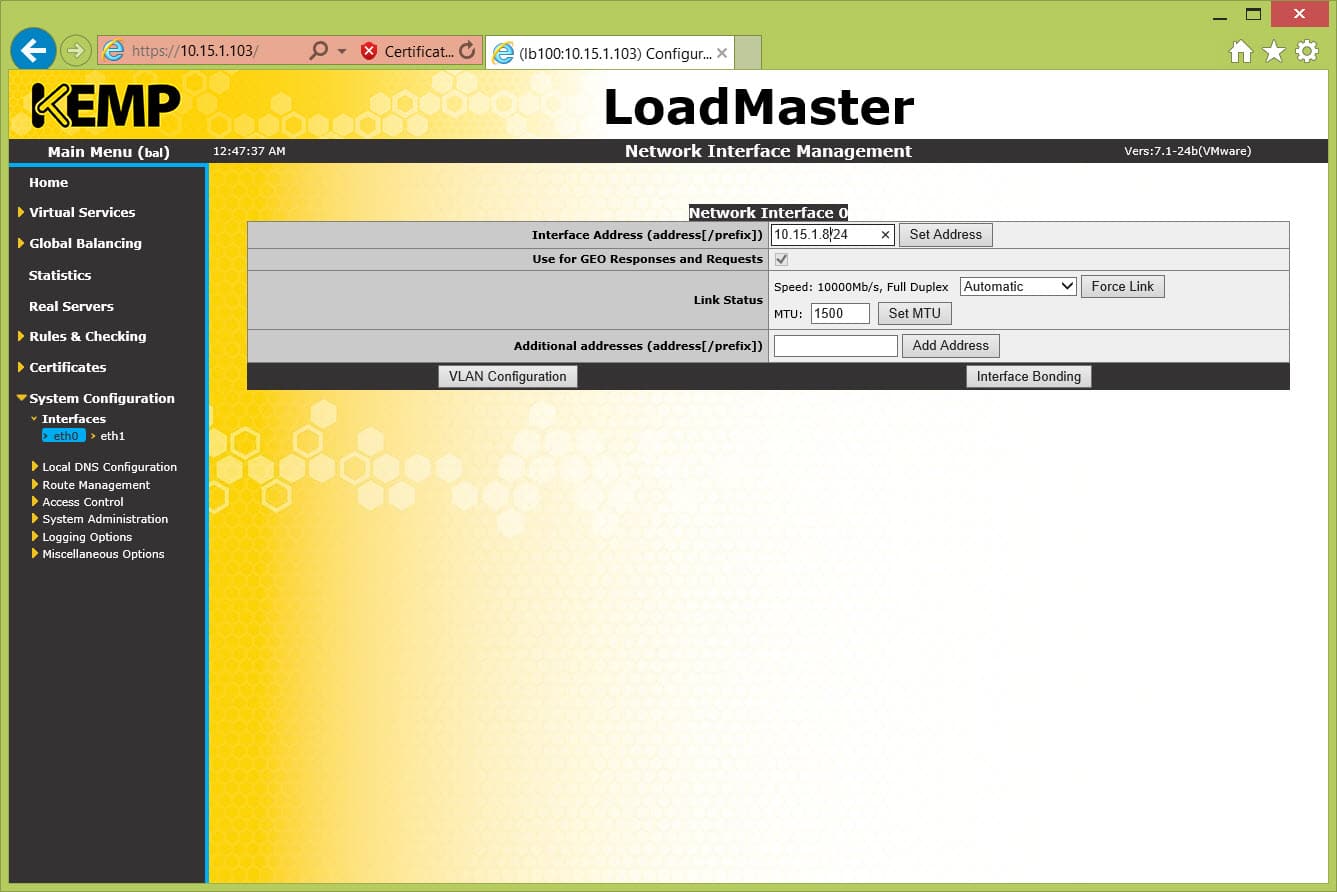
You will be prompted to confirm. Click Ok. You will receive a message that you are reconnecting to your new IP address. Click Ok.
Loose ends
A couple of other items we can complete in our initial configuration are the hostname, DNS servers, and time configuration.
Hostname
From the left navigation, expand System Configuration, expand Local DNS Configuration, and select Hostname Configuration. Enter a new hostname and select Set Hostname.

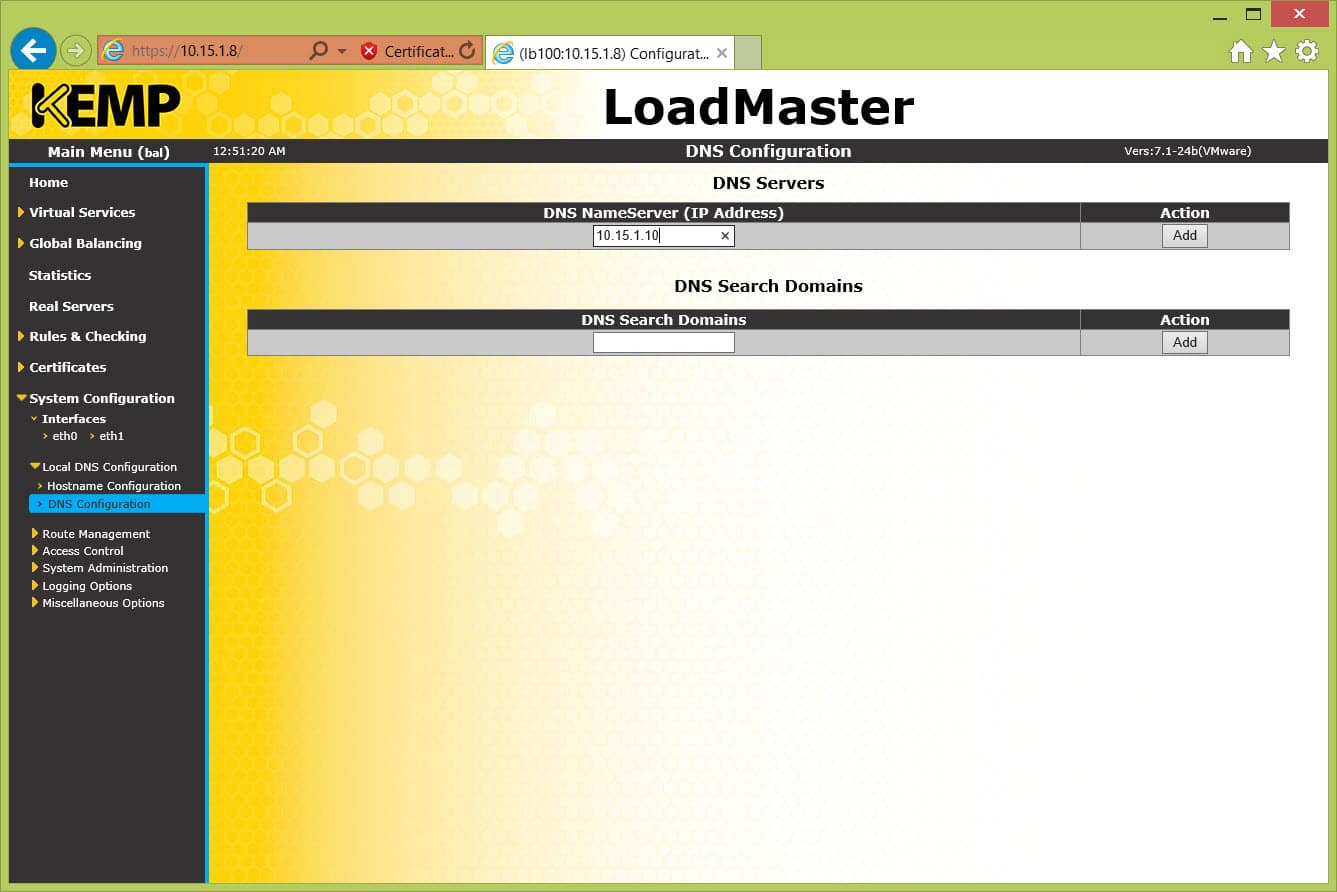
DNS Servers
From the left navigation, expand System Configuration, expand Local DNS Configuration, and select DNS Configuration. Enter a new DNS Nameserver and select Add.
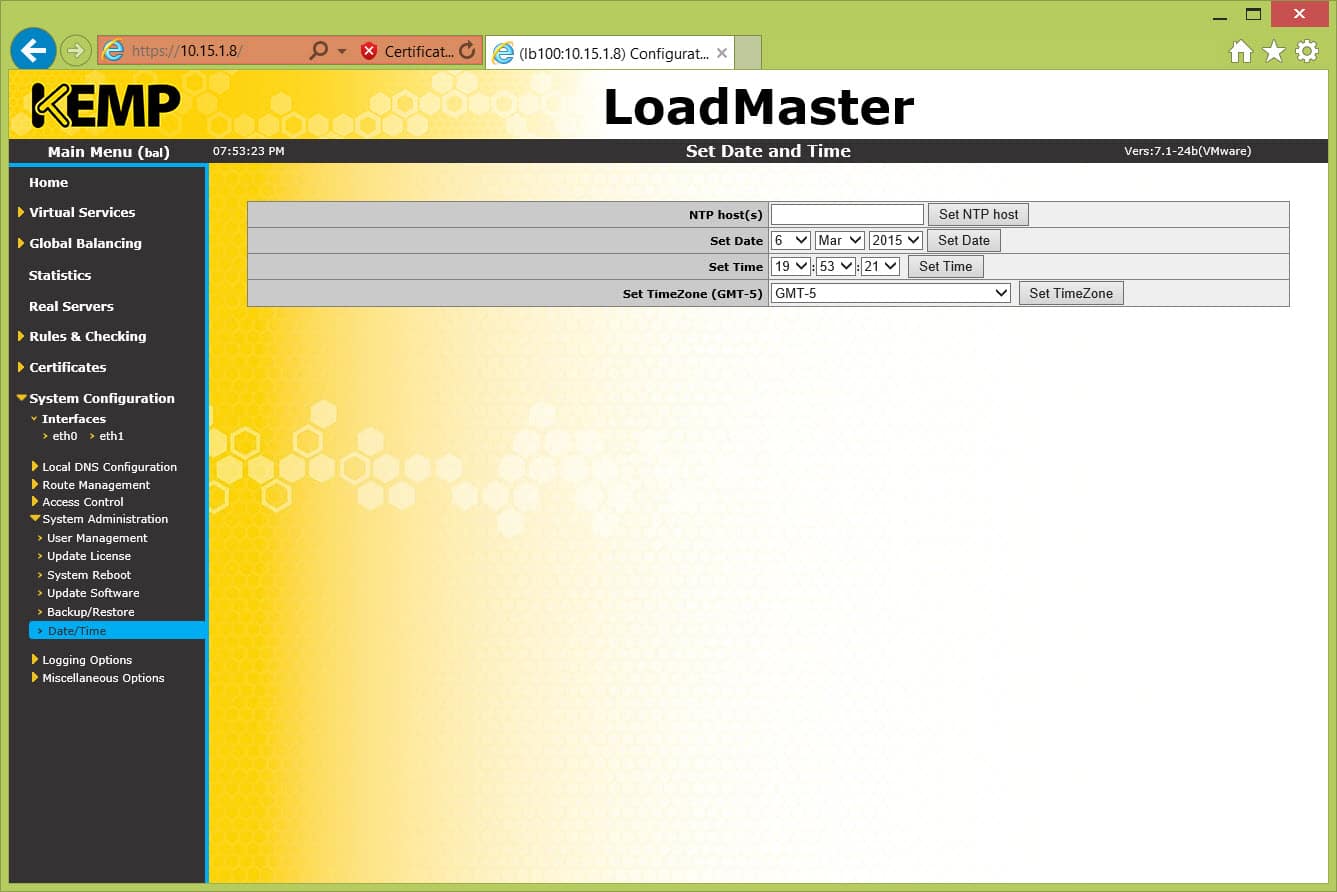
Time Configuration
From the left navigation, expand System Configuration, expand System Administration, and select Date/Time. Set the date, time, and time zone. Alternatively, you can specify a network time server with the NTP field.
You are all set!
Now that the initial configuration is done, we are ready for load balancing. In the second part of our series, we will download and apply the Exchange 2013 templates. This will give us a tremendous head start on making our Exchange lab highly available.
So what do you think? Drop us a comment and let us know how we are doing. Because without you, there would be no need for us.
Recommended Reading
- Configure Kemp Load Balancer for Exchange 2016
- Import & Export SSL Certificates in Exchange Server 2016
- Install Exchange 2016 in your lab (7-part series)

Leave a Reply