How to renew a certificate in Exchange
This article explores renewing a third-party certificate in Exchange 2016 CU23 and greater and Exchange 2019 CU12 and greater. This process differs from the older cumulative updates (and Exchange 2013), where renewing a third-party certificate through the Exchange Admin Center (GUI) was still possible.
If you are still on Exchange 2013 or older versions of Exchange 2016 or Exchange 2019, consider using this article instead for the Exchange Admin Center method.
Note: Using the Exchange Admin Center to generate and renew self-signed certificates is still possible. Self-signed certificates are out of the scope of this article.
This article demonstrates how to accomplish this using the PowerShell commands. The high-level steps include:
- Create a new certificate signing request
- Upload the certificate signing request to your certificate provider
- Download the processed certificate from your certificate provider
- Install the certificate on Exchange
- Assign Exchange services to the new certificate on each server
- Delete the old certificate
- Export the new certificate to a PFX file
- Import the certificate to all other Exchange servers
Let’s get started!
Renew a Certificate with PowerShell
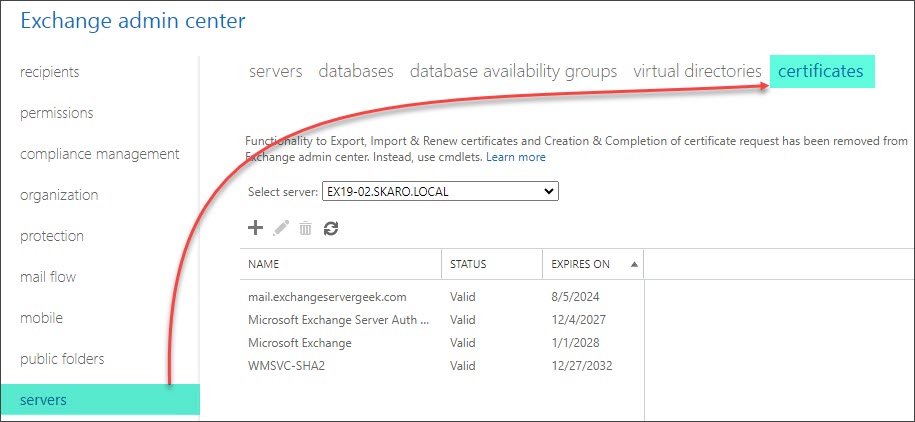
As mentioned earlier, newer versions of Exchange 2016 and Exchange 2019 require that third-party certificate requests be conducted through PowerShell. Third-party certificate requests can no longer be requested or renewed through the Exchange Admin Center.
To start, launch the Exchange Management Shell (either from the Exchange Server or a workstation that has the Exchange Management Tools installed).
First, we need to find the thumbprint of the certificate we plan to renew. To do this, we can run the Get-ExchangeCertificate command and filter the responses to only certificates that are issued by a third-party certificate authority.
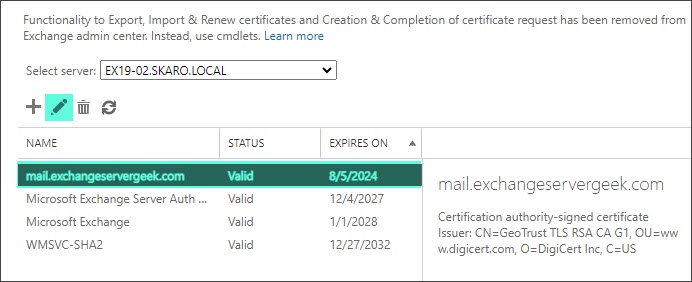
C:\> Get-ExchangeCertificate | Where {$_.IsSelfSigned -eq $false} | Format-List FriendlyName, CertificateDomains, Thumbprint, NotAfterThis will return all certificates that are not self-signed. In our example, we see just a single certificate returned. This certificate is named mail.exchangeservergeek.com and has a corresponding thumbprint. This is the certificate we will be renewing.
FriendlyName : mail.exchangeservergeek.com
CertificateDomains : {mail.exchangeservergeek.com, autodiscover.exchangeservergeek.com}
Thumbprint : B26C3C9B30A2A7371767275043816466CB921738
NotAfter : 7/15/2023 12:00:00 AM
Now that we have the thumbprint, let’s renew the certificate. To do this, we will pipe the thumbprint using the Get-ExchangeCertificate command into the New-ExchangeCertificate command. We will then save the output of New-ExchangeCertificate into a variable named $certrequest.
C:\> $certrequest = Get-ExchangeCertificate -Thumbprint B26C3C9B30A2A7371767275043816466CB921738 | New-ExchangeCertificate -GenerateRequest -PrivateKeyExportable:$trueThe example above leverages the following parameters:
- Thumbprint identifies the certificate we plan to renew.
- GenerateRequest is used to generate a certificate request for a third-party certificate authority. Without this parameter, you would generate a self-signed certificate issued by the Exchange Server.
- PrivateKeyExportable allows you to copy this certificate to other Exchange Servers. If you have multiple Exchange Servers, you need this parameter set to $true. If you omit this parameter (or set it to $false), you can only use this certificate on the Exchange Server that generated the certificate request.
Now that we have the Exchange certificate stored in a variable, we need to get that variable saved into a file. To do that, run the following command.
C:\> [System.IO.File]::WriteAllBytes('\\EX19-01\C$\Users\<user>\Desktop\certrequest.txt', [System.Text.Encoding]::Unicode.GetBytes($certrequest))In this command, two things are important. First, you must specify a UNC path to where you want to save the certificate request file. In our example, we saved this to our desktop as a text file named certrequest.txt. The second is what we are exporting into that file. In this case, it is the contents of the variable $certrequest. When you run this command, the file will be created in the specified location.
By running the following command, you will notice we have two certificates with the name mail.exchangeservergeek.com; however, one of these will be in a Pending Request state. The duplicate minimizes downtime for your users because it allows you to process the certificate renewal without affecting the existing certificate.
 C:\> Get-ExchangeCertificate | Format-Table Subject, Status

Subject                                                 Status
-------                                                 ------
CN=mail.exchangeservergeek.com                  PendingRequest
CN=mail.exchangeservergeek.com                           Valid
CN=EX19-01                                               Valid
CN=Microsoft Exchange Server Auth Certificate            Valid
CN=WMSvc-SHA2-EX19-01                                    Valid
[Read more…] about Renew a Certificate in Exchange 2016 & 2019