UPDATED 5/24/23
One of the great plugins for Outlook is FindTime. FindTime makes scheduling meetings easy by allowing organizers to poll attendees for their preferred date and time to meet. But FindTime is more than just a simple polling app, it integrates fully into your calendar. FindTime recommends meeting times, can place tentative placeholders on your calendar for each proposed time, and can automatically schedule the meeting if a consensus is met. Gone are the days of emails flying back and forth to find a time that works for everyone.
Note: If you have the April 2023 build of M365 Apps FindTime is now integrated as the “Scheduling Poll” feature. Older versions of Office can still leverage FindTime as an independent app.
Installing FindTime
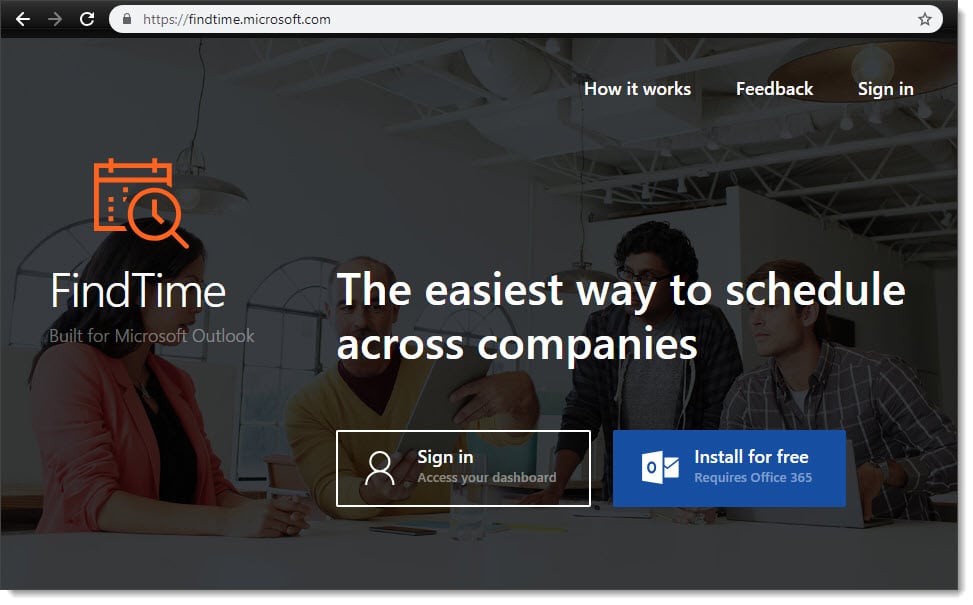
To install FindTime, navigate to findtime.microsoft.com (alternatively, you can install FindTime from the Office 365 App Store – to do this, log into Office 365 and select Add-Ins).
From the website, click Install For Free (Requires Office 365).
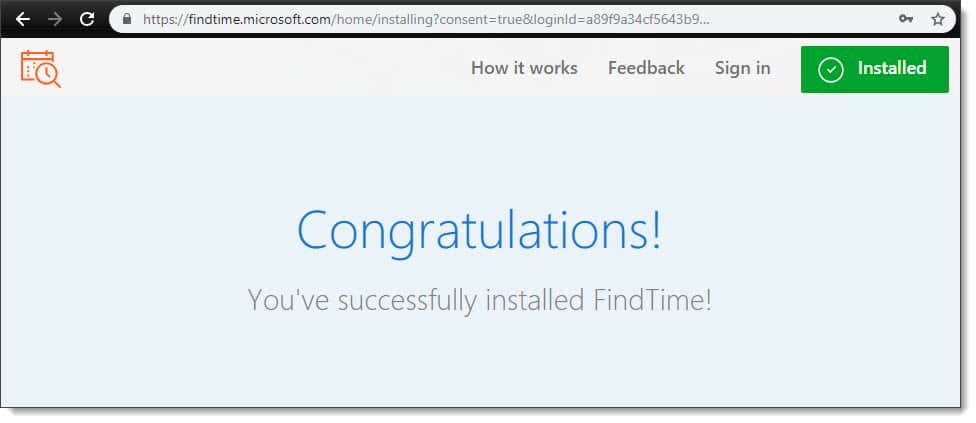
Select whether to receive FindTime announcements, updates, and information. Click I’m Ready.

Log into your Office 365 account.

You will receive a notification that FindTime has been successfully installed. Close your browser and open Outlook.
When you open Outlook you will see a new toolbar icon for FindTime. Click Reply with Meeting Poll.
The first time you use FindTime you must link it to your Office 365 account. Click Link Now.
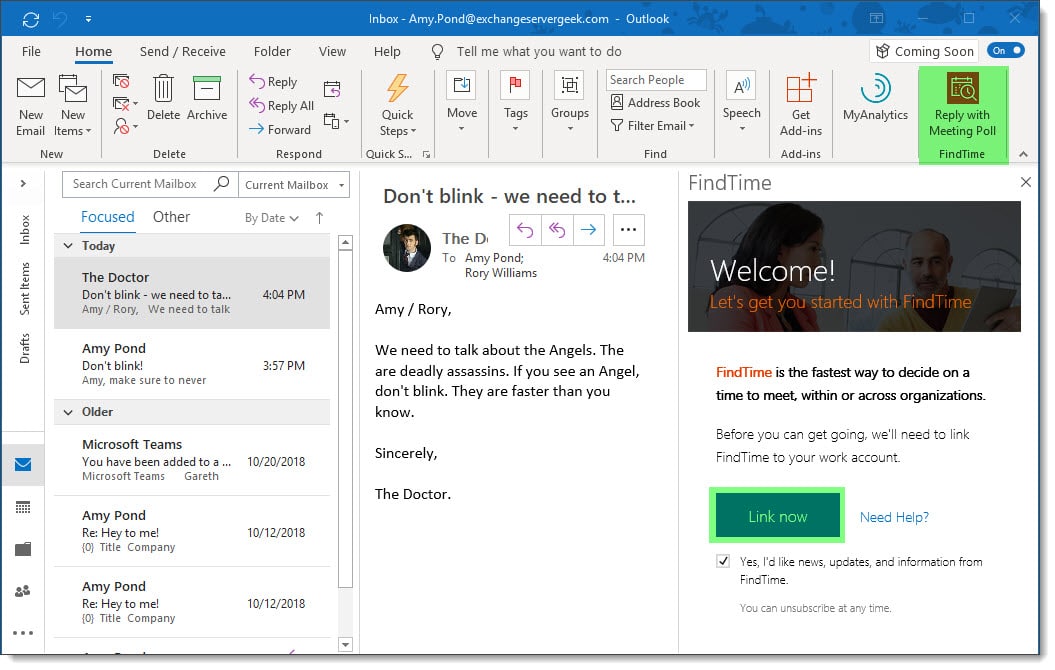
Log into your account. Click Sign In.

Organizing a meeting with FindTime
To use FindTime let’s find an email string where a meeting has been proposed. Click Reply with Meeting Poll.
In our example below, we have an email string that contains both internal and external recipients. FindTime will be able to view the availability of internal recipients in our company and make recommendations based on their availability. In most cases, the availability of external recipients will be unknown (unless calendar sharing has been established with these recipients previously)
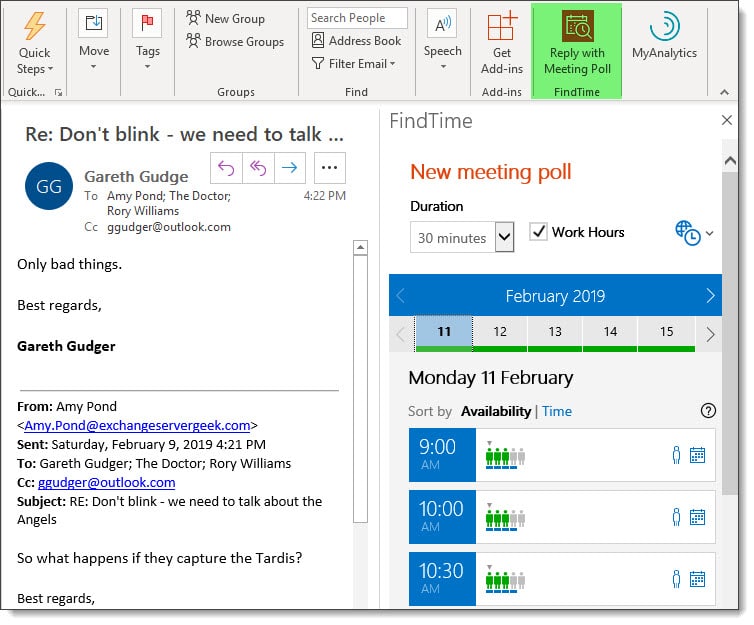
By default the meeting duration is set to 30 minutes and the current recommendations represent that. By selecting the Duration drop-down we can pick longer meetings. The availability recommendations will update based on the new duration.
You can also deselect the Work Hours checkbox to show all available hours versus the work hours configured in your calendar options.
To change the date, click on a visible date, or use the left and right arrows to reveal additional dates. You can also change the month (and year) using the left and right arrows.
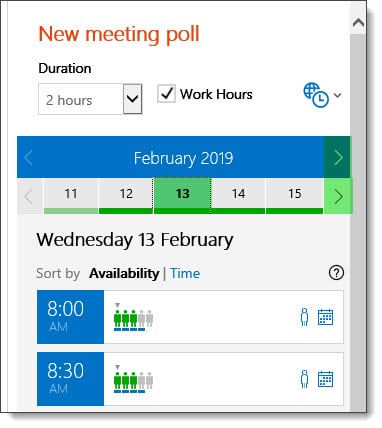
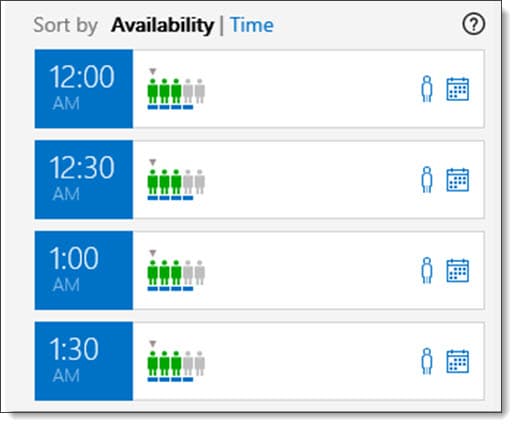
The recommendations are sorted by Availability. Meetings, where not all recipients are available, are moved to the bottom of the list but are still available for selection.
Each recommendation shows a legend for each attendee.
- Attendees in green are available
- Attendees in red are busy
- Attendees in grey are unknown
You can identify each attendee by hovering your mouse over each person icon.
- Attendee with the downward arrow is the meeting organizer
- Attendees with a blue underline are required
- Attendees without a blue underline are optional
Tip: When Reply with Meeting Poll is used to generate a poll from an email string, those in the To line are set as required. Those in the CC line are set as optional.
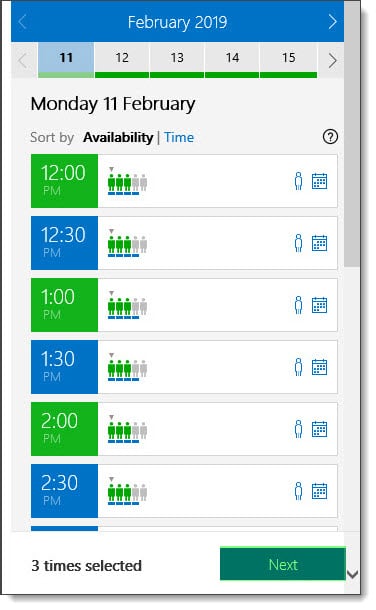
From the FindTime screen pick the dates and times you want to appear in the poll. Selected dates/times will turn to green.
On the next screen specify a meeting location and whether it is an online meeting.
You can also click Meeting Settings to show advanced FindTime options.
Notifications determines whether you will receive an email after each attendee vote.
Holds allow FindTime to place blocks on your calendar for each time you selected. These blocks are listed as tentative. When the final meeting is scheduled these tentative blocks are removed.
Autoschedule will automatically schedule the meeting if all required attendees come to a consensus on a meeting time. If multiple time slots are voted for, then the earliest is automatically scheduled.
Once you have configured all options click Insert to email. You can also click Back to select additional dates/times.
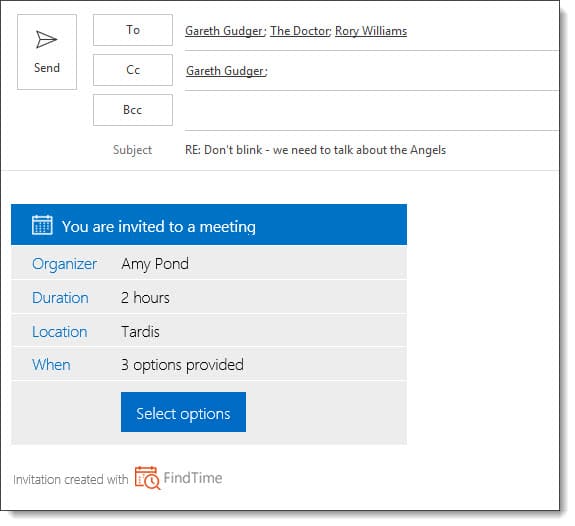
Insert to email will open an email. From here you can add or remove attendees, change the subject and body or pick any other message options. When ready, click Send.
Voting in the poll (the recipient experience)
When the recipient receives the email they will click the Select options button (see above). This will launch a web page asking the user to identify themselves.
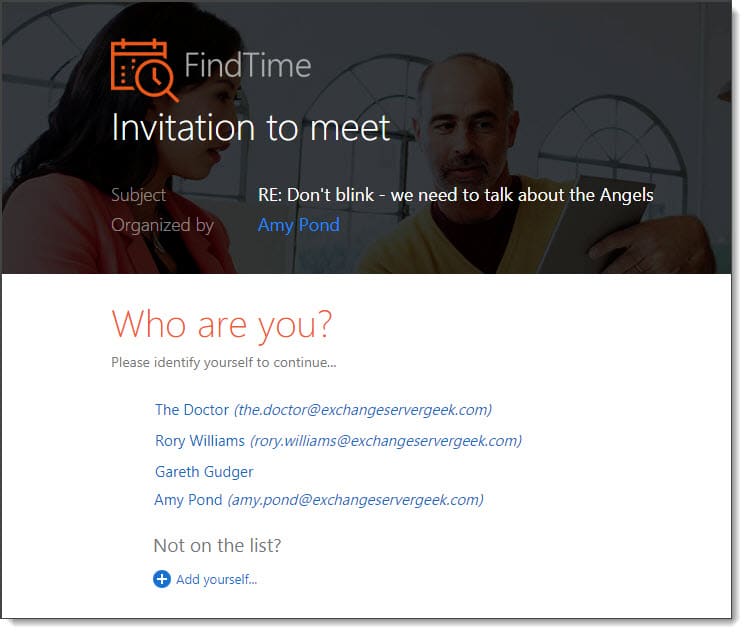
Once the user identifies themselves they can vote on the different date/time options.
For each option, the recipient can specify Yes, No, or Prefer. The recipient can also see the responses from other recipients.
The recipient also has the option to add additional times to the poll by clicking Add an option and specifying a date and time. Other recipients, including the meeting organizer, will be able to vote on this time, even if they have previously voted. Each recipient will also be notified by email that a new date/time option has been added (unless they have unsubscribed from notifications).

Once voted the recipient will click Submit.
Scheduling the meeting
As each attendee votes the meeting organizer will receive a notification (unless the organizer disabled notifications under Meeting Settings or has unsubscribed from notifications).
From this email, the organizer can identify the recipient’s preferences and click one of the Schedule links to immediately schedule the meeting. The organizer can also delete this notification as they wait for other attendees to respond.

The organizer can also view the status of the poll by logging into the FindTime dashboard. The dashboard shows all open polls, as well as any previously completed or canceled polls. The dashboard stores a poll for 90 days.
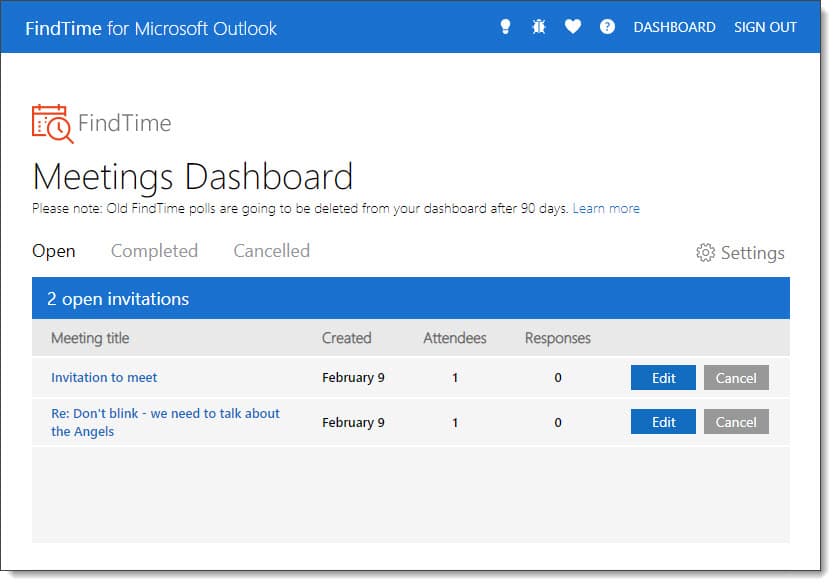
Once the meeting organizer has received enough responses they can either click the Schedule button from the notification email or log into the FindTime dashboard.
From the dashboard the organizer will be asked to confirm the scheduling of the meeting. Click Yes to send a meeting invite. Once you click Yes the poll will be closed and will not accept any more votes. Clicking No keeps the poll open and/or allows you to pick a different schedule option.

You will receive a confirmation that your meeting invite was sent. This is a standard meeting invite that each recipients will need to accept.

What do you think about FindTime? Has it helped you save time scheduling meetings? Drop a comment below or join the conversation on Twitter

I have used FindTime in the past but now, for whatever reason, it does not work. It shows me a screen that says I need to “link my account”. Once I click on it, it acts as if I am logging in, but once I try to use FindTime I get the same screen each time. No calendars, nothing. I do not understand why it simply stopped working. Help?
Hi Dr. Nelson,
When it is going through the “link my account” screens, does it tell you which account it is linking, or, do you get to specify the account you want to link? It sounds like it may be logging in with the incorrect account. Another option, have you tried removing and adding the plugin back. This could help clear any cached account information.
Hi,
I was able to deploy this Add-In to all users of O365 from O365 Admin Center. MS even offers you a template email that you can send to all users about the new Add-In and how it can help them with daily scheduling.
Thanks for sharing.
Ram
can you share the template ? how did you get it