The Exchange Team has announced the general availability of the Exchange Online PowerShell Module in Azure Cloud Shell.
Azure Cloud Shell is a web-based version of PowerShell that can be launched from within any web browser by navigating to shell.azure.com, or, clicking the PowerShell icon in the Azure portal (portal.azure.com).
In this article, we will explore how to initially configure Azure Cloud Shell, cover the basics of the interface, connect to Exchange Online, and perform some basic Cloud Shell tasks, such as managing files and running some Exchange cmdlets.
Let’s get started!
Running the Azure Cloud Shell for the first time
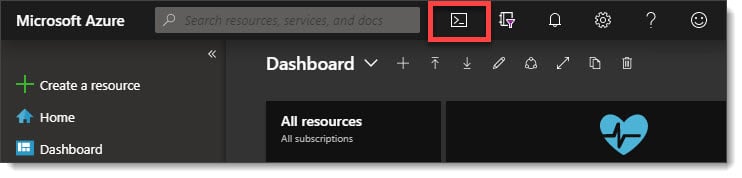
To get started with Azure Cloud Shell you can either navigate to shell.azure.com or, click the PowerShell icon in the Azure Portal. The icon is at the top of the screen, to the right of the search box (pictured in the screenshot below)
The first time you open Cloud Shell you will be asked if you want to connect to PowerShell or Bash. Click PowerShell.

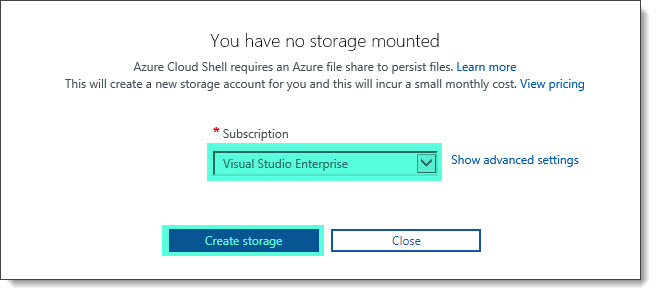
You will then be prompted to create storage for use with Cloud Shell. You will be given a drop down of all your available Azure subscriptions. Pick an Azure subscription with active credit and click Create Storage.
Tip: It does not matter which subscription you use. For example, you could use monthly credits from an MSDN or Visual Studio subscription.
The storage will then take several seconds to create.

Once created, Cloud Shell will be displayed and take a few seconds to establish a connection.
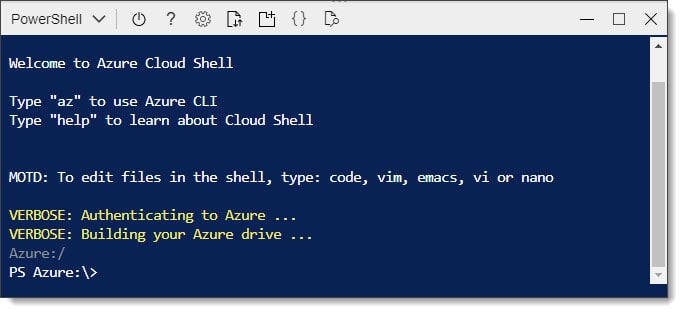
With your storage now configured, each subsequent connection to Cloud Shell will take you straight to the Shell itself.
Exploring the interface
The Azure Cloud Shell toolbar has a number of options (pictured below).

From left to right they are as follows:
- The Select environment drop-down lets you switch between PowerShell and Bash.
- Restart cloud shell allows you to completely restart your Cloud Shell session. Any running processes will be terminated. Once clicked you will be prompted whether you want to confirm or cancel.
- The Help menu contains a number of hyperlinks to Cloud Shell articles. These will all open in new tabs.
- The Settings menu allows you to control text size and font. At the time of writing only three text sizes (small, medium and large) and two fonts are available; Monospace and Courier New.
- The Upload / Download Files menu allows you to upload and download files for use with Cloud Shell. It also provides a hyperlink to manage the cloud storage required by Cloud Shell.
- Open New Session creates a brand new Cloud Shell in a new tab in your browser.
- Open Editor launches a Cloud Shell editor in the same tab as your current session.
- Minimize allows you to minimize the Cloud Shell without terminating the session. To bring the Cloud Shell window back, click the Powershell icon in the top of the Azure Portal. Note that the minimize button is only available at portal.azure.com and not shell.azure.com.
- Maximize allows you to maximize the Cloud Shell to take up the entire browser tab. This hides the Azure Portal. To return to the previous view click the Restore button. Note that the maximize and restore buttons is only available at portal.azure.com and not shell.azure.com.
- Close allows you to terminate the Cloud Shell. Unlike Minimize, close will terminate the PowerShell session and any running processes. Note that the close button is only available at portal.azure.com and not shell.azure.com.
Connecting to Exchange Online in Azure Cloud Shell
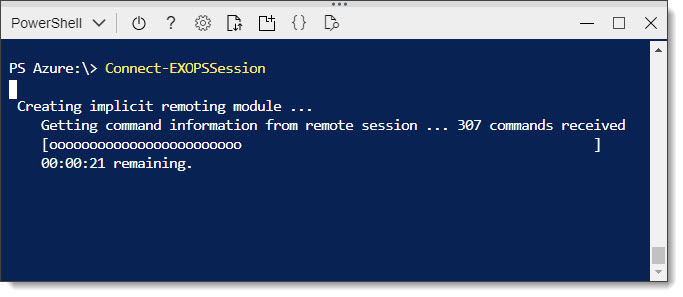
To use Exchange Online cmdlets in Azure Cloud Shell we will need to import the Exchange Online cmdlets. From Cloud Shell type Connect-EXOPSSession and press enter. You will notice that you will not be required to authenticate as Cloud Shell passes through your credentials.
It will take a few seconds for the cmdlets to import.
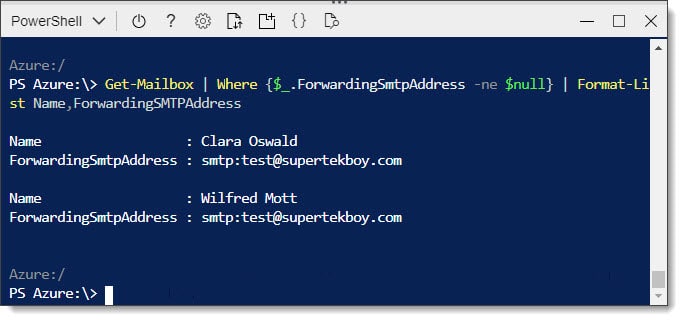
Once imported you can run any number of Exchange Online commands. Let’s look for all users who have a forwarding SMTP address. For this we will run the following command:
Azure:\> Get-Mailbox | Where {$_.ForwardingSmtpAddress -ne $null} | Format-List Name,ForwardingSMTPAddressAzure Cloud Shell returns two results. Both Clara Oswald and Wilfred Mott have a forward configured on their mailbox.
Upload or download files to Azure Cloud Shell
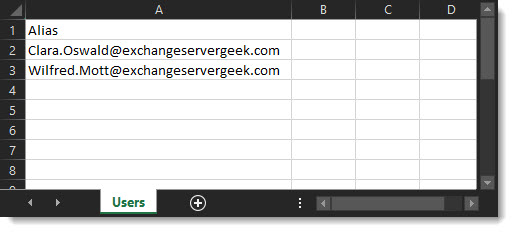
Let’s look at removing those forwards with a simple CSV file. For this example, we will upload a CSV file that contains the SMTP addresses of Clara and Wilfred. The contents of the CSV look like this.
To do this, click the Upload / Download Files menu and select Upload. This will open a windows file dialog. Select your desired file and click Open.
You will receive a notification once the file has been successfully uploaded and the file’s upload location. This should be your home directory by default.
Tip: If you are unsure on the path to your home directory type the variable $home. You should see a response of /home/<username>. This path is case sensitive.
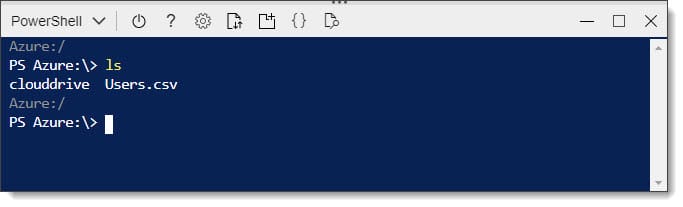
You can view all your uploaded files by typing ls (case sensitive) and pressing enter. In the screenshot below we can see Users.csv exists in our cloud storage.
Let’s drop the contents of this CSV file into a variable. To do this we will use the Import-CSV cmdlet. The path to the CSV is in our home directory. You can locate this by typing $home into the shell. However, I find it easier to just use that variable in my path instead. For example $home/Users.csv
Azure:\> $user = Import-CSV -Path $home/Users.csv
If I type my new variable, $user, into the shell I get the contents of my CSV.

From here I could then parse this variable into a ForEach loop. For example, to remove the previously identified forwards I could run a command such as this:
 Azure:\> foreach($item in $user)
{
 Set-Mailbox -Identity $item.alias -ForwardingSMTPAddress $Null
}
Remove files from Cloud Shell
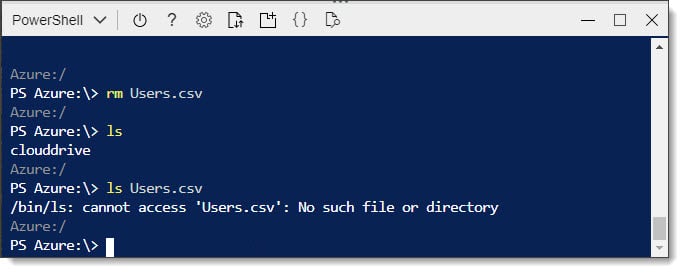
Now that we are done with our CSV let’s remove it. To remove a file the simplest way is to use the rm command (case sensitive). To remove the Users.csv file we simple type rm Users.csv. We can validate its removal by typing ls (or ls <filename>).
Disconnect from Cloud Shell
If you have imported sessions to other services such as Exchange Online, you should gracefully terminate these first. You can see if you have any of these open by running Get-PSSession. To terminate all imported sessions pipe Get-PSSession into Remove-PSSession.
Azure:\> Get-PSSession | Remove-PSSession
From here you can click the Close button (portal.azure.com only) which will terminate the Cloud Shell.
It is also worth noting that your session will be terminated after 20 minutes of inactivity. You will have the option to reconnect, however, it will be a new session.
The good news is that any files you have uploaded are persisted so you will not need to upload them again. In addition, Cloud Shell keeps a command history that spans previous sessions, making it easy to recall commands with an up arrow.

So, what do you think about Azure Cloud Shell and its ability to leverage Exchange Online cmdlets? Drop a comment below or join the conversation on Twitter @SuperTekBoy.

Leave a Reply