One of the new Exchange Admin Center benefits is that many of the global mail flow settings that were previously only available via PowerShell are now available in this new GUI. For example, the Mail Flow settings page allows you to define several global transport configurations. This article will look at these settings and what they do. These settings are:
- Plus addressing
- Sending from aliases
- Enabling SMTP AUTH protocol
- Legacy SMTP AUTH endpoint for TLS 1.0 / TLS 1.1 clients
- Reply-All storm protection
To find these settings, log into the new Exchange Admin Center and navigate to the Settings tab on the left navigation pane. Then select Mail Flow.

This will pop out a dialog with the following options.

Plus Addressing
Plus addressing allows users to create their own unique email addresses by leveraging a plus sign in their email address—for example, apond+newsletter@exchangeservergeek.com. Anything after the plus sign is completely at the discretion of the user.
This becomes particularly useful when you want to target newsletters to a unique email address, especially when configuring inbox rules. It is also helpful to determine who might have sold or leaked your email address.
To enable this feature from the new Exchange Admin Center, navigate to Settings > Mail Flow. From the pop-up window, select Turn on plus addressing from your organization and click the Save button.
If you prefer to enable this from PowerShell, log onto Exchange Online PowerShell and run the following command.
C:\> Set-OrganizationConfig -AllowPlusAddressInRecipients $true
To confirm the setting has taken effect, run Get-OrganizationConfig.
 C:\> Get-OrganizationConfig | FL AllowPlusAddressInRecipients

AllowPlusAddressInRecipients : True
Users can then start leveraging plus addresses. Emails addressed to a plus address will appear in the user’s inbox without any further user intervention. From there, the user can build inbox rules for the plus addresses if they desire.

Reference: Plus Addressing Now Available in Exchange Online
Sending from an alternate alias (email address)
One of the long-standing and highly requested features was the ability for a user to send from a different email address. The ask was that if a user had multiple email addresses configured on their mailbox, the user should have the ability to send from any one of those addresses.
The previous workaround was to assign users send-as permissions to a shared mailbox or distribution group. The user would then select that shared mailbox or group in their FROM field in their mail client. This would allow them to send as the primary address of that mail object. However, as you can see, creating a shared mailbox or distribution group for this sole purpose was adding objects unnecessarily to your directory.
Microsoft officially announced support for sending from an alternate alias on the user’s mailbox in January 2022. However, this feature is currently available only in Outlook Web and Outlook Mobile.
To enable this feature from the new Exchange Admin Center, navigate to Settings > Mail Flow. From the pop-up window, select Turn on sending from aliases and click the Save button. Note that you may need to wait up to 60 minutes before this setting takes effect.
If you prefer to enable this from PowerShell, log onto Exchange Online PowerShell and run the following command.
C:\> Set-OrganizationConfig -SendFromAliasEnabled $true
To confirm the setting has taken effect, run Get-OrganizationConfig.
 C:\> Get-OrganizationConfig | FL SendFromAliasEnabled

SendFromAliasEnabled : True
An Outlook Web user can leverage this feature by simply enabling the FROM field to compose a new email message and enter (or select) the alternate email address. Once the user has sent from that address at least once, it will remain in the FROM list until removed.

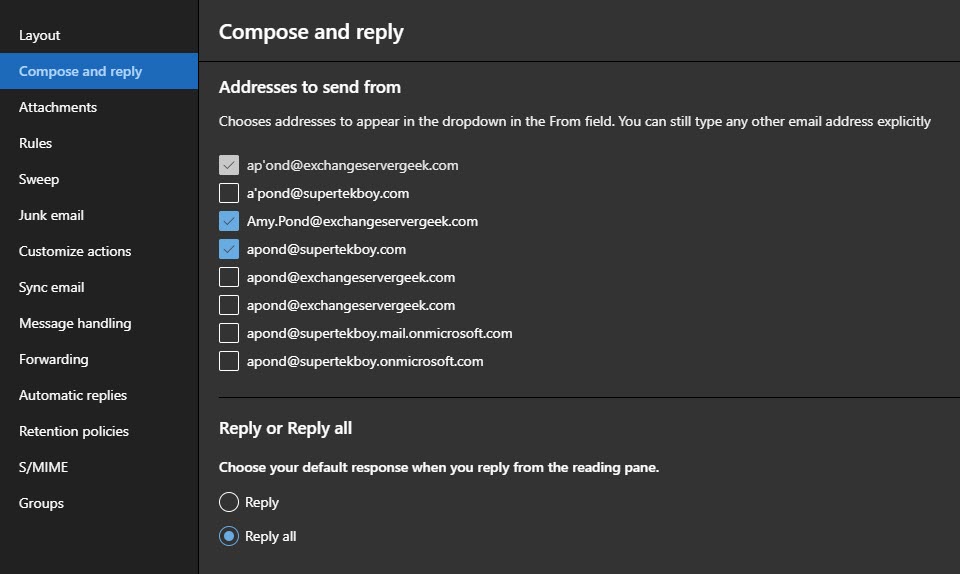
Alternatively, if a user navigates Settings > View all Outlook Settings > Compose and reply, they will be able to manage all email addresses they want to be displayed in their FROM field. Note that you cannot deselect the primary address.

Reference: Sending From Email Aliases
Configure SMTP AUTH for your organization
SMTP Authentication (SMTP AUTH) is a technology that allows a device or application to relay mail via Exchange Online by providing a username and password. Previously SMTP AUTH was enabled globally for all mailboxes in a tenant. To improve customers’ security posture, Microsoft disabled SMTP AUTH in new tenants by default. In addition, Microsoft also disabled SMTP AUTH in any existing tenant deemed not leveraging the technology.
To check the state of SMTP AUTH in your tenant, you can use the new Exchange Admin Center. First, navigate to Settings > Mail Flow. From the pop-up window, you can see whether the setting is enabled or disabled. To disable SMTP AUTH deselect the checkbox Turn on SMTP AUTH protocol for your organization and click the Save button. To enable SMTP AUTH, reverse this process.
If you prefer to enable this from PowerShell, log onto Exchange Online PowerShell and run the following command.
C:\> Set-TransportConfig -SmtpClientAuthenticationDisabled $true
To confirm the setting has taken effect, run Get-OrganizationConfig.
 C:\> Get-OrganizationConfig | FL SmtpClientAuthenticationDisabled

SmtpClientAuthenticationDisabled : True
Reference: Enable or disable SMTP AUTH in Exchange Online
Legacy TLS 1.0 / 1.1 endpoint for SMTP AUTH
Starting in February 2022, Microsoft plans to block SMTP AUTH clients using TLS 1.0 and TLS 1.1 from connecting to smtp.office365.com. Only TLS 1.2 will be accepted at smtp.office365.com.
With this deadline set, Microsoft has deployed a new SMTP AUTH endpoint, smtp-legacy.office365.com, to support TLS 1.0 and TLS 1.1 relays. This endpoint is disabled by default and requires administrators to opt-in (effectively agreeing to lower their security posture).
To enable this feature from the new Exchange Admin Center, navigate to Settings > Mail Flow. From the pop-up window, select Turn on use of legacy TLS clients and click the Save button.
Alternatively, you can enable this endpoint from PowerShell with the following command.
C:\> Set-TransportConfig -AllowLegacyTLSClients $true
To confirm the setting has taken effect, run Get-OrganizationConfig.
 C:\> Get-OrganizationConfig | FL AllowLegacyTLSClients

AllowLegacyTLSClients : True
Now you can redirect your legacy SMTP AUTH clients to smtp-legacy.office365.com. The best practice is not to enable this and only leverage clients that support TLS 1.2.
Reference: New opt-in endpoint available for SMTP AUTH clients still needing legacy TLS
Reply-All Storm Protection
Reply-all storm protection prevents a situation where numerous people execute a reply-all to a massive distribution list in a short period. This can cause losses in service availability.
Microsoft’s initial reply-all implementation blocked replies to an email thread for 4 hours if it had detected more than 10 reply-all messages within 60 minutes to a thread with over 5,000 recipients.
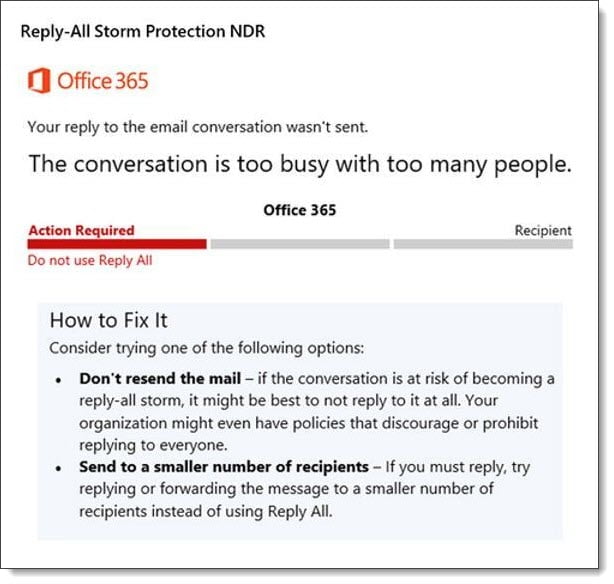
The eleventh sender would receive a non-delivery report titled Reply-All Storm Protection with the reason the message was blocked.
Microsoft then allowed administrators some freedom to modify the values of reply-all storm protection, or, to disable the protection altogether. The new ranges are as follows:
| Element | Old Value | New Value |
|---|---|---|
| Detection time | 60 minutes | 60 minutes (not configurable) |
| Block duration | 4 hours | 1 to 24 hours (new default 6) |
| Reply-All count | 10 reply-all messages | 5 to 20 reply-all messages (default 10) |
| Minimum DL recipients | 5,000 recipients | 1,000 to 5,000 (new default 2,500) |
To check the state of Reply-All Storm Protection in your tenant, you can use the new Exchange Admin Center. First, navigate to Settings > Mail Flow. Then, from the pop-up window, select the checkbox Enable reply-all storm protection.
The three fields below the checkbox allow you to modify the thresholds of the storm protection. As mentioned in the table above, detection time cannot be altered. This is hardcoded to 60 minutes. However, block duration, reply-all count, and minimum distribution list recipients can be modified using a range from the table above.
Alternatively, you can enable reply-all storm protection from PowerShell with the following command.
C:\> Set-TransportConfig -ReplyAllStormProtectionEnabled $true
You can also modify the thresholds with the same cmdlet. For example, to change the block duration to 1 hour, issue the following command.
C:\> Set-TransportConfig -ReplyAllStormBlockDuration 1
Reference: Reply All Storm Protection Customizable Settings

What PowerShell command would you like to see in the new Exchange Admin Center? Drop a comment below or join the conversation on Twitter @SuperTekBoy.


Leave a Reply