In the fifth part of our Exchange lab series we:
- Generated a certificate request
- Processed a certificate request
- Completed a certificate request
- Assigned services to a certificate
- Checked our work
In the sixth part of our Exchange lab series we:
Let’s get started.
Move our databases
In part one of our series, we discussed our drive layout. We stated that the E drive would contain the Exchange install directory, L would contain the log folder and, M would contain the mailbox database. We decided to use regular drive letters to keep things simple as we only planned to use a couple of databases in our lab. In summary, this is what we proposed.
| Drive | Size | Purpose |
| C: | 50 GB | Operating System |
| E: | 50 GB | Exchange Install Directory |
| M: | 10 GB | Databases |
| L: | 5 GB | Logs |
But there is a gotcha. If you log into EAC, browse to the database tab and, edit your database you may notice there is no way to move the database path.
This changed back in Exchange 2013. Moving the database and log files is only possible through the Exchange Management Shell (EMS). This differs from earlier versions of Exchange where you could do this from the GUI.

That said let’s open the Exchange Management Shell (EMS).
First, let’s get the name of the database. We do this with the following command.
C:\> Get-MailboxDatabase
You will get an output like the one below.
 C:\> Get-MailboxDatabase

Name                           Server     Recovery   ReplicationType
----                           ------     --------   ---------------
Daleks Database                EX13-01    False      Remote
Time Travel Research           EX13-01    False      Remote
Mailbox Database 1988836857    EX16-01    False      None
From this output, you can see we have three databases in our environment. ‘Daleks Database’ and ‘Time Travel Research’ are currently mounted on an Exchange 2013 server named EX13-01. The database that was created when we installed Exchange 2016 is ‘Mailbox Database 1988836857′. Let’s change both the path and the name of this database.
To move the database and log folder path we want to use the Move-DatabasePath cmdlet. Not only will this cmdlet change the path of our database but we can also opt to change the name of our EDB (database) file as well. Currently, the name of the EDB file matches the name of the database. This is ‘Mailbox Database 1899118761.edb’. During the move, we will change this to ‘Doctors Companions.edb’. Changing the name of the file does not change the name of the database in Exchange. We will tackle that later.
Note: If either the database name or folder paths contain a space you need to surround each of them with quotation marks.
Here is what your command may look like.
C:\> Move-DatabasePath -Identity "Mailbox Database 1988836857" -EdbFilePath "M:\Database\Doctors Companions\Doctors Companions.edb" -LogFolderPath "L:\Logs\Doctors Companions"
In our example:
-Identity specifies the database we are moving to.
-EdbFilePath specifies the new location for our database file.
-LogFolderPath specifies the new location for our log files.
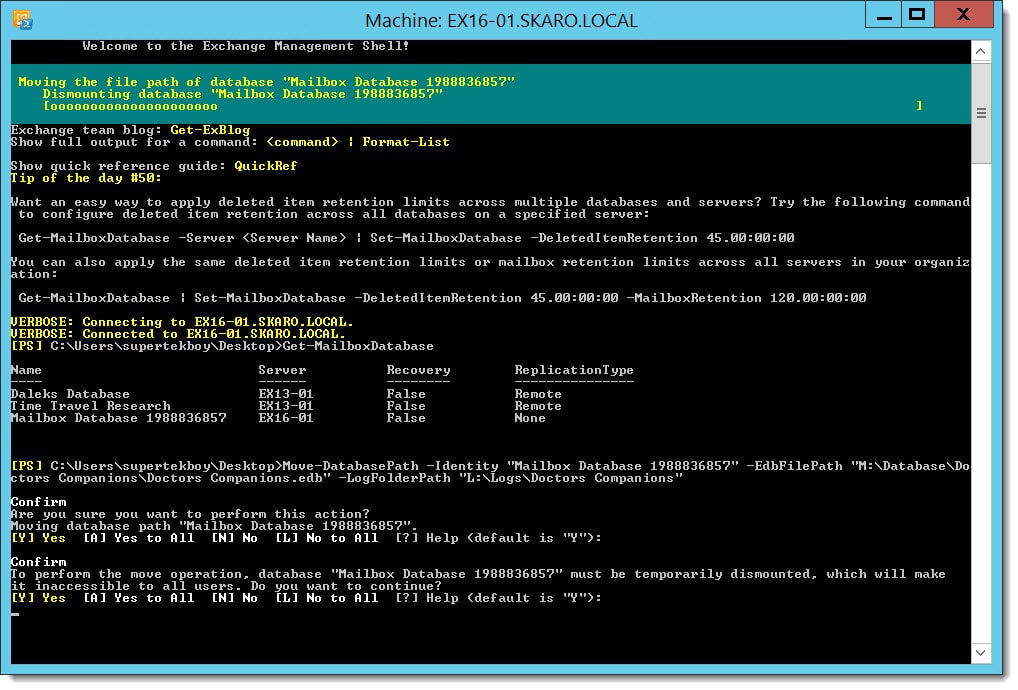
When we hit enter on this command it will prompt us twice. The first time whether we want to actually perform this move. The second to warn us that such a move will dismount the database and make it unavailable to users. The default answer is yes so we can tap enter on both prompts.
We don’t need to worry about creating the folder structure either. The command will create these folders for us.
 C:\> Move-DatabasePath -Identity "Mailbox Database 1988836857" -EdbFilePath "M:\Database\Doctors Companions\Doctors Companions.edb" -LogFolderPath "L:\Logs\Doctors Companions"

Confirm
Are you sure you want to perform this action?
Moving database path "Mailbox Database 1988836857".
[Y] Yes [A] Yes to All [N] No [L] No to All [?] Help (default is "Y"):

Confirm
To perform the move operation, database "Mailbox Database 1988836857" must be temporarily dismounted, which will make it inaccessible to all users. Do you want to continue?
[Y] Yes [A] Yes to All [N] No [L] No to All [?] Help (default is "Y"):
The database and log files will now be moved.
How long this takes depends on a number of factors including, the size of the files, the load on the server and the speed of the disk subsystem. For our lab, this move should be relatively quick.
Once complete it will go back to a cursor prompt.
To confirm the move you can run the following command.
 C:\> Get-MailboxDatabase | FL name,edbfilepath,logfolderpath

Name : Daleks Database
EdbFilePath : M:\Dalek Database\DalekDatabase.edb
LogFolderPath : L:\Dalek Database

Name : Time Travel Research
EdbFilePath : M:\Time Travel Research\Time Travel Research.edb
LogFolderPath : L:\Time Travel Research

Name : Mailbox Database 1988836857
EdbFilePath : M:\Database\Doctors Companions\Doctors Companions.edb
LogFolderPath : L:\Logs\Doctors Companions
You will notice that the name is still ‘Mailbox Database 1988836857’. Let’s get that changed next.
Change the Database Name
If you want to change the name of the database you can do this either through the Admin Center or the Management Shell.
While on the Databases tab in Exchange Admin Center, double click the database you want to rename.
Under the General tab change the Name field to what you desire. Click Save and wait a few seconds for it to update.

To do this in PowerShell issue the following command.
C:\> Set-MailboxDatabase -Identity "Mailbox Database 1988836857" -Name "Doctors Companions"
In our example:
-Identity specifies the database we are modifying.
-Name specifies the new name of our database.
To confirm, reissue the Get-MailboxDatabase command.
Enable Circular Logging
Log files will grow indefinitely. In most production environments log files are flushed after the successful completion of a database backup. If you don’t have a mechanism to flush the logs in your lab they will eventually consume all your disk space. While I never recommend this for production enabling circular logging in a lab is perfectly acceptable. In essence, circular logging allows Exchange to flush its own logs. This does come with some drawbacks such as eliminating the ability to recover from your logs. But for a lab, if you lose a database you can simply create a new one.
While on the Databases tab in Exchange Admin Center, double click the database you want to modify.
Under the Maintenance tab, check Enable Circular Logging. Click Save.

You will need to dismount and remount the database for this to take effect.
To do this select the database from the Databases tab. Select the More (![]() ) menu and Dismount. Click Yes to confirm the dismount.
) menu and Dismount. Click Yes to confirm the dismount.
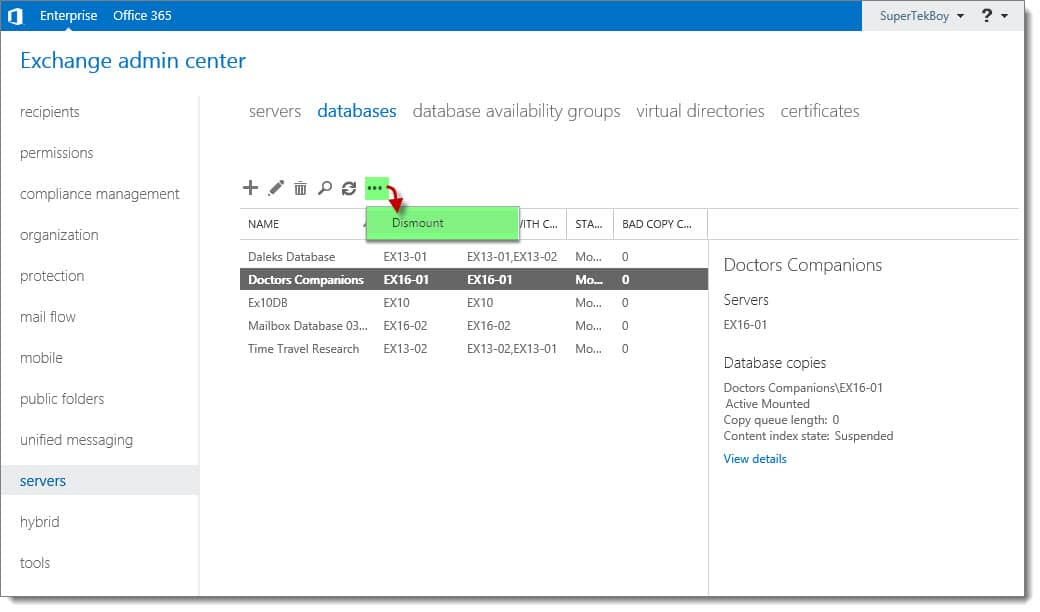
To mount, repeat the steps above but select Mount instead. Click Yes to confirm. To confirm the database mounted review the Status column.

To do this from PowerShell issue the following command.
 C:\>Set-MailboxDatabase -Identity "Doctors Companions" -CircularLoggingEnabled $true
WARNING: Circular logging parameter change will not be applied on this database before it is remounted. Dismount and remount database "Doctors Companions" in order to apply this parameter change.
In our example:
-Identity specifies the database we are modifying.
-CircularLoggingEnabled set to $true enables circular logging. Rerunning this command and setting to $false will disable circular logging.
You will also notice we received a warning to dismount and remount the database. To do this issue the following commands. When you dismount you will be prompted to confirm as this will make the database unavailable to users. In our lab, this is not a problem.
 C:\> Dismount-Database "Doctors Companions"

Confirm
Are you sure you want to perform this action?
Dismounting database "Doctors Companions". This may result in reduced availability for mailboxes in the database.
[Y] Yes [A] Yes to All [N] No [L] No to All [?] Help (default is "Y"):
Once dismounted you will be returned to a prompt. To remount the database:
C:\> Mount-Database "Doctors Companions"
Once mounted you will be returned to a prompt. To confirm the change took effect you would run a command similar to the following:
 C:\>Get-MailboxDatabase "Doctors Companions" | fl name,*circ*

Name : Doctors Companions
CircularLoggingEnabled : True
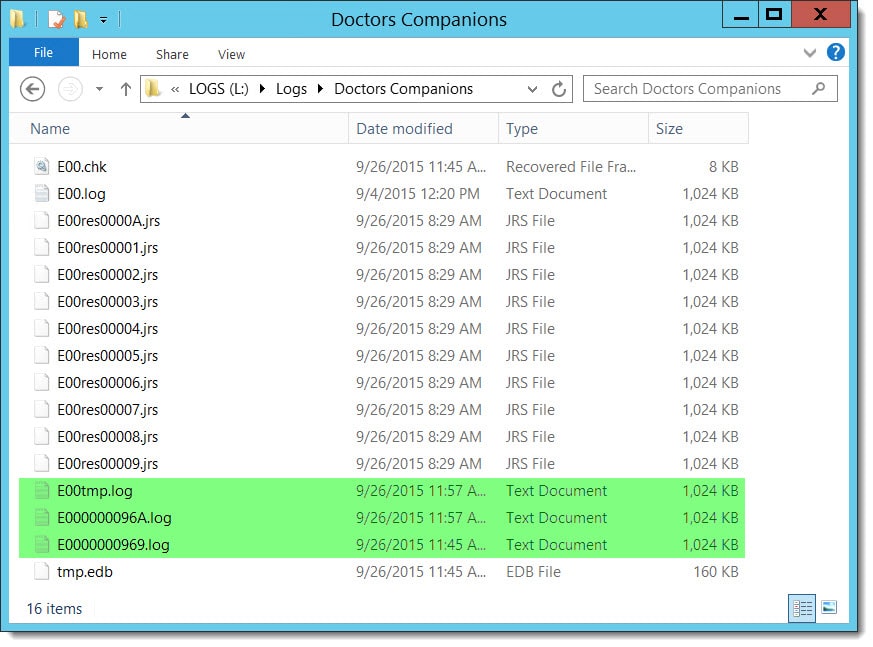
While this confirms the setting the real proof is in the pudding. Let’s navigate to the logs folder directory and see what remains.
Note: It can take a few minutes for the majority of log files to be flushed.
Our logs directory looks great. Only three logs remain. Now we are ready to migrate test users.
Next Steps
In the final part of our lab series, we move test users to Exchange 2016. In addition, we briefly explore Outlook on the Web (OotW).

Leave a Reply