
In our previous article, we sized and built the base for our multi-role Exchange Server. Then we extended our Active Directory Schema.
In this article, we will run through the Exchange Setup Program. We will then design and implement our namespace as well as configure split-brain DNS. We will finish by applying a 3rd-party certificate.
Step 4: Exchange Server Setup Installing All Roles
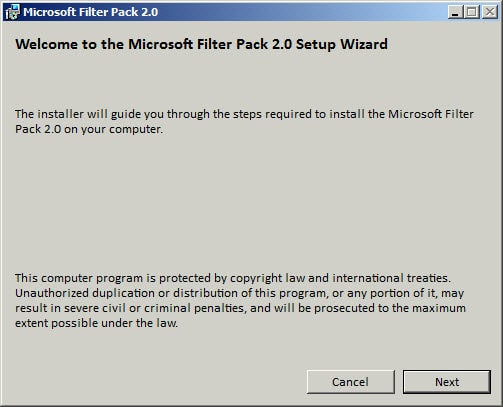
First, we will need to install the Microsoft Office 2010 Filter Pack.
This install is just a series of Next button clicks and you are done. There is nothing to configure.
The Filter Pack can be downloaded from here:
http://www.microsoft.com/en-us/download/details.aspx?id=17062
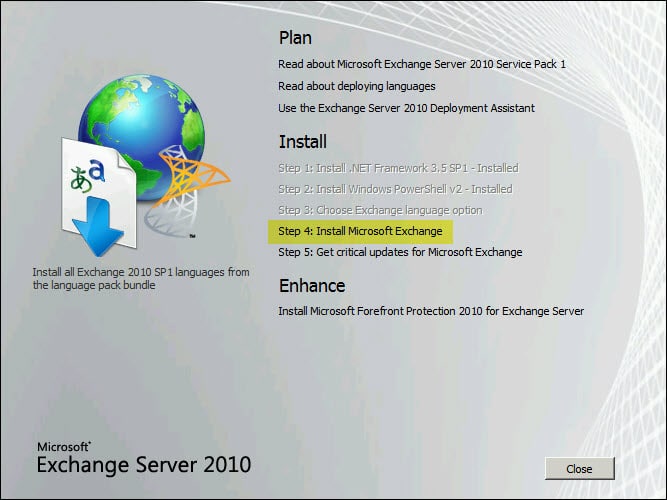
Now let’s go to our Exchange DVD. If it doesn’t auto-run, click double click SETUP.EXE on the DVD.
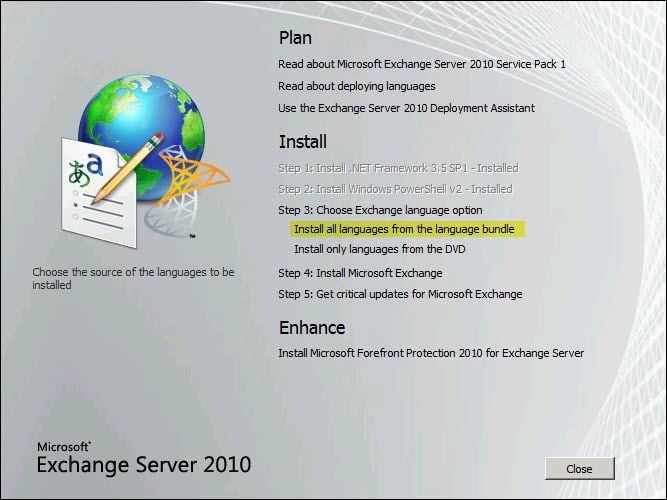
- Steps 1 & 2 should already be complete. Click Step 3 to expand it.
- Select Install all languages from the language bundle. (You can also pick Install Only Languages from the DVD. Whichever one you pick determines how many language options your users will have when they use tools such as Outlook Web App. If you are an international company I recommend the former option.)

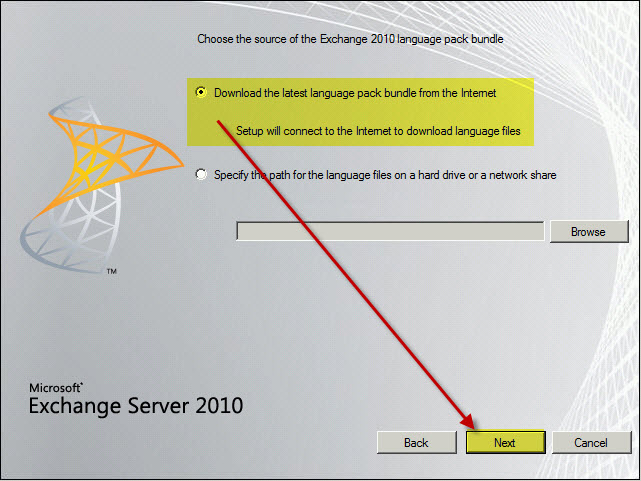
- Select Download the latest language pack bundle from the Internet and click Next.

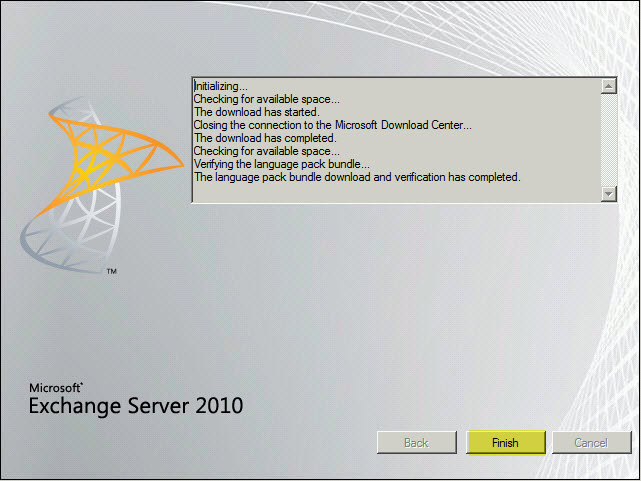
- Click Finish.

- Click Step 4: Install Microsoft Exchange.

- Click Next.

- Accept the License Agreement and click Next.
- Choose whether or not to send error reports to Microsoft. Click Next.
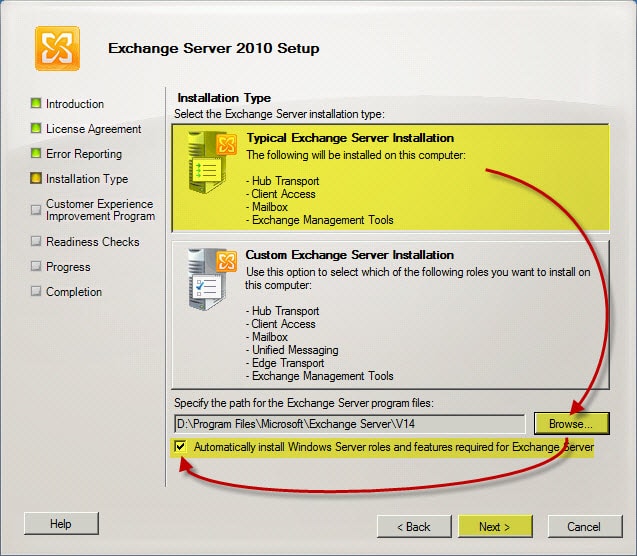
- Pick Typical Installation (this installs all roles).

- Based on the planning from our last article we are going to put the Exchange Install on the D: drive. Click the Browse button and change the path to the D: drive. In our example, our file path becomes:
D:\PROGRAM FILES\MICROSOFT\EXCHANGE SERVER\V14 - Select Automatically install Windows Server roles and features required for Exchange Server. This completes A LOT of busy work for us!
- Click Next.
- Check The Client Access Server role will be Internet-facing.

- Enter the FQDN you plan to use for Exchange Web Services. EWS includes services such as Outlook Web App, ActiveSync, and Outlook Anywhere. It doesn’t matter if this is the same URL you currently use for Exchange 2003. We will discuss namespaces a little later. In our example, our external namespace is: mail.daleksofskaro.com
- Click Next.
- Choose whether you want to join the Customer Experience Improvement Program and click Next.
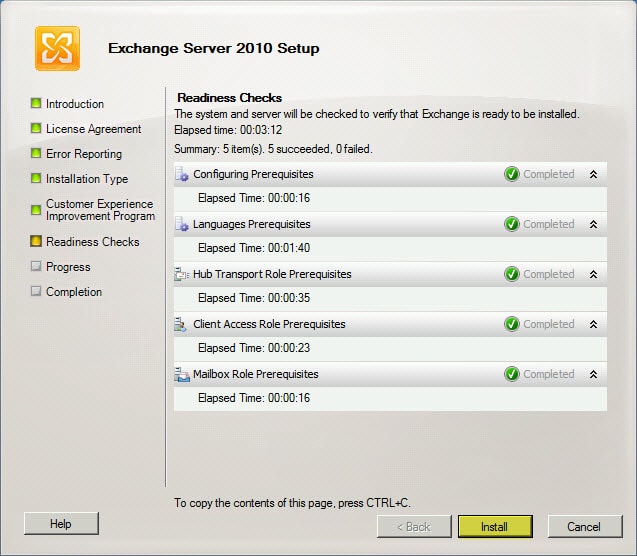
- The Exchange Installation will then perform readiness checks. This determines whether or not all prerequisites and requirements have been met. If everything is good, click Install.

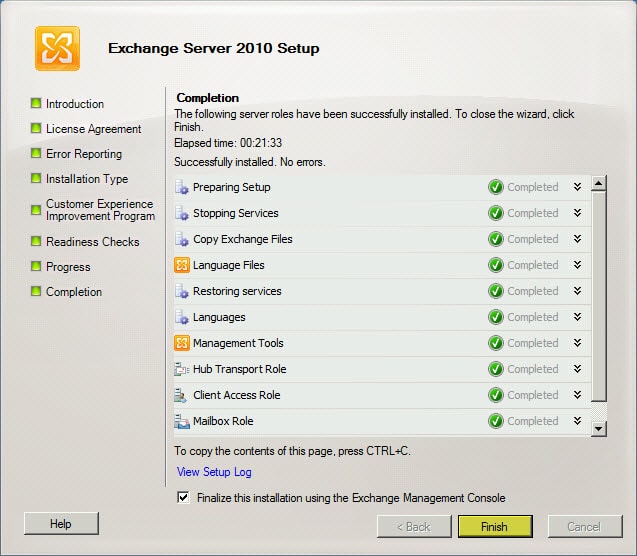
- The installation will take some time. Now is a good time to refill that coffee cup! If everything completes successfully, click Finish.

- Click Ok to reboot.


Step 5: Namespace Design
and Implementation
While we are waiting for our server to reboot let’s discuss namespace.
Namespace is very important in Exchange 2010. Not only does namespace govern services like Outlook Web App, or, ActiveSync, but it also governs items such as the distribution of the Offline Address Book, or, the Autodiscover service.
A correct namespace design is key.
Currently, our Exchange 2003 box is providing Outlook Web Access, ActiveSync and RPC over HTTPS. It uses a namespace of mail.daleksofskaro.com.
It is our plan that Exchange 2010 will use that same namespace. We will also have a period of coexistence.
“How can both servers use the same name?”
Well, they can’t.
We will change the namespace (and certificate) on the Exchange 2003 server to legacy.daleksofskaro.com.
We will need a new host record for our Autodiscover service. This will be autodiscover.daleksofskaro.com.
We also need to examine our internal namespace. During the install process, the setup made all our internal URLs the name of our internal server. In our example this is EXCHANGE.SKARO.LOCAL.
Due to recent restrictions, 3rd-party certificate providers can no longer put internal names on certificates. This is actually a good thing! Otherwise, you are exposing the internal hostnames of your servers to the internet.
However, if our certificate does not match our internal server name it will give our internal users security warnings.
“So how do we combat this?”
Simple. We make our internal URLs match our external URLs.
Then we use split-brain DNS. So mail.daleksofskaro.com matches the internal IP of exchange.skaro.local. That keeps all the traffic on the local LAN. Without the split-brain DNS, all local traffic would try to go out of the firewall only to try and come back in later. Most firewalls will block this kind of traffic.
Server rebooted?
Okay, let’s change those Internal URLs.
- Open the Exchange Management Console.
- Expand Microsoft Exchange On-Premises (server name)
- Expand Server Configuration
- Select Client Access
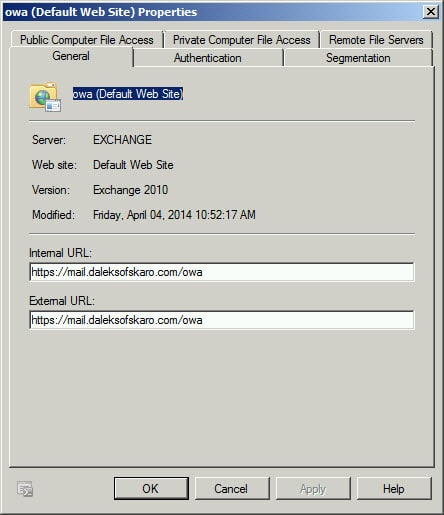
- In the lower-right pane, under the Outlook Web App tab, double-click OWA (Default Web Site).
- Under the General tab, copy the contents of the External URL and paste over the content in the Internal URL field.

- Click Ok.
- Repeat steps 6 and 7 for the Exchange Control Panel, Exchange ActiveSync, and Offline Address Book Distribution tabs.
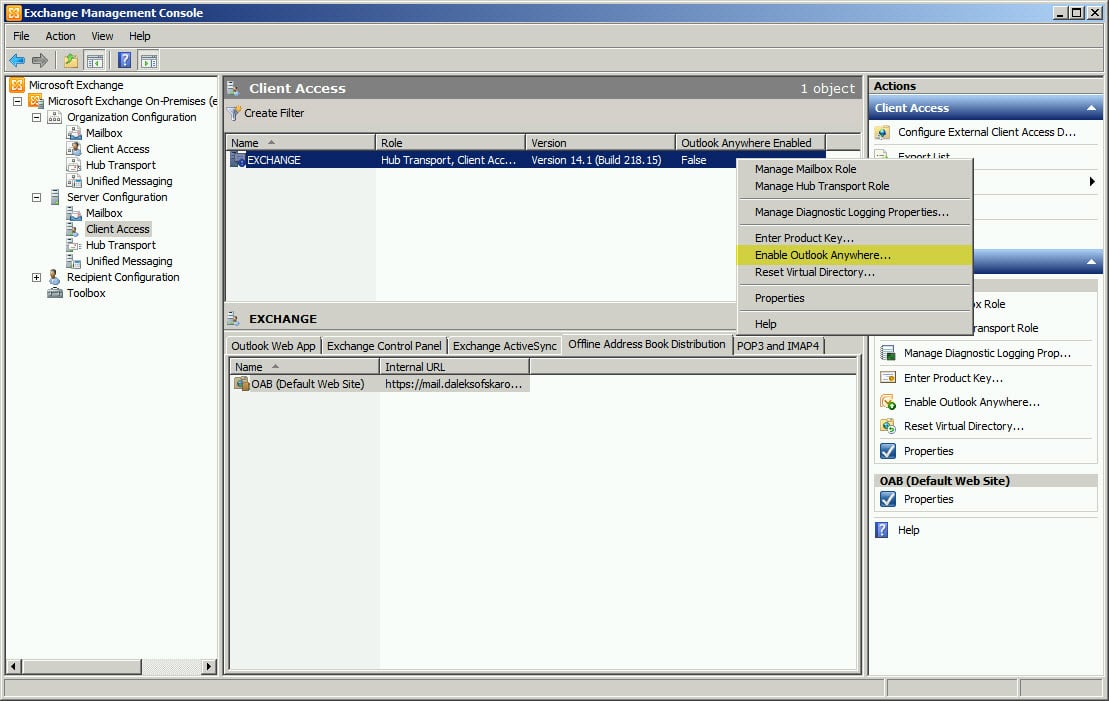
- Now is a good time to enable Outlook Anywhere. While still on the Server Configuration >> Client Access, right-click on the name of the server and select Enable Outlook Anywhere from the context menu.

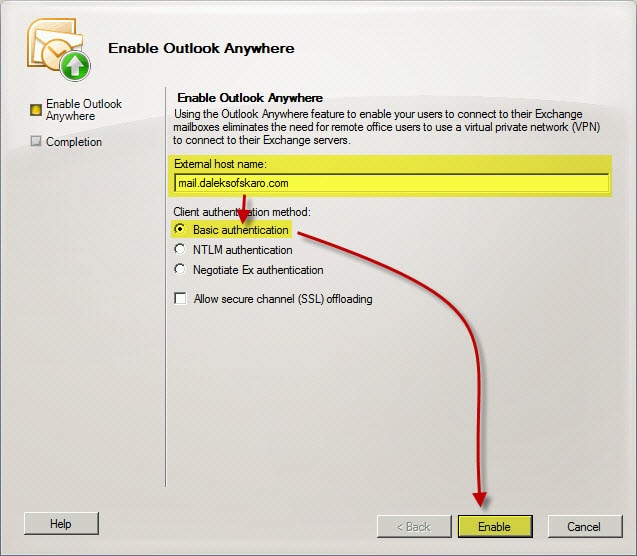
- In the External hostname field, we will enter mail.daleksofskaro.com.
- Keep Basic Authentication checked.

- Click Enable.

- Click Finish.

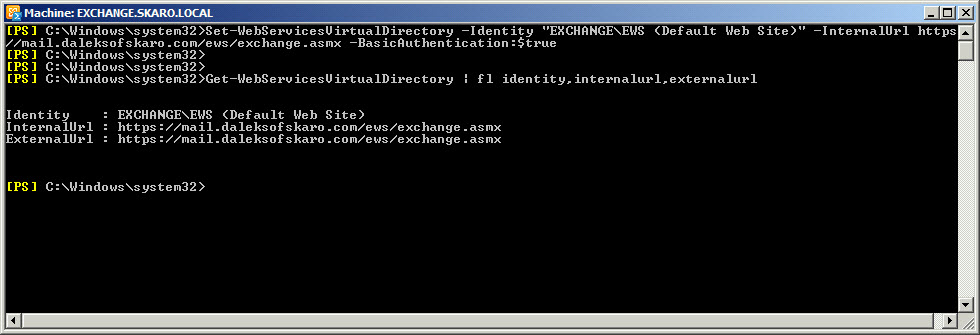
We also need to make changes to two additional namespaces. Autodiscover and Exchange Web Services (EWS). These are not in the GUI. For this open the Exchange Management Shell and issue the following commands.
Note: Be sure to change EXCHANGE on both these commands to the hostname of your internal server.
C:\> Set-WebServicesVirtualDirectory -Identity “EXCHANGE\EWS (Default Web Site)” -InternalUrl https://mail.daleksofskaro.com/EWS/Exchange.asmx -BasicAuthentication:$true
To confirm the change.
C:\> Get-WebServicesVirtualDirectory | fl identity,internalurl,ExternalURL
And now for Autodiscover.
C:\> Set-ClientAccessServer -Identity EXCHANGE –AutoDiscoverServiceInternalUri https://autodiscover.daleksofskaro.com/Autodiscover/Autodiscover.xml
To confirm this change.
C:\> Get-ClientAccessServer |fl identity,autodiscoverserviceinternaluri
Split-Brain DNS
Alright, let’s get our split-brain DNS configured next. Our DNS Servers will hold non-authoritative zones for our external namespace. This will only be used by our internal users.
- On your DNS server open DNS Manager.
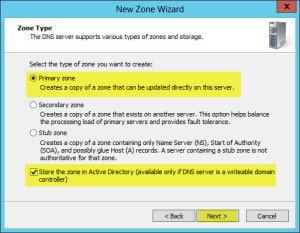
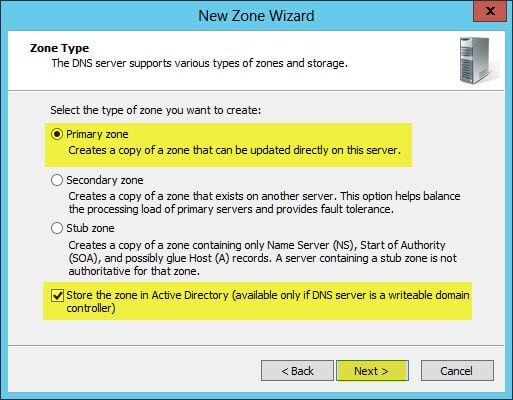
- Right-click on Forward Lookup Zone and select New Zone… from the context menu.

- Click Next.
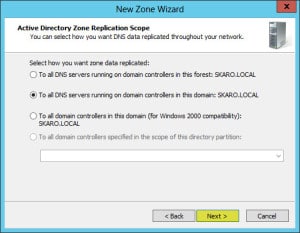
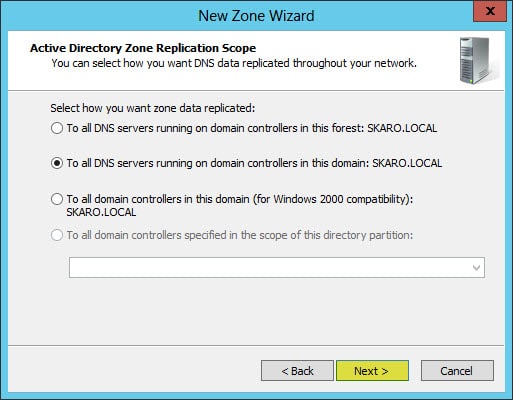
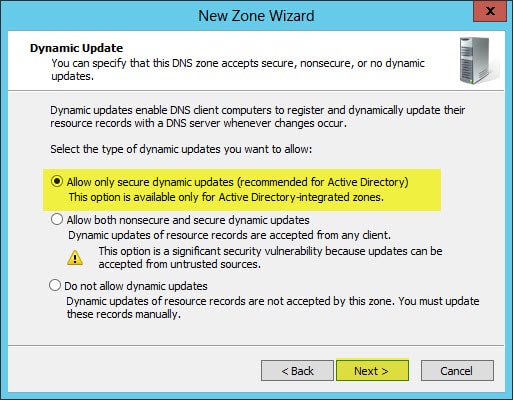
- Keep all the default settings. Click Next.
- Keep all the default settings. Click Next.
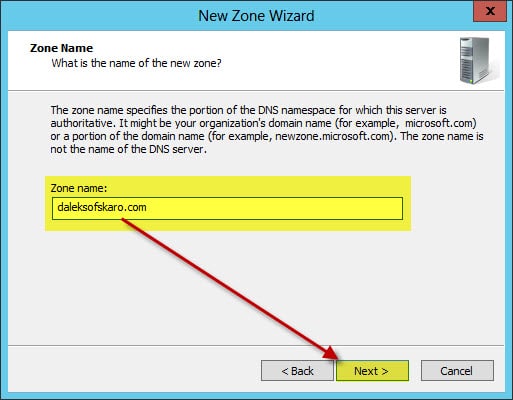
- In the Zone Name field enter your public domain name (in our example daleksofskaro.com).

- Keep all the default settings. Click Next.
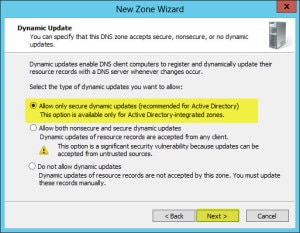
- Click Finish.
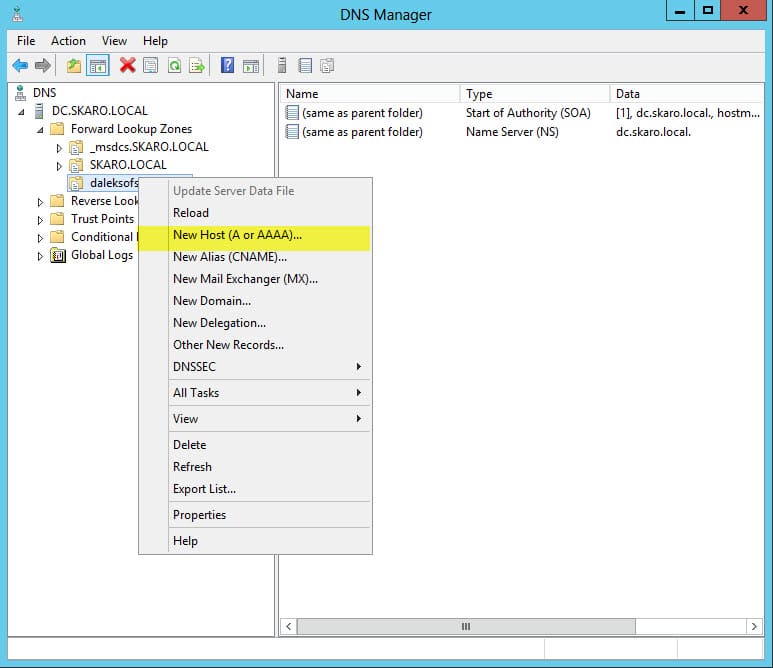
- Expand Forward Lookup Zones.
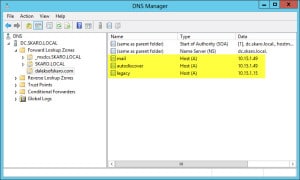
- In the left pane, right-click on daleksofskaro.com zone and select New Host (A or AAAA) from the context menu.
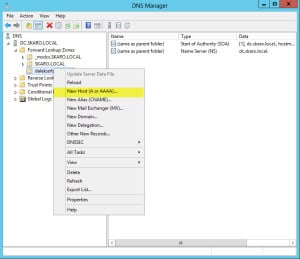
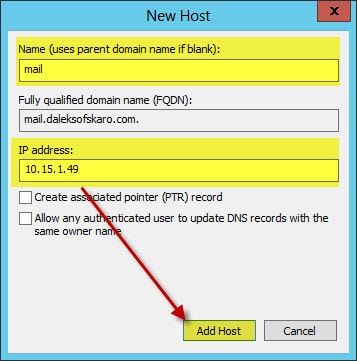
- In the Name field type mail. In the IP address field type the internal IP of your Exchange 2010 Server. (In our example it is 10.15.1.49).
- Click Add Host

- Repeat Steps 10-12 for autodiscover and legacy. However, with regard to legacy, point it to the internal IP of your Exchange 2003 Server.
- The end result should look like this.


Note: You will also need to repeat Steps 10-12 for any resources you have on the Internet. For example, if your website is www.daleksofskaro.com, you will need to create a www host A record and point it to the public IP address of your hosting provider.
Now, this takes care of our internal namespace but we still need to do some more work on the external namespace.
First, though we need to open some ports on our firewall. For coexistence, we will need two public IPs.
Our first public IP will continue to point to our Exchange 2003 server.
Our second public IP will point to our Exchange 2010 server.
We need to open ports 80 (HTTP) and 443 (HTTPS) to our Exchange 2010 server.
This process will vary based on the firewall you have.
Before we cut over our external DNS records to the second public IP we should get our new certificate in order first. It takes time for a certificate request to be processed by a 3rd-party. That time can vary greatly. I have seen some take an hour. I have seen some take days.
Step 6: Unified Communications Certificate (UCC / SAN)
One of the greatest improvements in Exchange 2010 was including a brand new Certificate Generation Request wizard in the EMC.
This wizard takes all the guesswork out of what kind of certificate you will need to purchase.
Let’s get started.
- Open the Exchange Management Console.
- Expand Microsoft Exchange On-Premises (server name)
- Select Server Configuration
- In the far-right Action pane, click the link for New Certificate Request…
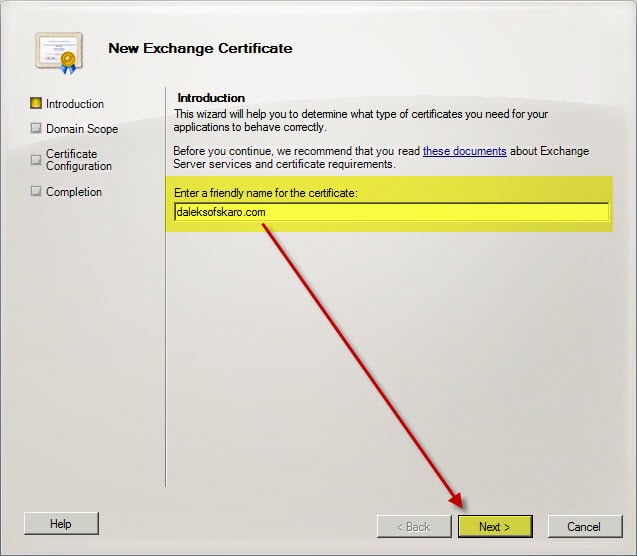
- In the Enter a friendly name field enter your certificate name. In our example, we will make this mail.daleksofskaro.com. Click Next.

- Do NOT check wildcard. Leave this unchecked and click Next.
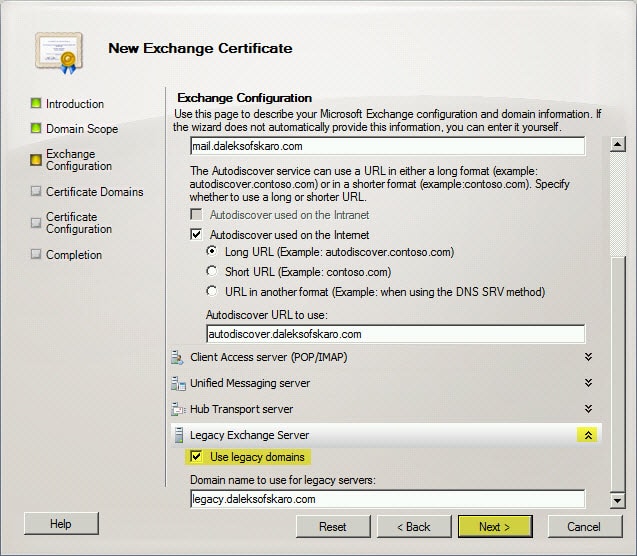
- This next page will help us determine all the namespaces we need on our new certificate.
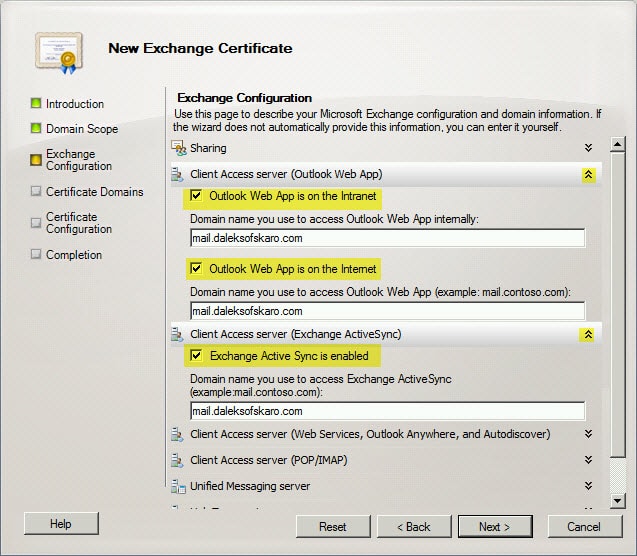
- Expand Client Access Server (Outlook Web App).
- Check Outlook Web App is on the intranet.
- Check Outlook Web App is on the internet.
- Make sure our external URL is the only address in both Domain name fields. In our case mail.daleksofskaro.com.
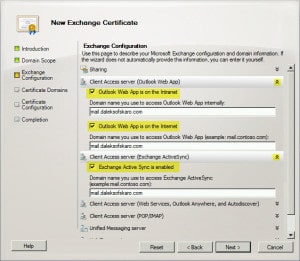
- Expand Client Access Server (Exchange ActiveSync).
- Check Exchange Active Sync is enabled.
- Make sure our external URL is the only address in the Domain name field. In our case mail.daleksofskaro.com.
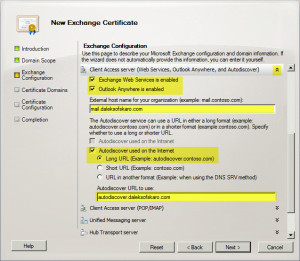
- Expand Client Access Server (Web Services, Outlook Anywhere, and Autodiscover):
- Check Exchange Web Services is enabled.
- Check Outlook Anywhere is enabled.
- Make sure our external URL is the only address in the External hostname field. In our case mail.daleksofskaro.com.
- Check Autodiscover used on the Internet
- Check Long URL (Example: autodiscover.contoso.com)
- Make sure our autodiscover URL is the only address in the Autodiscover URL to use field. In our case autodiscover.daleksofskaro.com.
- Expand Legacy Exchange Server
- Check Use legacy domains
- Make sure our legacy URL is the only address in the Domain name field. In our case only legacy.daleksofskaro.com.

- Click Next.
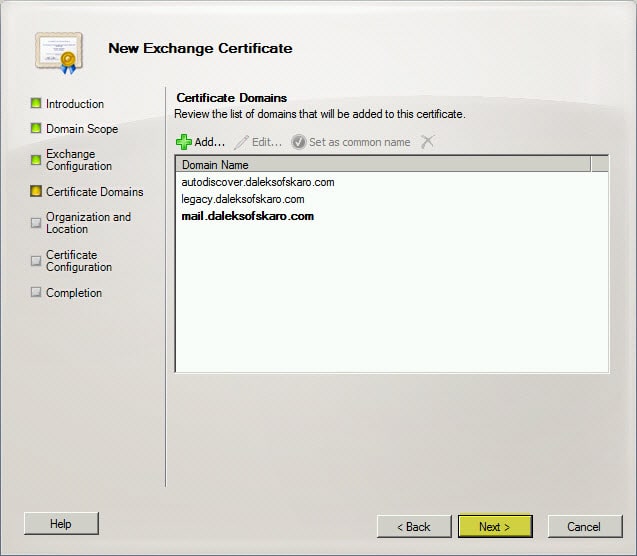
- This should list three Certificate Domains. Make sure mail.daleksofskaro.com is Set as the common name (in bold).
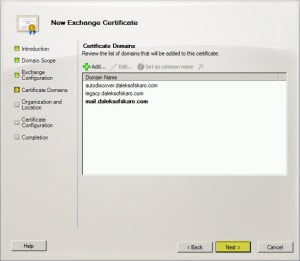
- Click Next
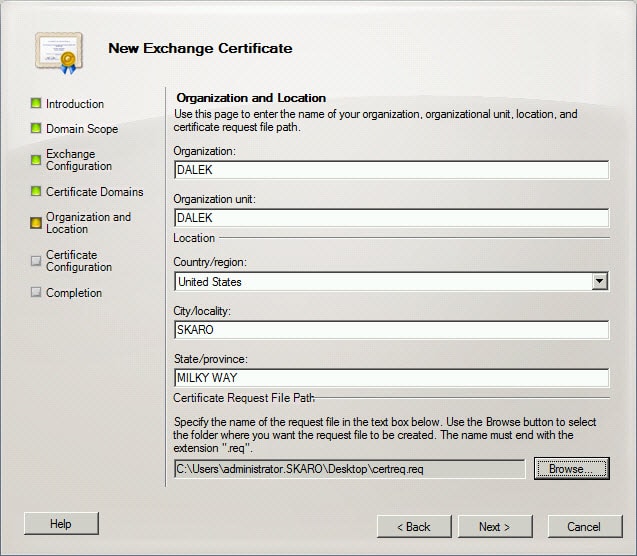
- Fill out your Organization and Location information.
- Click the Browse button and save the Certificate Request file to the Desktop.

- Click Next
- Click New
- Before you click Finish, review the three steps. You will notice in Step 1, it has identified you need a UC certificate. This is also known as a SAN certificate. Click Finish.


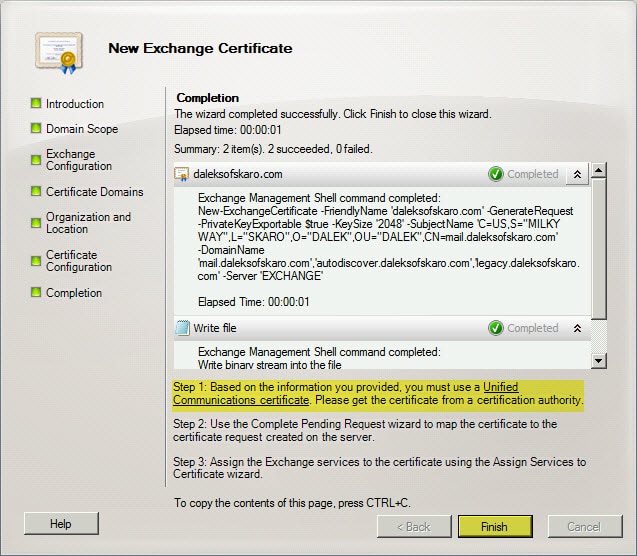
This should have created a certificate request file on your desktop. Open this file with Notepad and copy the entire contents, including the BEGIN and END lines.
Now you will need to purchase a UC / SAN certificate from a 3rd party source. There are many out there. But for the best price and quickest turnaround I highly recommend Digicert.com (affiliate).
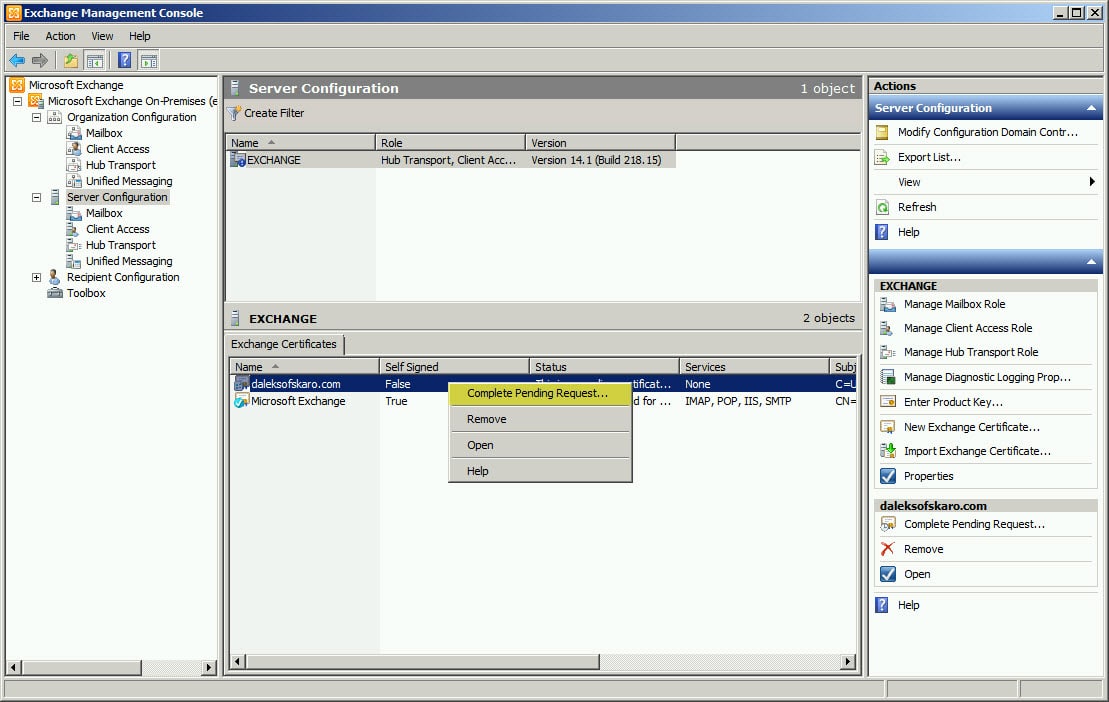
Once the certificate has been processed (and you have downloaded and unpacked your ZIP file from Digicert – affiliate) we need to complete the certificate request.
- In the lower-right pane, right-click on the name of our certificate (mail.daleksofskaro.com) and select Complete Pending Request from the context menu.
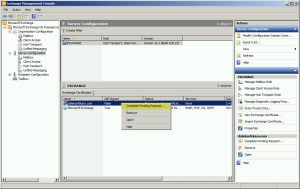
- Click the Browse button and locate the certificate from Digicert (affiliate).

- Click Complete.

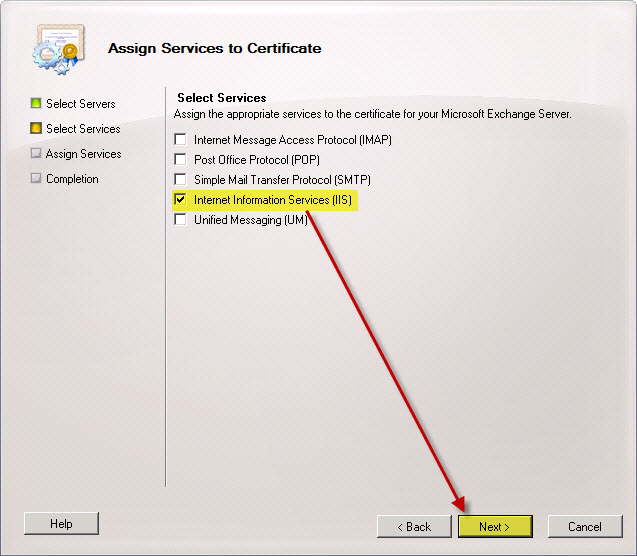
Exchange Web Services are still assigned to the self-signed certificate. Let’s get these switched over to the 3rd-party certificate.
- In the lower-right pane, right-click on the name of our certificate (mail.daleksofskaro.com) and select Assign Services to Certificate from the context menu.
- Select Internet Information Service (IIS).

- Click Assign
- Click Finish
Also, be sure to import this certificate on the Exchange 2003 server as well. You do this in IIS Manager. Go to the Properties of the Default Web Site. Then from the Directory Security tab click Server Certificate and do an Import (.pfx) from the wizard.
Now that we have our certificate installed, we need to test to make sure it is working properly.
The easiest way to check is to enter your external URLs (mail.daleksofskaro.com and legacy.daleksofskaro.com) into the web browser of an internal PC.
Make sure you can get to OWA on both servers and that there are no certificate errors.
Also, check from an external source as well, using the public IP address of the 2010 server (for example, https://123.123.123.123/owa). This will generate a certificate error but you should have access.
If all looks good then now is a good time to cut over the external DNS records. Remember that:
mail.daleksofskaro.com will point to the public IP of our 2010 server.
autodiscover.daleksofskaro.com will point to the public IP of our 2010 server.
legacy.daleksofskaro.com will point to the public IP of our 2003 server.
Note: DNS changes can take anywhere from 24-72 hours to propagate through the internet. I always recommend making DNS changes over a weekend, or, during times of low service usage.
Now that we have made these DNS changes we need to set up a forward for Outlook Web App. During coexistence, we will have users on both mailbox servers. The DNS changes will direct everyone to the 2010 OWA login page. What this forward does is redirect users still on the 2003 mailbox to legacy.daleksofskaro.com instead.
To execute this forward open the Exchange Management Shell and issue the following command. Replace EXCHANGE with the internal name of your 2010 server.
C:\> Set-OWAVirtualDirectory -Identity "EXCHANGE\OWA (Default Web Site)" -ExternalURL https://mail.daleksofskaro.com/OWA -Exchange2003URL https://legacy.daleksofskaro.com/exchange
Once the DNS propagation completes, retest OWA from a browser using an external source. Use the external URL rather than the public IP this time. Make sure you don’t get any certificate errors.
I highly recommend testing with the Exchange Remote Connectivity Analyzer.
https://testconnectivity.microsoft.com/
Phew!
That was a lot of content for one article. We got a lot of good stuff covered though!
In our next article, we will move our databases and logs to their dedicated disks. We will configure Public Folder replication. We will move test users and confirm mail flow to the new server. We will also discuss backing up Exchange 2010 and finally move production users.

Gareth, I’m hoping you can help, though it’s long after your article was produced. I’m just now attempting to migrate from exchange 2003 to exchange 2010. I’ve gotten through the steps until we get to this Namespace issue. I have never used a url naming convention. We do use OWA and activesync, but to the IP address, not to a named url. I don’t have the option to add DNS entries through the company in control of the public DNS setting, I can only do the DNS of my internal DNS server. So I could do split DNS. I also don’t have the option of buying certificates, so must use a self-signed certificate, if I absolutely must have one. My firewall directs all incoming and outgoing smtp traffic through my spam filter device, which then sends it to or from my Exchange 2003 server. Any advice you can provide for this scenario?
I am facing a problem in moving PUBLIC FOLDER DATABASE to other server. It is saying that “This operation cannot be performed on a remote server. Please use ConfigurationOnly option and then manually move the files.”
Any suggestions to resolve this issue?
Thanks
Gareth, is the 80 port required to be forwarded to Excahnge 2010 just for OAB? I read on TechNet to enable SSL for OAB too. On IIS 7.5 I saw that ssl I disabled only for OAB virtual directory.
Thank you,
Francesco B.
Hey Francesco,
I do everything exclusively over 443 these days. I keep port 80 closed to the Exchange server.
Hi Gareth, I followed your guide and TechNet instructions about certificate installation.
I have installed a 3rd party certificate on Exchange 2010. Ok. No certificate warnings on connecting to it. If I open the certificate in the EMC all seems ok.
I have used the same certificate for my Exchange 2003. Ok. I also am able to connect to it without certificate warnings. The problem is (may be it’s not?) that by opening the certificate itself on the Exchange 2003 box it says that the signature is not valid. Even if I open the certificate from the locker icon in the browser of my pc all is ok.
Have I to worry about it? Do you know the reason for this behavior?
Thank you,
Francesco B.
Hey Francesco,
How did you transfer the cert from 2010 to 2003? Did you do an Export/Import from within Exchange?
Hi Gareth, I have done it with every method:
– Took the zipped cert that Comodo sent to me (.cer) and imported through mmc in the EX2003 server in personal certificates
– Exported from EMC in the .pfx format and imported in IIS6 on EX2003.
Same result.
Anyway I think that is a non-problem because actually I have not certificate warnings neither connecting to legacy name space nor connecting to normal namespace. It just gives me validation warning by opening the certificate in the EX2003 server. I think that the Comodo CA is not accepted correctly in windows server 2003. Maybe?
Thank you
Francesco B.
Hey Francesco,
It could be that there are some intermediary Comodo certs you need to install on the 2003 server. I would recommend calling Comodo support.
Hey Gareth, it is a very useful and clear howto! Thank you very much at first! I have a question about what is discussed in part iii: Have I not to forward Active sync and Outlook anywhere requests from the new Exchange to the old one too? I have several collegues with iphone, ipad, etc that connect to their mailboxes through EAS and Others that connect with RPC over HTTPs. Thank you!
Hey Francesco. No Exchange will be able to redirect/proxy those as needed. Just make sure you have a legacy.domain.com record in place and that the legacy name is in the certificate. Then apply that cert to the 2003 server. To make it easier for EAS the new 2010 server should take over the existing EAS URL.
Thank you Gareth. I have another question regarding the part of public IPs. In my environment I have a smart host (symantec messaging gateway formerly brightmail). It takes care of all incoming and outgoing smtp traffic. It follows a brief if my current configuration to let you understand my thought.
– Lets say my public ip for email services is 1.1.1.1. DNS record that points to it is mail.myexternaldomain.com
– Inside my firewall I have port forwardings that route traffic directed to the above ip to specific internal hosts on specific ports: Smtp goes to my smart host. Https, http, imap go to my Exchange2003.
Now, you say to keep using current public ip for Exchange 2003 and to assign a new public ip to Excahnge 2010. When ready, change the DNS pointment so that legacy.myexternaldomain.com points to current ip and mail.myexternaldomain.com points to Exchange 2010. This would have to be done on off peak hours because of record propagation time.
Instead, I thought to follow another way, so that I can do things with calm and not depending on internet propagation or third party activity delays:
1 – tell to my isp provider to create the legacy.myexternaldomain.com A record that points to 1.1.1.2, currently going nowhere.
2 – on my firewall I add port forwardings so that 1.1.1.2:80, 1.1.1.2:443, 1.1.1.2:143 point to my Exchange 2003. I may keep it disabled for now.
3 – Setup split brain dns.
4 – Setup my Exchange 2010 with cas, ht, mb roles and configure virtual directories as you indicate in this guide for external and internal namespaces.
5 – Get certificates and install them on CAS and IIS.
6 – When ready: change actual Exchange 2003 port forwardings (1.1.1.1:80,443,143) to point to Exchange 2010 internal ip and leave untouched other ones above. Change on my smart host the internal mailserver ip to my Exchange 2010.
7 – Test connectivity to both legacy. and mail. hosts with Microsoft Connectivity Analyzer and test inbound outbound mail flow: if things are ok i’m done, else it is sufficient to roll back the point 6 to make things work as before the changes.
What do you think about this way of proceeding?
And a last question: which web services will be proxied and which instead will be redirected from Exchange 2010 CAS to Exchange 2003? I mean which services, ActiveSync, OWA, Outlook Anywhere, IMAP.. I don’t find documentation on this.
Thankyou very much for your time.
Francesco B.
Hey Gareth, for the last question about which services are proxied instead of redirected I have read an exhaustive article at https://technet.microsoft.com/en-us/library/bb310763(v=exchg.141).aspx :). Give me just a feedback, if you want, on the other question.
Also take into account that my mx record too is mail.myexternaldomain.com and so resolves to 1.1.1.1 . I cannot follow your DNS cut over illustrated here in part iii because if I did it I would break mail flow (I mean by making resolve mail.myexternadomain.com to 1.1.1.2) unless also doing firewall reconfiguration.. It is either that or I have not understood your guide or it definitively (this specific part of public IPs and dns setup) not applies to my case.
Hey Francesco,
Great question. The steps you mentioned sound great for the client access services. Just to add some clarity, the SSL cert will need to be applied to both the 2010 and 2003 servers.
For mail flow you don’t need to do anything with DNS or your firewall. Just update your Symantec appliance with the internal IP of your 2010 server for mail delivery.
OWA will be a redirection, which is the requirement for the legacy namespace. Other services such as ECP will be proxied. I recommend this article here: https://technet.microsoft.com/en-us/library/bb310763.aspx
Thank you Gareth for all the info. You have clarified to me what it was my concerns about public IP and DNS stuff. I have thoroughly read TechNet article you linked. It is a really exhaustive article!
I think I can start with my deployment of Exchange 2010. When I will be ready I surely will look for an Exchange 2010-2013 Supertekboy migration guide alongside TechNet library ! 🙂
Thank you again for your time.
Francesco B.