
In our previous article, we ran through the Exchange Setup Program. We then discussed and implemented our namespace. We configured a split-brain DNS. Then we wrapped up by applying a 3rd-party certificate.
In this article, we will move our databases and logs to their dedicated disks. We will configure Public Folder replication. Move test users and confirm mail flow to the new server. Discuss backing up Exchange 2010. Move production users.
Step 7: Relocating the database and log files
In our previous article, we discussed configuring a dedicated disk structure that would place our database on drive M: and our log files on drive L:.

Let’s take care of this now.
- Open the Exchange Management Console.
- Expand Microsoft Exchange On-Premises (server name).
- Expand Organization Configuration.
- Select Mailbox.
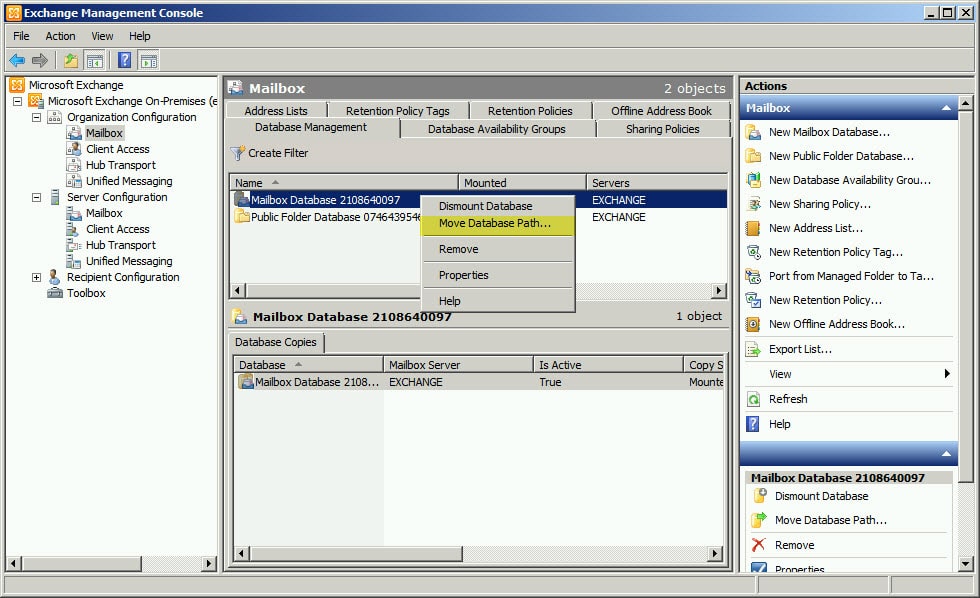
- In the top-right pane select the Database Management tab.
- Right-click on the database and select Move Database Path… from the context menu.

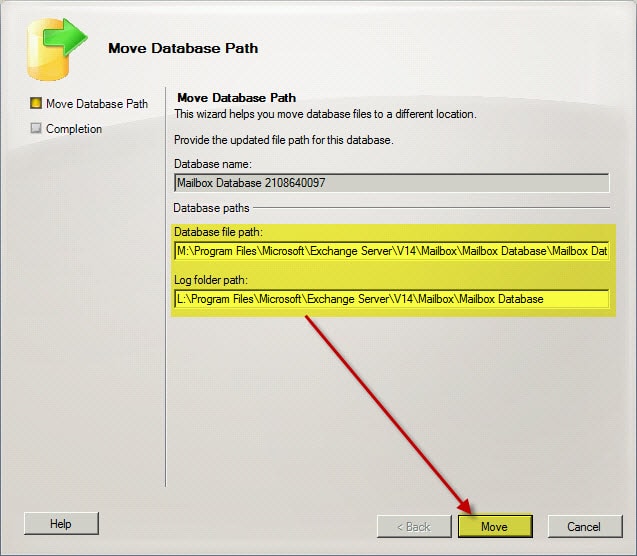
- In the Database File Path field, specify the M: drive. In our example:
M:\Program Files\Microsoft\Exchange Server\V14\Mailbox\Mailbox Database\ - In the Log Folder Path field, specify the L: drive. In our example:
L:\Program Files\Microsoft\Exchange Server\V14\Mailbox\Mailbox Database\ - Click the Move button.

- Click the Finish button.

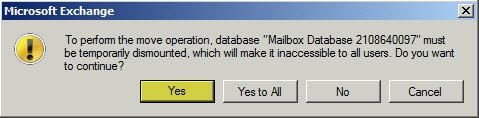
- Click the Yes button to confirm dismounting the database.

- The database will now move. Repeat steps 6 through 11 for the Public Folder Database.

Step 8: Configure Public Folder Replication
Now that we have our databases moved, let’s configure Public Folder replication.
We need to set up replication so our Public Folder content is copied to our Exchange 2010 server. We configure this through the Exchange System Manager on the 2003 Server.
Let’s replicate the Offline Address Book and Schedule+ Free/Busy information first.
To do this:
- Open Exchange System Manager from the Exchange 2003 server.
- Expand Administrative Groups.
- Expand the name of your administrative group (most likely First Administrative Group).
- Expand Folders.
- Expand Public Folders.
- Right-click on Public Folders and select View System Folders from the context menu.
- Expand Offline Address Book.
- Right-click on the address book and select Properties from the context menu.
- Select the Replication tab.
- Click the Add button.
- Add the Exchange 2010 server.
- Change the Public folder replication interval drop-down to Always Run.
- Change the Replication Message Priority drop-down to Urgent.

- Click Apply and Ok.
- Repeat steps 8 through 14 for the remaining Address Books and Schedule+ Free/Busy Folders.
- Repeat steps 8 through 14 for your Public Folder content. To get back to the Public Folders, right-click the Public Folders node (step 6) and select View Public Folders from the context menu.

Replication can take a very long time. Changing the schedule and priority should help speed things along.
Step 9: Moving test users to Exchange 2010
While we are waiting for replication, let’s move a test user from Exchange 2003 to 2010.
Tip: If you don’t have a test user, create one real quick in Active Directory. Give it a mailbox on 2003. Confirm you can log in using OWA (mail.daleksofskaro.com will automatically redirect the user to the legacy 2003 login page). Send and receive a test message to initialize the mailbox.
To move a test user:
- Open the Exchange Management Console.
- Expand Microsoft Exchange On-Premises (server name).
- Expand Recipient Configuration.
- Select Mailbox.
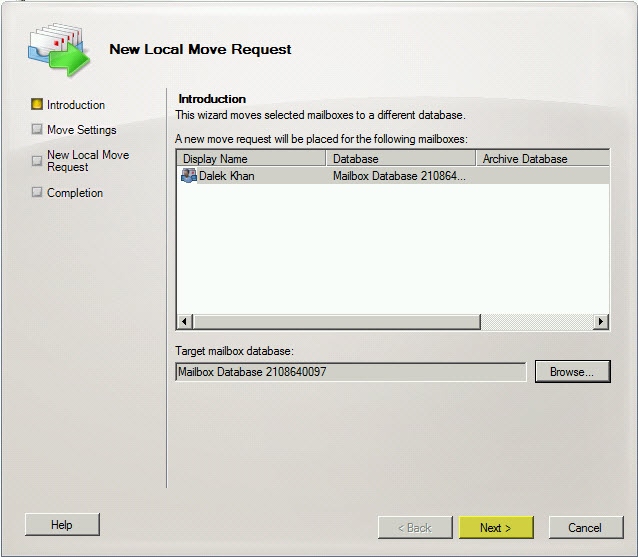
- In the right pane, find the test user we wish to move. Right-click the user and select New Local Move Request… from the context menu.
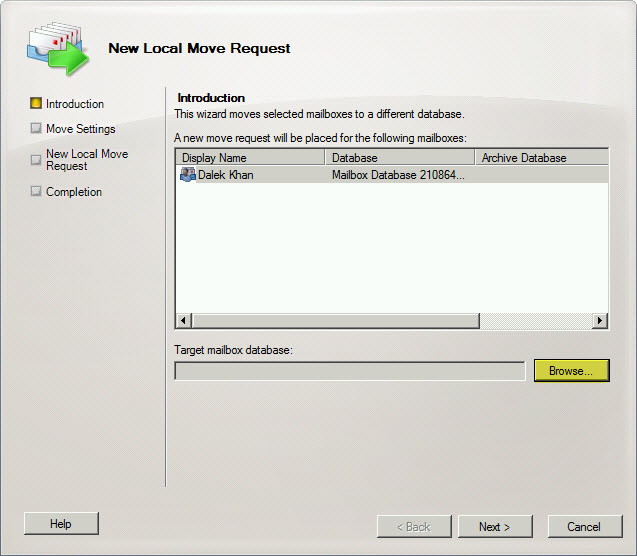
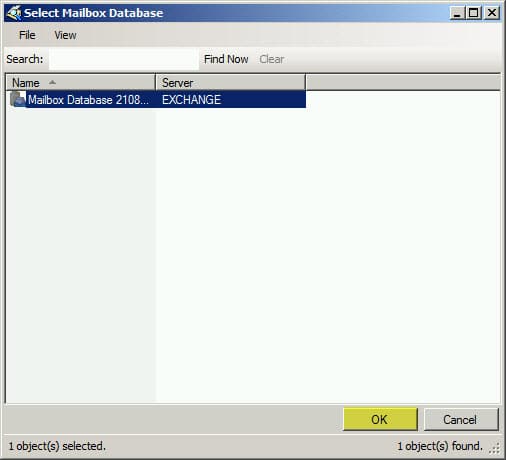
- From the New Local Move Request wizard, click the Browse button.

- Select a database on the Exchange 2010 server and click Ok.

- Click Next.

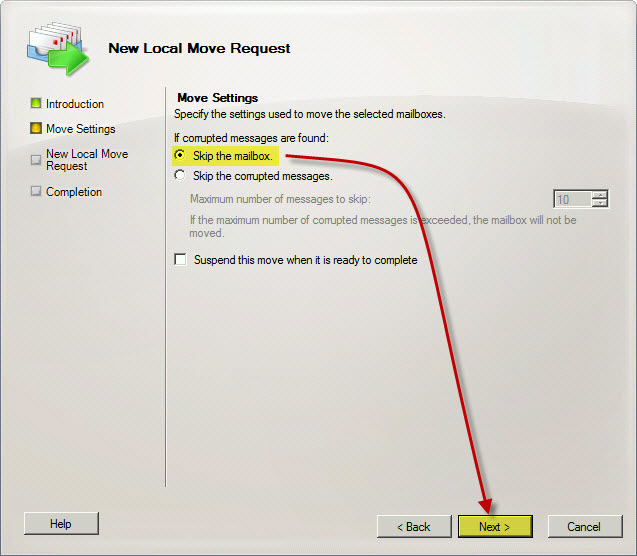
- Leave the default Skip the mailbox and click Next.

- Click New.

- Click Finish.

Problems?
If you have any errors during the Move Request the two most common causes are either corrupt messages or, insufficient permissions.
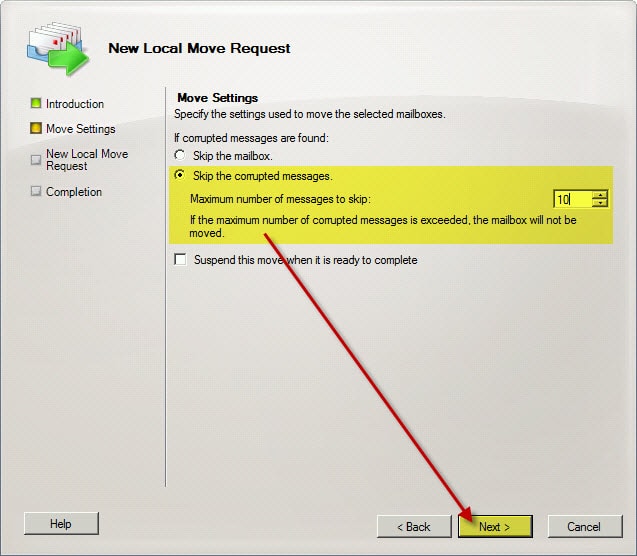
For the first problem, one option is to ignore corrupted items. Instead of setting to Skip Mailbox in Step 9, you can Skip the corrupted messages instead. Then specify a threshold of how many messages you will skip.
Be warned that this may result in data loss in that mailbox.
For the second problem, I have found two different causes and solutions:
Local Move Request from Exchange 2003 to 2010 fails with database offline
Moving Mailboxes from Exchange 2003 to 2010 fails with Access Denied
Now that we have a test user successfully moved, let’s make sure everything is working.
Log into webmail. In our example, this is https://mail.daleksofskaro.com/owa. Our test user should see a brand new OWA interface.
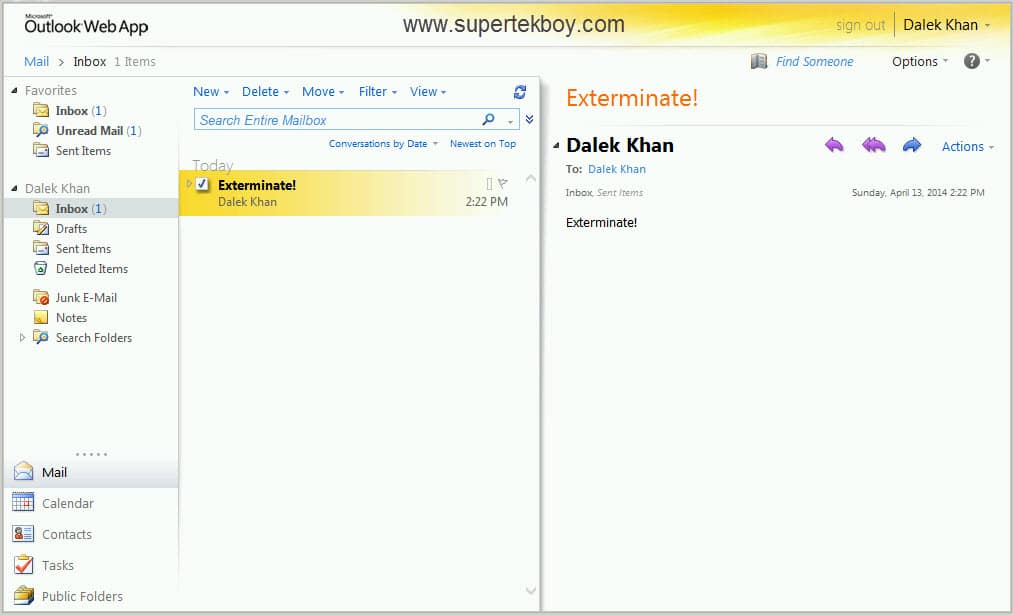
Let’s run a few tests.
From OWA, have the test user send a test message:
- To themselves.
- To a user on the Exchange 2003 server.
- To an external mailbox (Gmail, etc.).
And in return, send a test message:
- From a user on Exchange 2003 to our test user.
- From an external mailbox (Gmail, etc.) to our test user.
Did everything go through?
Great!
If not, let’s examine our Exchange environment a little more closely.
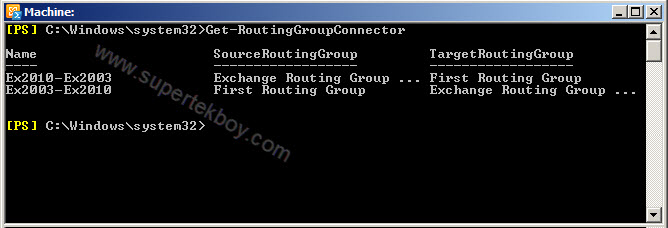
Right now everything is routing through the Exchange 2003 server. When SETUP ran it automatically created a routing group connector between 2003 and 2010.
To check, launch the Exchange Management Shell. Then issue the following command:
C:\> Get-RoutingGroupConnector
The output should look similar to this.
If all looks correct here, then review the message queues. If the problem was sending from the 2010 side then check the 2010 queues.
To do this:
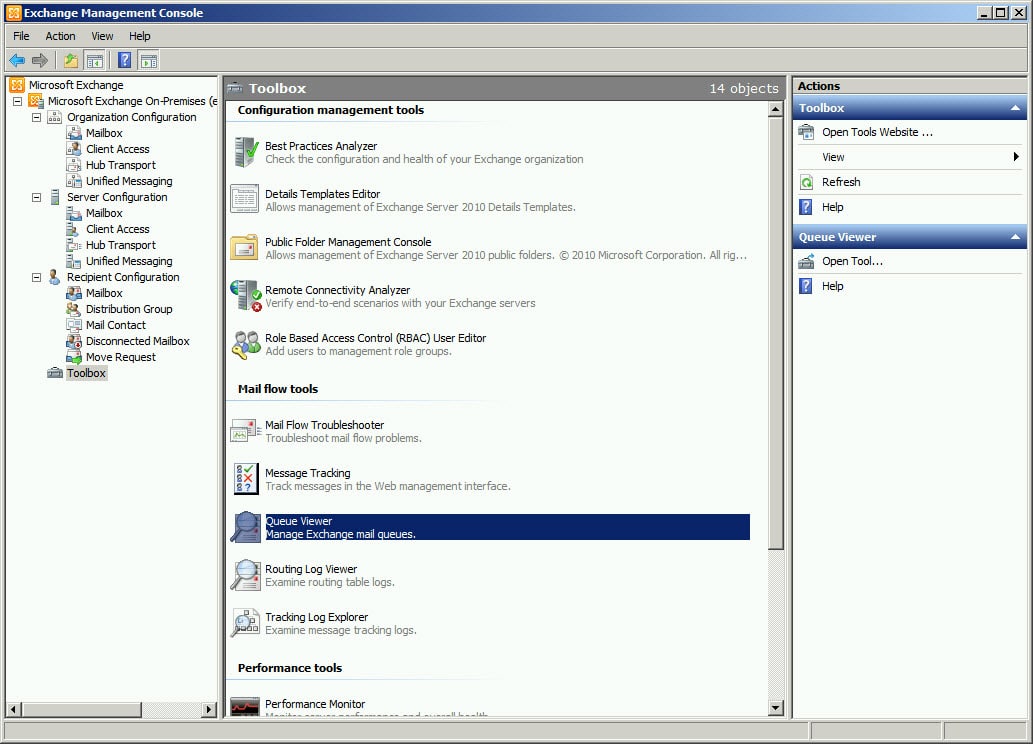
- Open the Exchange Management Console.
- Expand Microsoft Exchange On-Premises (server name).
- Select Toolbox.
- Under Mail Flow Tools, double-click Queue Viewer.

- Find the stuck message. Examine the error in the Last Error column. This error message is key to troubleshooting the problem.
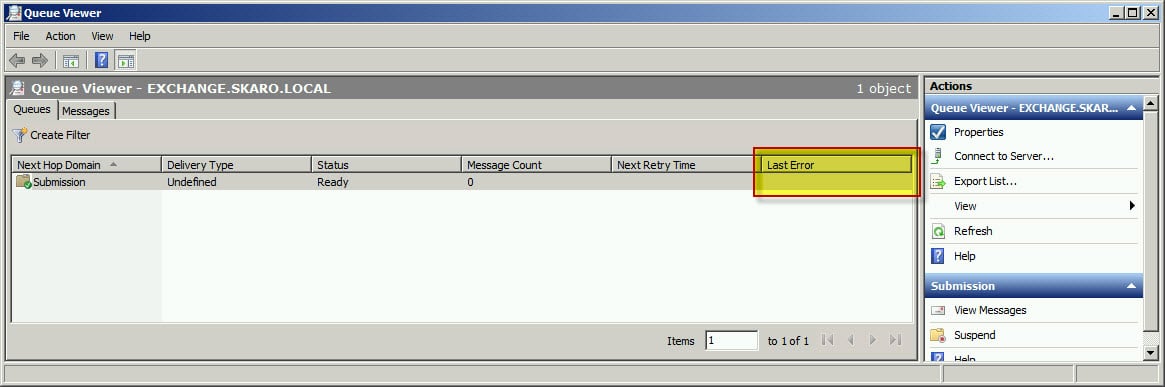
Tip: This article describes one possible error code and how to fix it.
451 5.7.3 Cannot achieve Exchange Server authentication
Step 10: Moving production users to Exchange 2010
Before we do this we need to take a step back.
Backups.
This supporting process is often overlooked during the planning stage for any type of migration. Not just Exchange.
You need to make sure your current backup technology supports Exchange 2010. And, if 2010 is just a quick stepping stone to 2013, then this is even more important.
I use Symantec Backup Exec to accomplish this.
Backup Exec 2012 fully supports Microsoft Exchange 2010.
Not only does it support the backing up and restoring of databases but, it also supports the granular recovery of individual mailbox items. These items are things like messages, calendar items, and contacts. Furthermore, you don’t need a recovery database to perform a restore. Restoring is just a few simple clicks.
Note: Backup Exec Media Server must be installed on a 64-bit operating system to back up Exchange 2010.
Restore. Restore. Restore.
You’d be surprised how many “successful” backups I have seen, that won’t actually restore. Just because your backup software indicates it succeeded, doesn’t necessarily mean it did.
The proof is in the pudding.
This is a great time to attempt a test restore. Not only could you attempt a test restore of the mailbox database but, you can also perform a test of individual items.
Everything restoring as it should?
Awesome!
Note: One other thing to check is antivirus. If you have an antivirus client on your Exchange Server make sure you exclude all the Exchange locations. This includes numerous locations. For a complete list check here: http://technet.microsoft.com/en-us/library/bb332342(v=exchg.150).aspx
Let’s move some users!

Now that we have everything backing up, let’s move a pilot group of users. This should just be a small percentage of your overall user base. For our 75 user environment, let’s move 7 or 8 users. That’s 10% of our base.
When you move users from 2003 their mailboxes will become unavailable. You will want to specify a maintenance window when your users are offline.
How long these take to move can depend on a lot of things. Such as; hardware, network congestion and the size of the mailbox.
If our pilot users are all under 1 GB then a single evening should suffice. If these users each have a 30 GB mailbox, you may wish to schedule this for a weekend.
To move these users, refer back to the procedure in Step 9: Moving test users to Exchange 2010.
The point of the pilot group is to determine if there are any problems before you move the bulk of your users.
Once you move your pilot users make sure:
- Their Outlook clients reconfigure automatically to the new server.
- They can send and receive mail.
- They can use Outlook outside of the office.
- They can use Outlook Web App.
- Any mobile devices still work.
- Any collaboration functions, such as calendar sharing (especially with users still on 2003)
Once you are comfortable that your pilot group is a success then you can schedule the rest of your user moves.
An easy way to keep track of who is on what server is to check the Recipient Type Details column. Any mailbox listed as Legacy Mailbox is still on the 2003 server. Any listed as User Mailbox is on the 2010 server.
Keep an eye on the free space on your log drive. Move requests will generate a lot of log files. These won’t be cleaned up until your next Exchange backup.
We got a lot covered in this article!
In our next article, we will cut mail flow over to the 2010 server. We will also take a look at Offline Address Books. Finally, we will decommission our 2003 server.

Gareth,
I got everything working nicely no problems sending or receiving mail from both servers. the test users migrated nicely. Only problem i have is the OOF. If the user is on exchange 2003 the OOF works and is received by the internal and external user. if the mailbox was migrated the OOF does not work externally but will work internally. I checked on the 2010 server that OOF is allowed externally and i checked that the auto reply and auto forward check boxes were selected in the remote domains of the hub transport. no errors or stuck messes in the queue viewer. I’m guessing the exchange 2003 server is dropping the message or is blocking the OOF. maybe the smart host rely to the internet is silently dropping the message. im not sure where else to look at this point. and the smart hosts is an open relay through my ISP. port 25 is blocked as of right now. i know this is old but i stopped the migration at this point to figure this out. might be a wast of time since exchange 2003 is going away and I’m working with he ISP to open port 25
Hello Gareth ,
We have a plan to decommission the Exchange on premises 2010 , we have 4 CAS and 4 MB server to be removed and we should retain 2 hybrid servers, All Mailbox has been migrated already to cloud , can you please give the procedure like auto discover , OAB and other stuffs has to move to hybrid servers. Step by step procedure and we have F5 for load balancing the CAS .
or Please suggest some information for the above
Hello Gareth ,
We have a plan to decommission the Exchange on premises 2010 , we have 4 CAS and 4 MB server to be removed and we should retain 2 hybrid servers, All Mailbox has been migrated already to cloud , can you please give the procedure like auto discover , OAB and other stuffs has to move to hybrid servers. Step by step procedure and we have F5 for load balancing the CAS .
Hi Gareth :), me again. This is a technical curiosity.
In my mail flow with internet I have a smart host (Symantec Messaging Gateway).
As per https://technet.microsoft.com/en-us/library/aa996395(v=exchg.141).aspx :
“Receive connectors represent a logical gateway through which all inbound messages are received.”
“However, to allow anonymous relay on this Receive connector, you must also grant the following permission to the Anonymous Logon security principal on the Receive connector:
•Ms-Exch-SMTP-Accept-Any-Recipient”
This step is also mandatory as per https://technet.microsoft.com/en-us/library/bb738161(v=exchg.141).aspx :
“Establish Internet mail flow between a Hub Transport server and an external SMTP gateway by using anonymous relay”
“4.For the Receive connector that you just modified, grant the relay permission to the Anonymous logon security principal by following these steps:
a.Open the Shell.
b.Run the following command using the name of the Receive connector that you created in step 2 and modified in step 3.
Get-ReceiveConnector “Receive Connector Name” | Add-ADPermission -User “NT AUTHORITY\ANONYMOUS LOGON” -ExtendedRights “Ms-Exch-SMTP-Accept-Any-Recipient”
”
Now, the receive connector that I create for accepting mails from the smart host has the checkbox “Anonymous users” checked that gives “NT Authority\Anonymous User” various permissions, one of which is “Ms-Exch-SMTP-Accept-Any-Sender” that is what I need to permit the smart host to forward emails from internet to my internal Exchange users. What is the reason why I would have to give the “NT Authority\Anonymous User” the “Ms-Exch-SMTP-Accept-Any-Recipient” permission for the purpose of receive inbound emails from my Smart Host since, if I well understood from what above, receive connectors are inbound connectors (internet -> Exchange). I don’t understand why Exchange would use it to send emails to recipients with domains not in the accepted domain policy.
Thank you,
Francesco B.
Hey Francesco,
That is strange. I haven’t followed this document before. But I can say I do everything up until step 3 and end there. Not sure why they are looking to accomplish in step 4. Maybe they assume your SMTP gateway is keeping you safe. Should be find to skip this.
Thaaank youuu Gareth 🙂
I also posted this question on TechNet in the Exchange 2010 forum but nobody answered in an exhaustive manner like you did.
From my tests on the receive connector that I created, in fact, just leaving checked Anonymous users checkbox in the connector properties, I was able using telnet to relay emails using any sender and, as expected behavior, only recipients in Accepted domains. This is what I want for inbound emails and you confirmed to me that it is the correct setup.
Thank you very much.
Francesco B.
PS: I would like to add your answer as the correct answer on my question on TechNet forum so it can be useful to other people looking for the same answer. If you want this is the address: https://social.technet.microsoft.com/Forums/office/en-US/c42bfc85-493d-4adf-b400-661a0d53dfd1/exchange-2003-to-2010-transition-smart-host-and-msexchsmtpacceptanyrecipient-permission?forum=exchange2010