One of the most frequent questions I receive concerns namespace design.
I covered this recently in an article geared towards Exchange 2010. However, it quickly became apparent I needed to revisit this topic specifically for Exchange 2013. Especially with the big GUI rewrite.
So, let’s get started!
What’s in a namespace
Namespace is very important.
Not only does namespace govern services like Outlook Web App, or, ActiveSync, but it also governs items such as the distribution of the Offline Address Book, or, the Autodiscover service.
A correct namespace design is key.
Out of the box, Exchange configures its internal URLs to match its internal hostname.
Due to recent restrictions, 3rd-party certificate providers can no longer put internal hostnames on certificates. This is actually a good thing! Otherwise, you are exposing the internal names of your servers to the internet.
However, if our certificate does not match our internal hostname it will give our users a security warning.
“So how do we combat this?”
Simple. In Exchange, we copy and paste our external URLs over our internal URLs. That way there is no certificate mismatch.
Then we use split-brain DNS to resolve those newly pasted addresses to the internal IP of our CAS server (or load balancer).
Split-brain keeps all the traffic on the local LAN. Without it, all local traffic would try to go out the firewall only to try and come back in later. Most firewalls will block this kind of behavior.
Reconfigure those URLs
Okay, let’s change those Internal URLs.
- Log into the Exchange Admin Center.
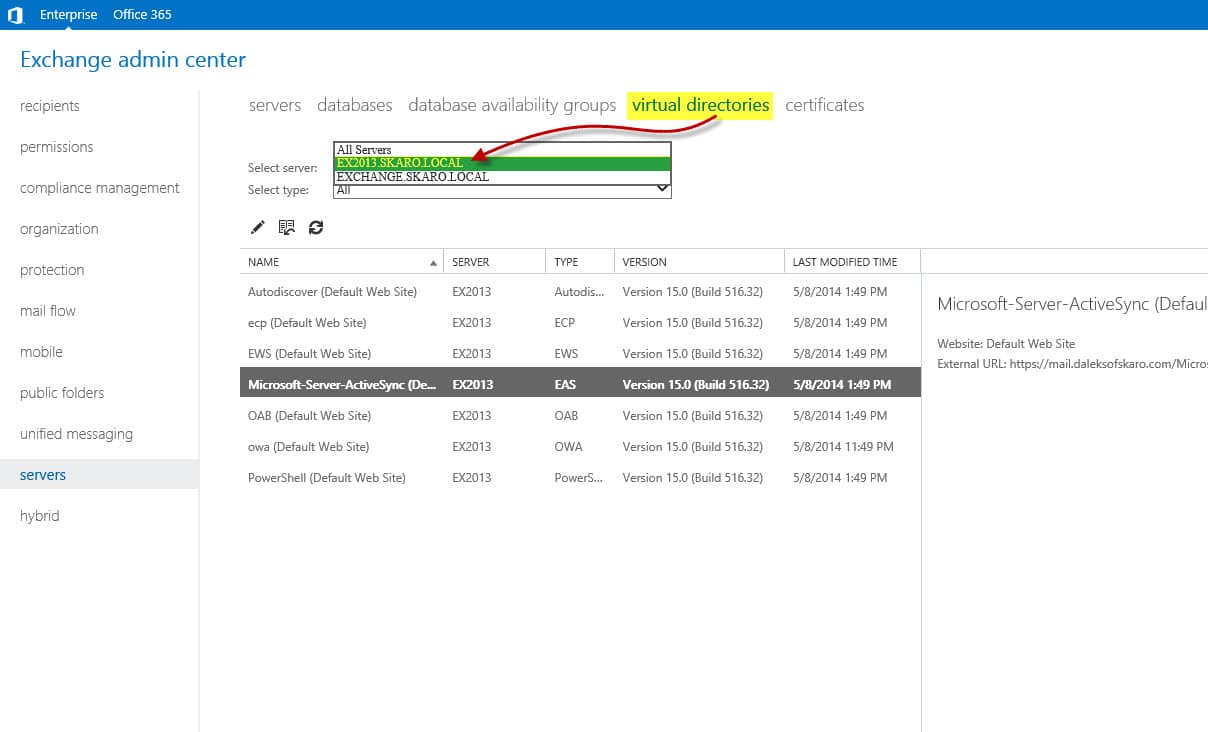
- Select the Servers tab.
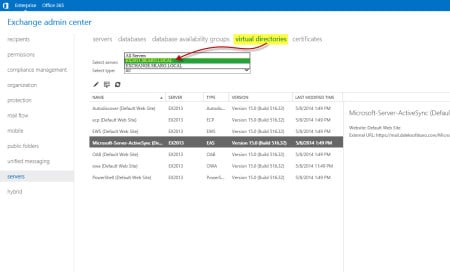
- Select the Virtual Directories tab.

- In the Select Server drop-down box, pick the server you wish to modify.
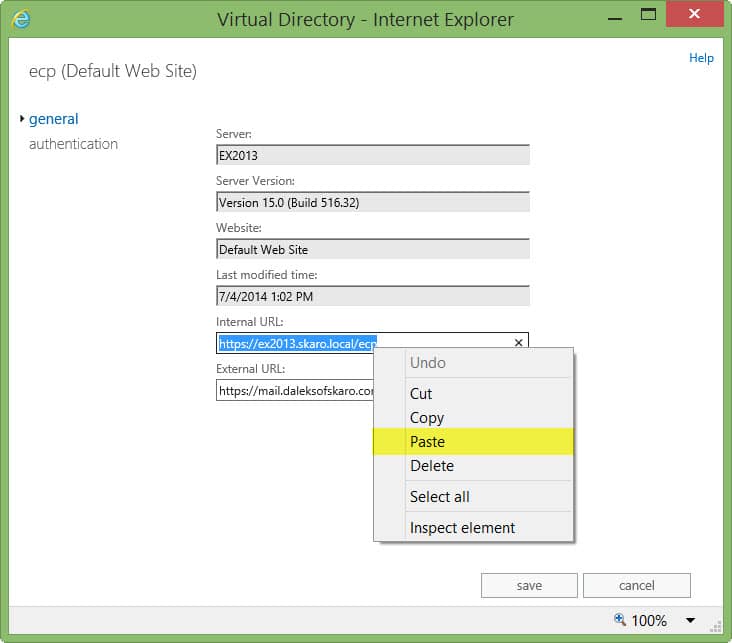
- Double-click to open the ECP (Default Web Site) properties.
- Copy the contents of the External URL and paste over the contents of the Internal URL.

- Click Save.
- Repeat steps 5 through 7 for:
- EWS (Default Web Site).
- Microsoft-Server-ActiveSync (Default Web Site).
- OAB (Default Web Site).
- OWA (Default Web Site).
- PowerShell (Default Web Site).

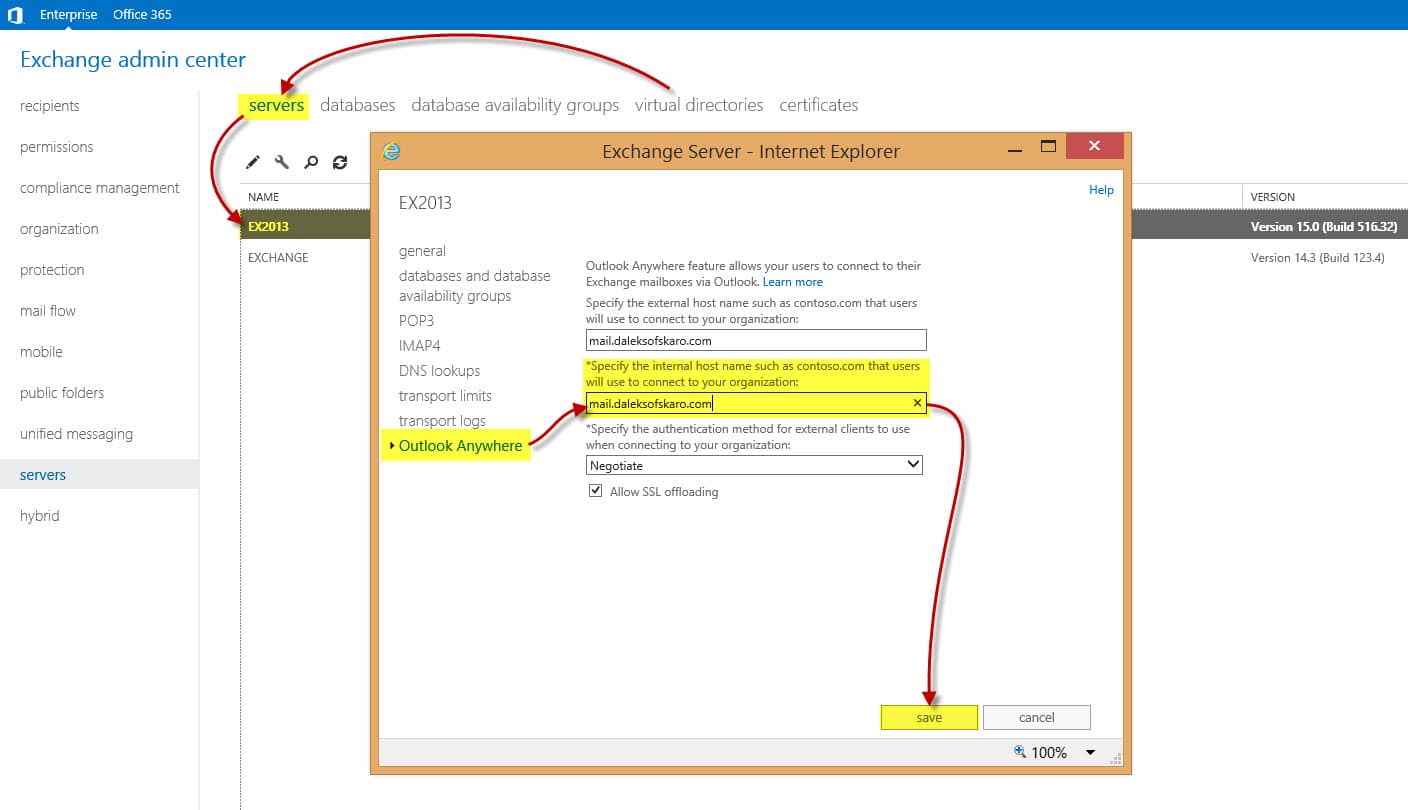
We also need to modify the Outlook Anywhere URLs.
- Select the Servers sub-tab.

- Double-click the server you wish to change.
- Select the Outlook Anywhere tab.
- Copy the contents of the External Host Name field and paste over the contents of the Internal Host Name field.
- Click Save.
We also need to make a change to one additional namespace; Autodiscover. This is not in the GUI. For this open the Exchange Management Shell and issue the following commands.
Note: Be sure to change EX2013 on this command to the hostname of your internal server.
C:\> Set-ClientAccessServer -Identity EX2013 –AutoDiscoverServiceInternalUri https://autodiscover.daleksofskaro.com/Autodiscover/Autodiscover.xml
To confirm this change.
C:\> Get-ClientAccessServer |fl identity,autodiscoverserviceinternaluri
Split-Brain DNS
Alright, let’s get our split-brain DNS configured next. Our DNS Servers will hold non-authoritative zones for our external namespace. This will only be used by our internal users.
- On your DNS server open DNS Manager.
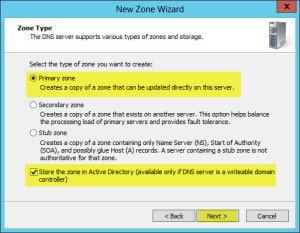
- Right-click on Forward Lookup Zone and select New Zone… from the context menu.

- Click Next.
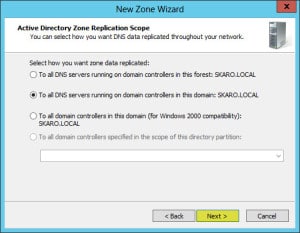
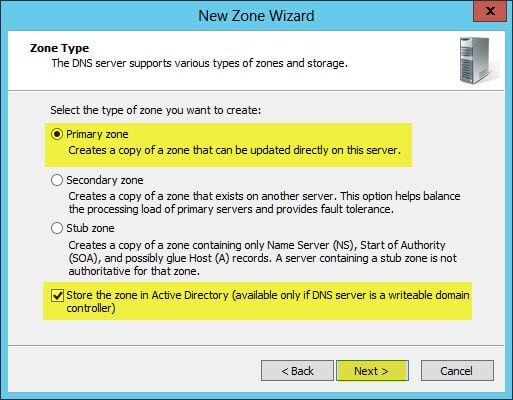
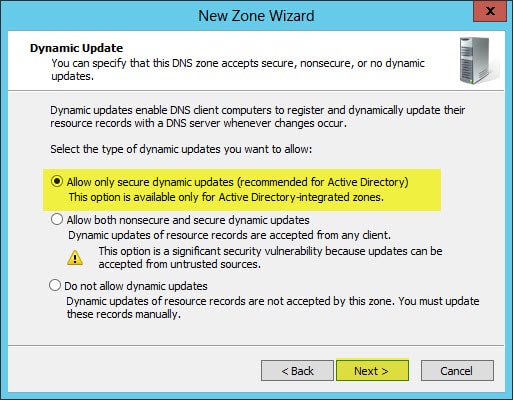
- Keep all the default settings. Click Next.
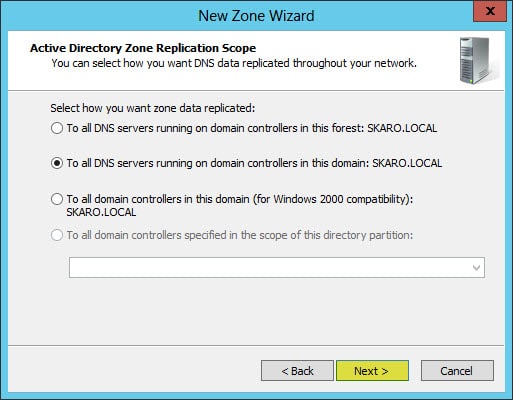
- Keep all the default settings. Click Next.
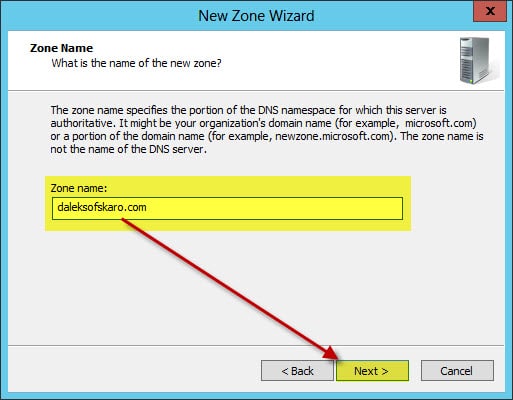
- In the Zone Name field enter your public domain name (in our example daleksofskaro.com).

- Keep all the default settings. Click Next.
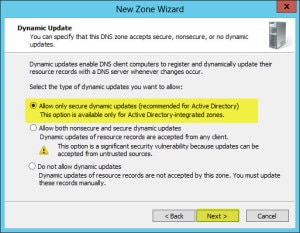
- Click Finish.
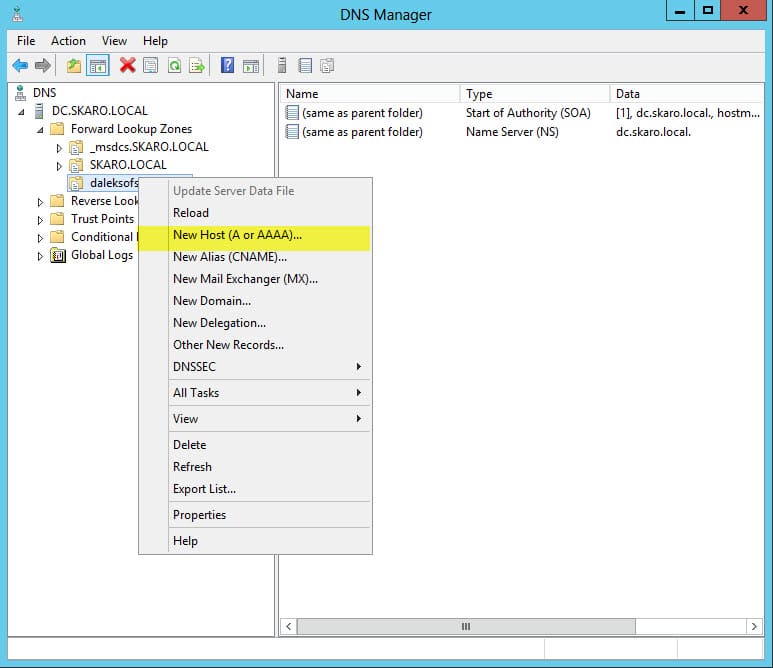
- Expand Forward Lookup Zones.
- In the left pane, right-click on daleksofskaro.com zone and select New Host (A or AAAA) from the context menu.
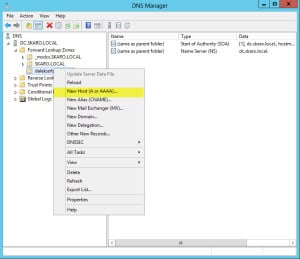
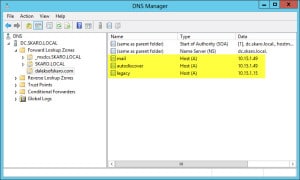
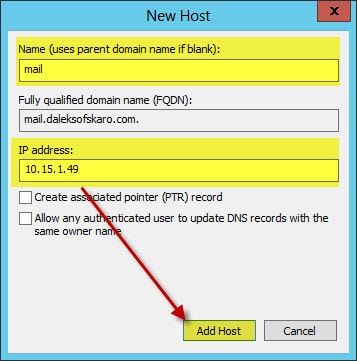
- In the Name field type the first name on your certificate. In the IP address field type the internal IP of your Client Access Server. (In our example it is 10.15.1.49).
- Click Add Host

- Repeat Steps 10-12 for all other names on your certificate.
- The end result should look similar to this.


Note: You will also need to repeat Steps 10-12 for any resources you have on the Internet. For example, if your website is www.daleksofskaro.com, you will need to create a www host A record and point it to the public IP address of your hosting provider.
Certificate Requirements
Now let’s get our certificate generated for our new namespace.
Like its predecessor, Exchange 2013 maintains the Certificate Request Wizard. Unlike, 2010, I believe this wizard has been greatly simplified.
This wizard takes all the guesswork out of what kind of certificate you will need to purchase.
Let’s get started.
- Open the Exchange Admin Center.
- Select the Servers tab.
- Select the Certificates tab.
- Click the + (New) button.

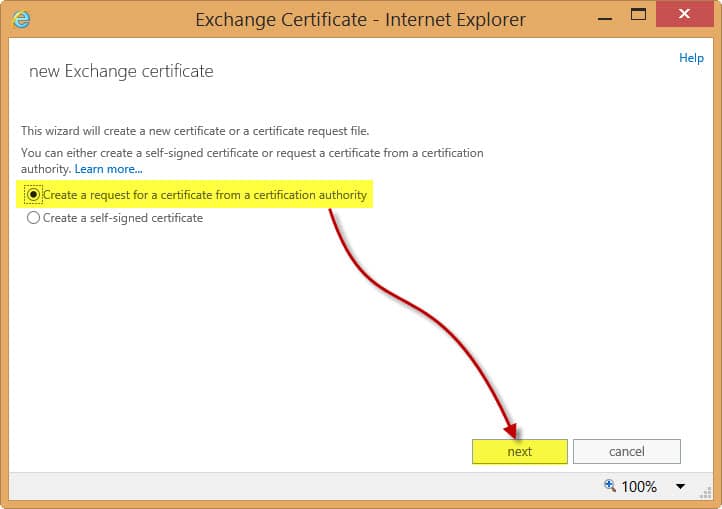
- In the New Exchange Certificate wizard select Create a request for a certificate from a certification authority. Click Next.

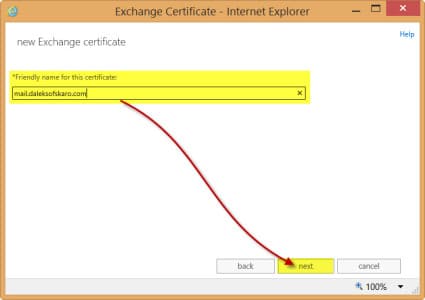
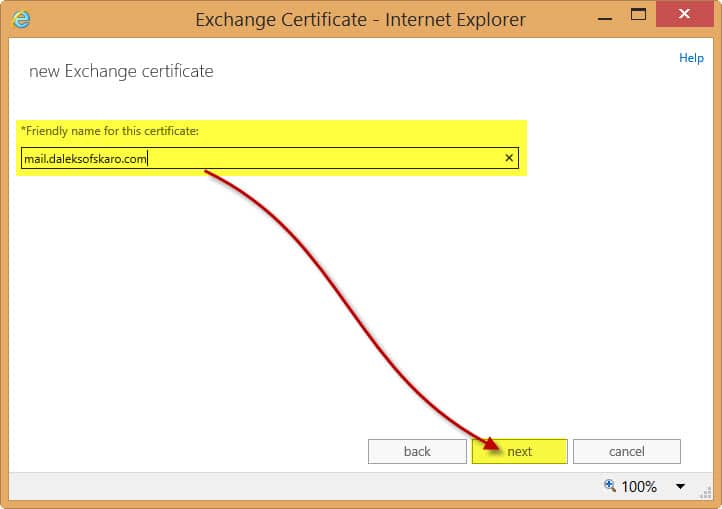
- In the Enter a friendly name field, enter your certificate name. In our example, we made this mail.daleksofskaro.com. Click Next.
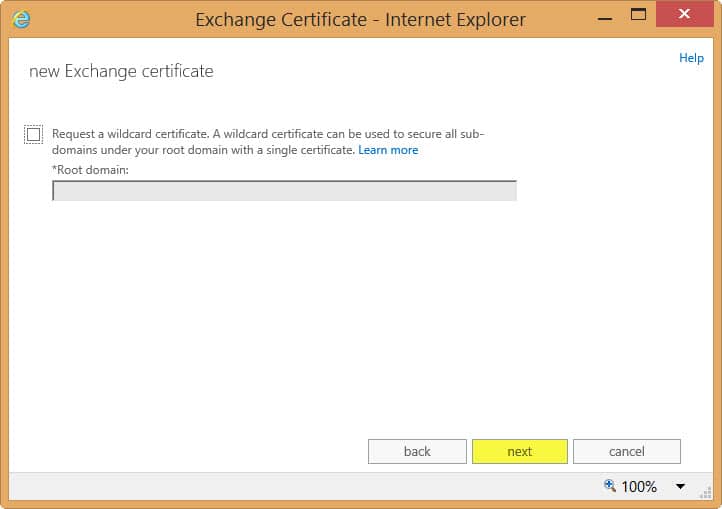
- Do NOT check wildcard. Leave this unchecked. Click Next.

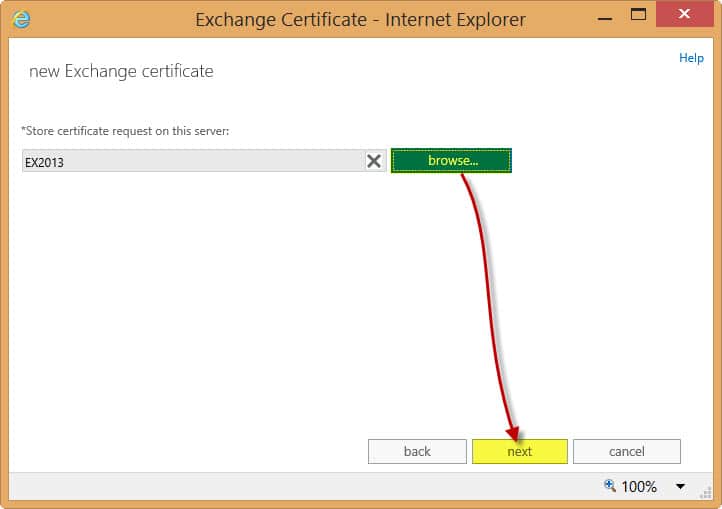
- Click Browse.
- Select the server you wish to store this request on. Click Ok.
- Click Next.

- The next screen allows you to manually change any domain names you want on your certificate. I normally skip past this and make my edits on the next screen. Click Next.

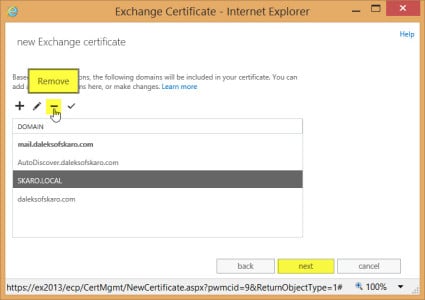
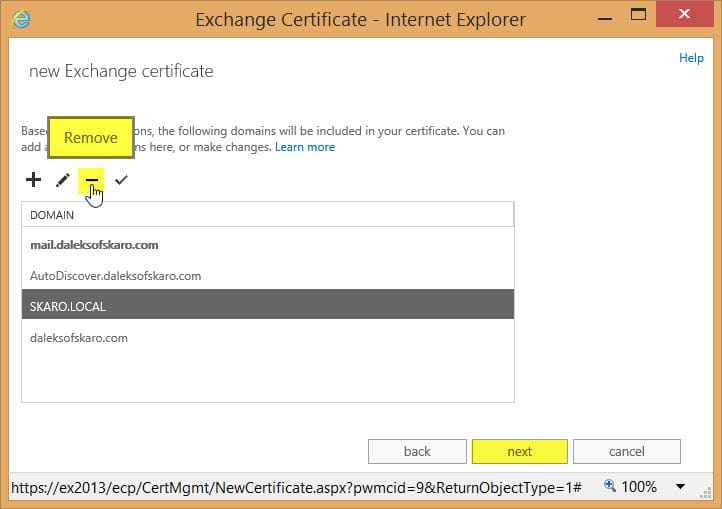
- Select the Add, Edit or Remove buttons to make any final tweaks to the names you require on your Exchange certificate. With our previous modifications of all the Internal URLs, this should be minimal. In our example, we had to remove the root local domain. You can also confirm which name is Set as the common name. (In our example this is mail.daleksofskaro.com.)
- When done, click Next.
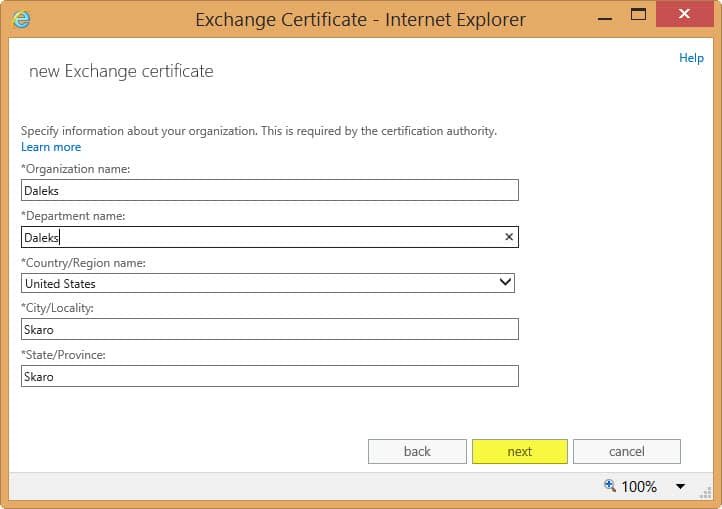
- Complete all organization information. Click Next.

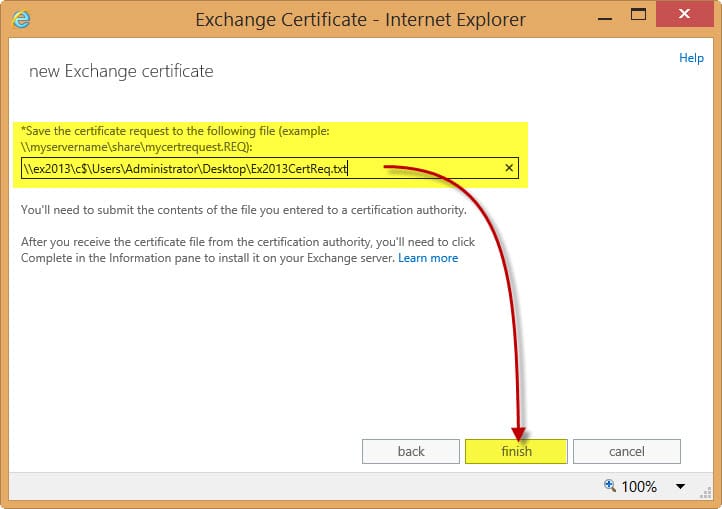
- Specify a UNC path to where you want to save the certificate request file. In our example, we saved this to our desktop.

- Click Finish.


This should have created a certificate request file on your desktop. Open this file with Notepad and copy the entire contents, including the BEGIN and END lines.

Now you will need to purchase a UC / SAN certificate from a 3rd party source. There are many out there. I highly recommend Digicert.com (affiliate). Once the certificate has been processed and you have downloaded and unpacked your cert file we need to complete the certificate request.
- While still on the Certificates tab, select your pending certificate request and click the Complete link from the action pane.

- In the Complete Request window, type the UNC path to the location of the unpacked Digicert (affiliate) certificate.
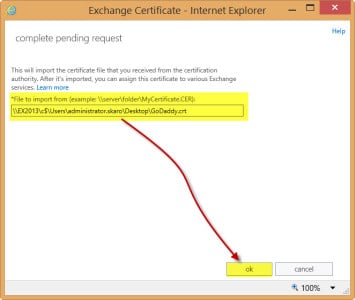
- Click Ok.
- Once the task completes the certificate will be listed as Valid in both the Status column and in the Status section in the action pane.


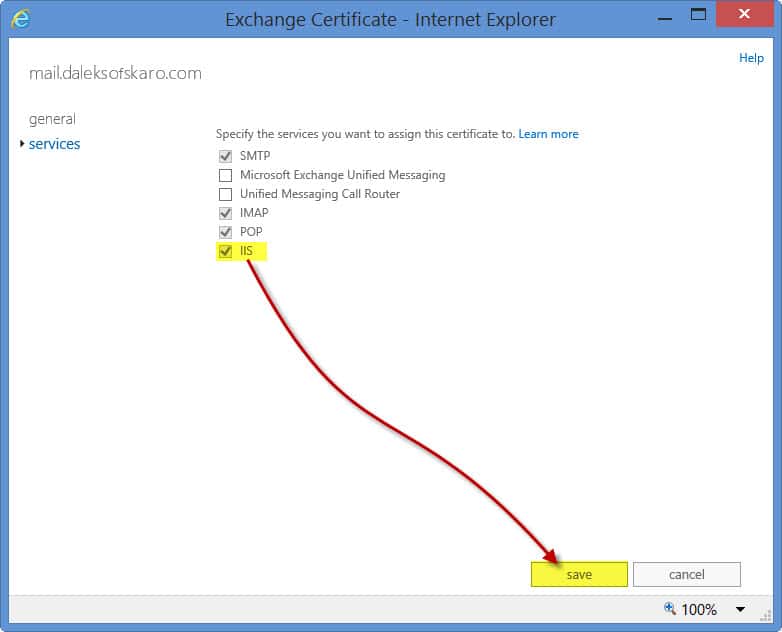
Exchange Web Services are still assigned to your old certificate. Let’s get these switched over to the new certificate.
- While still on the Certificates tab, select your newly added certificate and click the Edit button.
- Select the Services tab.
- Select IIS (and any additional services you need).
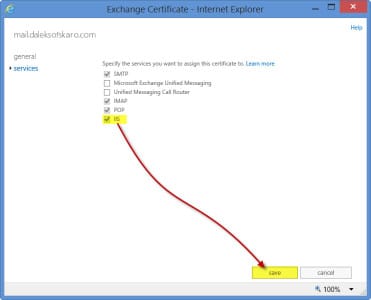
- Click Save.
Now that we have our new certificate installed, we need to test to make sure it is working properly.
The easiest way to check is to enter your external URL (https://mail.daleksofskaro.com/owa) into a web browser.
Test from both an internal and an external source.
Make sure there are no certificate errors.
Note: I recommend testing with the Microsoft Remote Connectivity Analyzer. https://testconnectivity.microsoft.com/
Test results all good? Then you are all done!
Did this post help you? Let us know how we are doing by leaving us a comment. Your feedback is always important to us!

Hello mates, pleasant piece of writing and nice urging commented
at this place, I am actually enjoying by these.
Hey Gareth, is there somewhere on your site a guide for Ex2010 -> Ex2013 transitioning with coexistence? Or do you know a good guide like the fantastique one about 2003 -> 2010 transitioning?
Thank you,
Francesco B.
Good Job
I am trying to set up two servers: A W2012 SRV: AD-DNS-DHCP and SRV: Exchange 2013 and IIS on W2012.
I applied your method, I must do what is necessary to GoDaddy because too many mistakes certificates. I think it will be the resolution of my problem both internally and externally (Outlook 2013, Webapp, ActiveSync, Outlook Anywhere)
In your internal DNS zone you have an A record legacy. What does he?
Last question: When removing your SKARO.LOCAL, you keep still and the autodiscover.daleksofskaro.com daleksofskaro.com in your certificate requests? From my side I just name FQCN without .local.
From my SRV B integrated field?
Thank you for your answer,
PS: Sorry for my English better than average.
Hi, naabot.
Sorry about the delay.
Disregard the A record for “legacy”. I had reused that screenshot from an article on Exchange 2010 coexistence with Exchange 2003. I need to change that screenshot. Thanks for alerting me to it!
With regard to your last question, there are a couple of ways you can handle autodiscover. You can have an A record in your external DNS. Or you can have an SRV record. Most DNS providers support SRV records these days so that is no longer an issue. I generally still use the A record method as my preferred method.
Whatever method you choose for autodiscover, you need to make sure you won’t get a certificate error. So, I have autodiscover.daleksofskaro.com on my certificate, as well as daleksofskaro.com.
Whether you remove the invalid .local addresses, or, simply edit them to make them .com is up to you.
Hope this helps.
hello,
No problem for your late reply. I got my certificate for my different domain, my Exchange 2013 server is running for 3 months without a problem. My first exchange server !!!! Sourvenir big and huge experience for me.
Thank you for you, great blogs
Great to hear you are up and running! Be sure to share my article with colleagues.