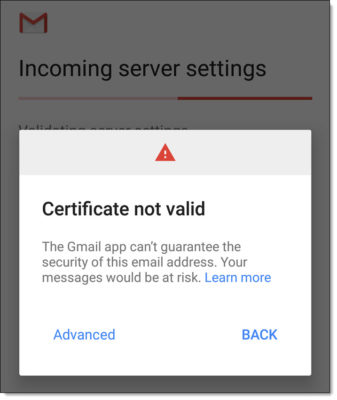
Ran into an issue recently where Outlook was working fine, however, Android devices, particularly mobile phones, would throw an error that the certificate was invalid when configuring an Exchange mailbox via the Gmail app. The error was:
Certificate not valid

The Gmail app can't guarantee the security of this email address. Your messages would be at risk.
When clicking Advanced, we received more clarification that the certificate was not trusted. However, we could quickly see that the correct certificate was being presented to the Android devices, and it clearly wasn’t an issue with the date.
Certificate not trusted

Contact your email provider about this error, or proceed with username (unsafe).

We then tested our certificate with DigiCert’s SSL Certificate Checker. This is a great tool to confirm that the certificate is installed correctly and that the certificate path is valid. You can check any certificate with this tool. It does not have to be a certificate issued by DigiCert. In our case, we were testing our GoDaddy certificate with this tool.
We quickly found there was an issue with a missing intermediary certificate. It is typically required that when a certificate does not have a direct path to the root certificate authority that you must also install the certificates of any intermediary authorities to complete the certificate chain. In our case, we needed to install the missing GoDaddy intermediary certificate.
When you download your certificate, most certificate providers bundle the intermediary certificates in the same zip file. However, most providers also publish a repository of all their intermediate certificates. You can find GoDaddy’s repository here.

DigiCert’s diagnostic tool gave us some good advice (and support articles) on common locations that intermediary certificates needed to be installed. However, in our case, we were publishing Exchange through a Kemp Load Balancer, so we knew this was the best place to start.
Adding intermediary certificates to a load balancer
Note: This article provides the steps for a Kemp LoadMaster. However, the same principles apply to all load balancers. Need a free load balancer, check out https://freeloadbalancer.com (affiliate).
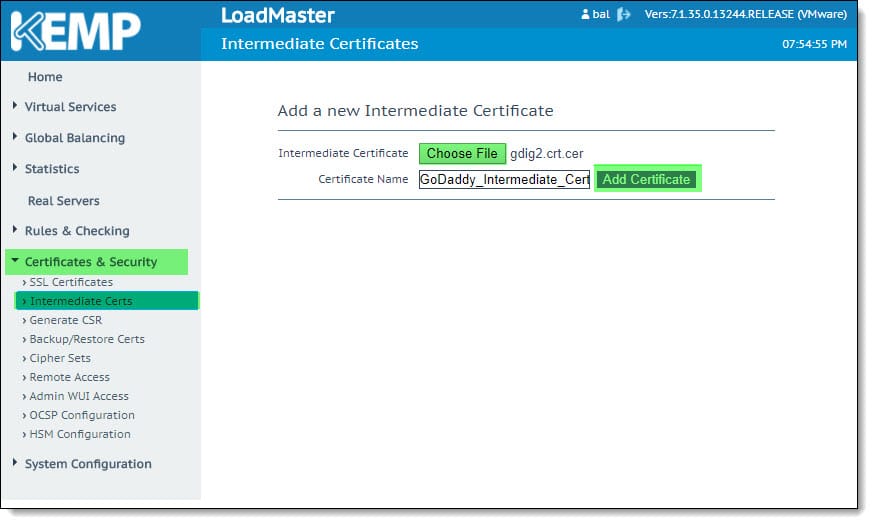
To check the presence of intermediary certificates on a Kemp load balancer, log onto the Kemp and navigate to Certificates & Security > Intermediate Certs. This screen will display any certificates currently installed on your Kemp load balancer. If no intermediary certificates are installed, you will only see the option to Add A New Intermediate Certificate.
In that case, click Choose File and select the intermediate certificate. In the Certificate Name field, supply a name for the intermediate certificate. This name can not contain spaces. But you can use characters such as underscores or hyphens. Click the Add Certificate button.
You will receive a popup that the certificate successfully installed. Click Ok. At this point, the certificate will now be displayed on the same page where you can add additional intermediate certificates. This table can populate over time to show multiple intermediate certs.

Adding intermediary certificates to IIS
If you have a single Exchange server in your environment, then the chances are you need to install the intermediate certificate on the Exchange server itself. You do this with the Certificates MMC snap-in. To do this:
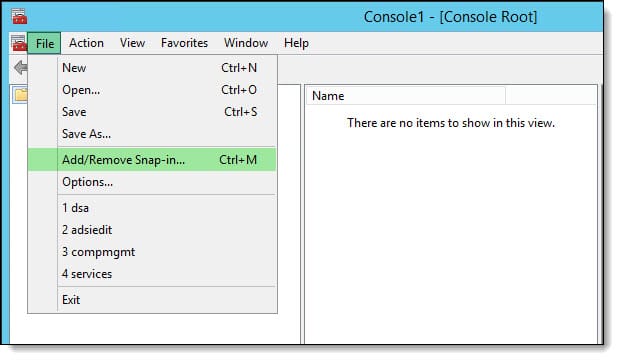
Click Start and type MMC. From the search results, select MMC to open the Microsoft Management Console.
From the MMC console, select the File menu followed by Add/Remove Snapin.
Select Certificates and click Add. From the wizard, select Computer account > Local computer > Finish. Click Ok.

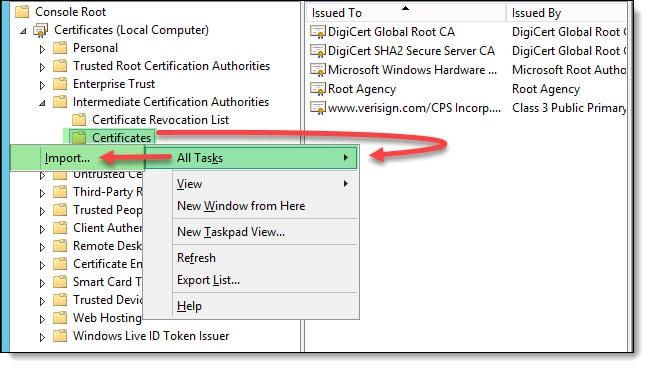
Back on the console, expand Certificates (Local Computer) > Intermediate Certification Authorities. Right-click on Certificates and select All Tasks > Import from the context menu.
On the Welcome page, click Next.
On the File to Import page, click the Browse button and select your intermediate certificate. Click Open. Click Next.
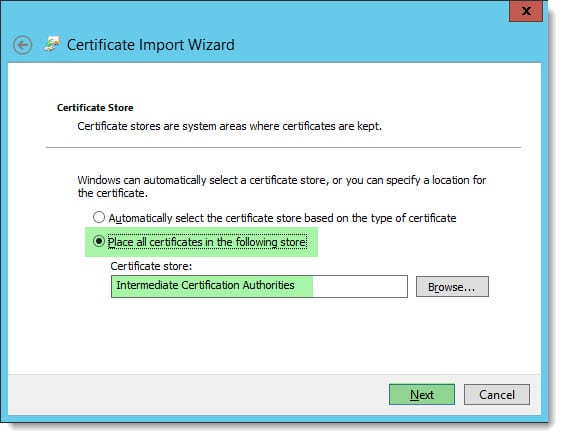
On the Certificate Store page, keep the default settings of Place all certificates in the following store and Intermediate Certification Authorities. This will place the intermediate certificate under the correct node. Click Next.
Click Finish. You will receive a prompt that the import was successful. Click Ok to dismiss the notification.
The certificate will then appear under Certificates (Local Computer) > Intermediate Certification Authorities > Certificates.
Checking your work
At this point, you can retest the certificate installation with DigiCert’s SSL Certificate Checker. In the results, you should now see a chain that includes the intermediate certificate you just installed.

Once we received this validation from the SSL checker, we then retested our Android devices and were able to add an Exchange mailbox without any further errors.

We would love to hear from you. Have you seen any of these errors before? What did you do to fix it? Drop a comment below or come join the conversation on Twitter @SuperTekBoy.

Gmail client certificate.
Certificate not valid