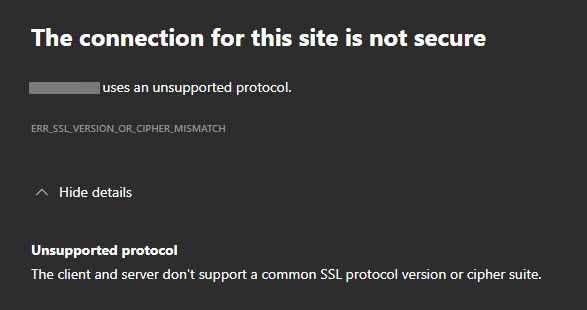
When trying to activate (or sign in to) Microsoft Office with your Office 365 enterprise credentials, you may receive the following error.
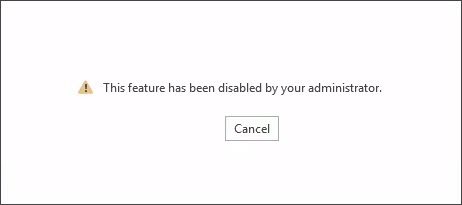
This feature has been disabled by your administrator.
This error is likely a result of a group policy.
To check this, open Group Policy Management Console (GPMC). From the GPMC, expand your domain name (e.g., skaro.local) and Group Policy Objects.
Select your policy that is managing the Office suite and click the Settings tab. Expand User Configuration (Enabled) > Policies > Administrative Templates > Microsoft Office 2016 > Miscellaneous. If you see a setting named Block signing into Office that is Enabled, this is the culprit.

Note: If you do not see this setting, I recommend checking all group policies currently applied to the impacted user. You can get this by running GPRESULT from a command prompt on your impacted user’s computer.
[Read more…] about Office Activation fails ‘This feature has been disabled by your administrator.’