How to renew a certificate in Exchange
This article explores renewing a third-party certificate in Exchange 2016 CU23 and greater and Exchange 2019 CU12 and greater. This process differs from the older cumulative updates (and Exchange 2013), where renewing a third-party certificate through the Exchange Admin Center (GUI) was still possible.
If you are still on Exchange 2013 or older versions of Exchange 2016 or Exchange 2019, consider using this article instead for the Exchange Admin Center method.
Note: Using the Exchange Admin Center to generate and renew self-signed certificates is still possible. Self-signed certificates are out of the scope of this article.
This article demonstrates how to accomplish this using the PowerShell commands. The high-level steps include:
- Create a new certificate signing request
- Upload the certificate signing request to your certificate provider
- Download the processed certificate from your certificate provider
- Install the certificate on Exchange
- Assign Exchange services to the new certificate on each server
- Delete the old certificate
- Export the new certificate to a PFX file
- Import the certificate to all other Exchange servers
Let’s get started!
Renew a Certificate with PowerShell
As mentioned earlier, newer versions of Exchange 2016 and Exchange 2019 require that third-party certificate requests be conducted through PowerShell. Third-party certificate requests can no longer be requested or renewed through the Exchange Admin Center.
To start, launch the Exchange Management Shell (either from the Exchange Server or a workstation that has the Exchange Management Tools installed).
First, we need to find the thumbprint of the certificate we plan to renew. To do this, we can run the Get-ExchangeCertificate command and filter the responses to only certificates that are issued by a third-party certificate authority.
C:\> Get-ExchangeCertificate | Where {$_.IsSelfSigned -eq $false} | Format-List FriendlyName, CertificateDomains, Thumbprint, NotAfterThis will return all certificates that are not self-signed. In our example, we see just a single certificate returned. This certificate is named mail.exchangeservergeek.com and has a corresponding thumbprint. This is the certificate we will be renewing.
FriendlyName : mail.exchangeservergeek.com
CertificateDomains : {mail.exchangeservergeek.com, autodiscover.exchangeservergeek.com}
Thumbprint : B26C3C9B30A2A7371767275043816466CB921738
NotAfter : 7/15/2023 12:00:00 AM
Now that we have the thumbprint, let’s renew the certificate. To do this, we will pipe the thumbprint using the Get-ExchangeCertificate command into the New-ExchangeCertificate command. We will then save the output of New-ExchangeCertificate into a variable named $certrequest.
C:\> $certrequest = Get-ExchangeCertificate -Thumbprint B26C3C9B30A2A7371767275043816466CB921738 | New-ExchangeCertificate -GenerateRequest -PrivateKeyExportable:$trueThe example above leverages the following parameters:
- Thumbprint identifies the certificate we plan to renew.
- GenerateRequest is used to generate a certificate request for a third-party certificate authority. Without this parameter, you would generate a self-signed certificate issued by the Exchange Server.
- PrivateKeyExportable allows you to copy this certificate to other Exchange Servers. If you have multiple Exchange Servers, you need this parameter set to $true. If you omit this parameter (or set it to $false), you can only use this certificate on the Exchange Server that generated the certificate request.
Now that we have the Exchange certificate stored in a variable, we need to get that variable saved into a file. To do that, run the following command.
C:\> [System.IO.File]::WriteAllBytes('\\EX19-01\C$\Users\<user>\Desktop\certrequest.txt', [System.Text.Encoding]::Unicode.GetBytes($certrequest))In this command, two things are important. First, you must specify a UNC path to where you want to save the certificate request file. In our example, we saved this to our desktop as a text file named certrequest.txt. The second is what we are exporting into that file. In this case, it is the contents of the variable $certrequest. When you run this command, the file will be created in the specified location.
By running the following command, you will notice we have two certificates with the name mail.exchangeservergeek.com; however, one of these will be in a Pending Request state. The duplicate minimizes downtime for your users because it allows you to process the certificate renewal without affecting the existing certificate.
 C:\> Get-ExchangeCertificate | Format-Table Subject, Status

Subject                                                 Status
-------                                                 ------
CN=mail.exchangeservergeek.com                  PendingRequest
CN=mail.exchangeservergeek.com                           Valid
CN=EX19-01                                               Valid
CN=Microsoft Exchange Server Auth Certificate            Valid
CN=WMSvc-SHA2-EX19-01                                    Valid
Processing a certificate request
Before we can use our certificate, we must process this request through a third-party certificate provider. There are plenty out there, but I recommend DigiCert (affiliate). Not only do they have fantastic technical support, but they also have some really neat certificate tools. Best of all, their certificate turnaround time is incredibly fast (even on a Sunday at 7:42 pm–yep, personal experience right there.).
The specific steps for each certificate provider are different, but the principles remain the same. You provide a certificate request. The provider validates your identity. The provider then issues you a certificate.
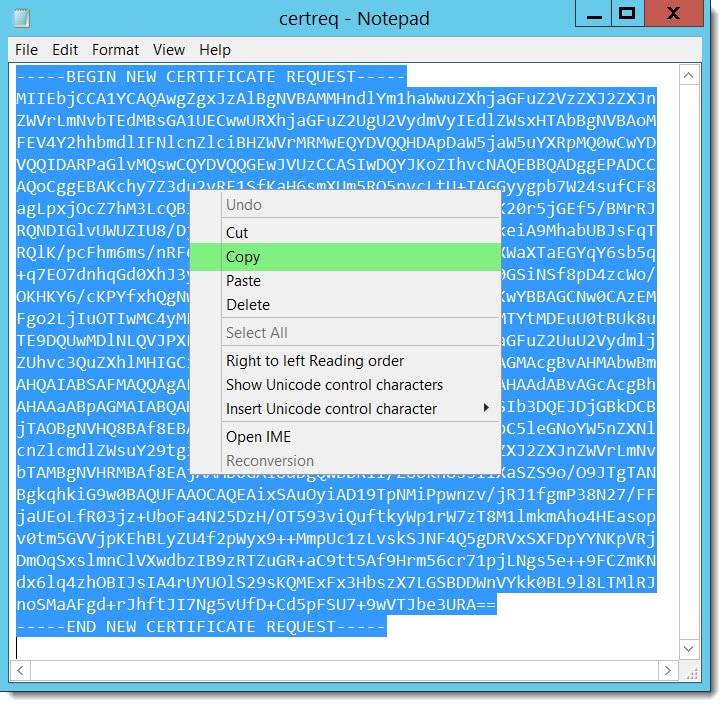
First, we need to get the certificate request we created in the previous section. This should have created a file on your desktop (or the path you specified). Open this file with Notepad and copy the entire contents, including the BEGIN and END lines.
Next, we need a Unified Communications (UC) certificate. This is also called a Subject Alternative Name (SAN) certificate. As mentioned above, I recommend DigiCert (affiliate).
At some point, the 3rd party certificate authority will ask you to paste the contents of the CSR file into their system for processing. From this file, the provider will identify all the subject and alternate names you need. Using our previous example, the certificate provider identified we requested both mail.exchangeservergeek.com and autodiscover.exchangeservergeek.com. The validation process will then begin.
Note: Some certificate providers allow you to prepay for several years in advance but will only issue a certificate for a single year. In those instances, you may need to rekey the existing certificate and then provide the CSR to the provider.
The validation process can vary between providers as well. Some providers will perform a simple domain validation where they send an email to the recipients listed on your domain registration. Others will perform more extensive checks, including validating your business against various agencies.
Once your identity has been validated and your certificate approved, download and unpack your certificate. Often providers will ask you what system the certificate is for. If you have the option for Exchange, this will give you the appropriate certificate bundle. You will then be ready to complete your certificate request.
Complete the certificate renewal with PowerShell
To complete our pending certificate, we need to leverage the Import-ExchangeCertificate command. In our example below, the Import-ExchangeCertificate command leverages the following parameters.
C:\> Import-ExchangeCertificate -FriendlyName mail.exchangeservergeek.com -FileData ([System.IO.File]::ReadAllBytes('\\EX19-01\C$\Users\<user>\Desktop\mail_exchangeservergeek_com.cer')) -PrivateKeyExportable $true- FriendlyName is purely for display. It identifies how you want the certificate to appear in the Exchange Admin Center and PowerShell. It is beneficial to put something descriptive in this field. If you omit this field, Exchange names the certificate “Microsoft Exchange”. In our example above, we made the friendly name the same as the subject name.
- FileData is the UNC path to the certificate we downloaded from the certificate authority. In our example, we saved the file mail_exchangeservergeek_com.cer to our desktop for easy access.
- PrivateKeyExportable allows you to copy this certificate to other Exchange Servers. If you have multiple Exchange Server, you need this parameter set to $true. If you omit this parameter (or set it to $false), you can only use this certificate on the Exchange Server that generated the certificate request.
Assign Services to a Certificate with PowerShell
To assign services using PowerShell, we will need to capture the thumbprint of our new certificate. To do this, we will need to first run the Get-ExchangeCertficate command.
 C:\> Get-ExchangeCertificate | Format-Table Subject, Thumbprint, NotAfter

Subject                          Thumbprint                               NotAfter
-------                          ----------                               --------
CN=mail.exchangeservergeek.com   BD09E758DF572307128D878697D3A766BDBEBF35 7/15/2024
CN=mail.exchangeservergeek.com   B26C3C9B30A2A7371767275043816466CB921738 7/15/2023
CN=EX19-01                       C232F4D642F74B9DC7E4ED33D4AB56E68C10CA76 1/1/2028
CN=Microsoft Exchange Server...  411A27BA64FD140523E4D1CF088589C228CA9C5E 12/4/2027
CN=WMSvc-SHA2-EX19-01            D894B092E2ABE925E7104A0C9DFF6C448182CA30 12/27/2032
You will notice we have a duplicate of the certificate. The one with the later expiration date (NotAfter column) is your new certificate. In our example above, the thumbprint highlighted in green, with the NotAfter date of 7/15/2024, is our new certificate. The thumbprint highlighted in blue, with the NotAfter date of 7/15/2023, is our current certificate that users are still leveraging.
This new certificate is not yet live. To make it live, we must assign services to the certificate. To do this, we run the following command. Be sure to use the new thumbprint.
Note: When you assign services to a certificate, it will impact current connections to Exchange. For example, assigning IIS to a certificate can cause Outlook clients to reconnect. You may wish to perform this action during a maintenance window or after hours.
C:\> Enable-ExchangeCertificate -Server EX19-01 –Thumbprint BD09E758DF572307128D878697D3A766BDBEBF35 –Services IIS,SMTPIn this command:
- Server specifies which server you want the action performed against. If you omit this parameter, the action is performed against the server where PowerShell is connected.
- Thumbprint specifies the certificate to configure via its thumbprint
- Services define which components you want to use the certificate with (e.g., IIS, SMTP, POP, IMAP, etc.)
If you specified SMTP as a service to add to the new certificate, you will be prompted on whether to overwrite the existing default SMTP certificate. Enter Y and press Enter.
Overwrite the existing default SMTP certificate?
Current certificate: 'B26C3C9B30A2A7371767275043816466CB921738'
Replace it with certificate: 'BD09E758DF572307128D878697D3A766BDBEBF35'
[Y] Yes  [A] Yes to All  [N] No  [L] No to All  [?] Help (default is Y): Y
In our example, we enabled IIS and SMTP for our renewed certificate. Let’s see how things look by running a slightly different Get-ExchangeCertificate command.
 C:\> Get-ExchangeCertificate | where {$_.IsSelfSigned -eq $false} | Format-List FriendlyName,Thumbprint,NotAfter,Services

FriendlyName : mail.exchangeservergeek.com
Thumbprint : BD09E758DF572307128D878697D3A766BDBEBF35
NotAfter : 7/15/2024 12:00:00 AM
Services : IIS, SMTP

FriendlyName : mail.exchangeservergeek.com
Thumbprint : B26C3C9B30A2A7371767275043816466CB921738
NotAfter : 7/15/2023 12:00:00 AM
Services : None
The green thumbprint, with a NotAfter date of 7/15/2024, identifies our new certificate. The blue thumbprint, with a NotAfter date of 7/15/2023, identifies the old certificate that is about to expire. Now that we have successfully assigned services to our new certificate let’s ensure it works as expected.
Checking your work
Now that we have our new certificate installed, we need to test it to ensure it works properly.
The easiest way to check is to enter your URL into a web browser. In our case, we enter https://mail.exchangeservergeek.com/ecp. This should result in no certificate errors. You can also select the padlock in the address bar and explore the properties of the certificate to verify the updated expiration date and certificate chain.

DigiCert’s SSL Certificate Checker is a great tool to confirm that the certificate is installed correctly and that all intermediary certificates in the chain are valid. You can check any certificate with this tool. It does not have to be a certificate purchased from DigiCert.
Test results all good? Awesome! Your certificate is correctly installed.
More than one server?
You will need to copy this certificate (and assign services) to each Exchange Server if you have multiple Exchange servers. To do this, check our article on importing and exporting Exchange certificates. If you have a load balancer in the mix, you may need to copy the certificate to that device and assign it to your Exchange Virtual IP/Virtual Server.
If you have Exchange Hybrid
If you have Exchange Hybrid, it is highly likely your old certificate is being used for hybrid mail flow (forced TLS) between Exchange Online and Exchange on-premises.
If you are running Exchange Hybrid, rerun the Hybrid Configuration Wizard and select your new certificate for hybrid mail flow. When the hybrid configuration wizard is complete, you can delete the old certificate from Exchange.

Delete the old certificate with PowerShell
Now that everything is correctly installed, we can delete the old certificate. To delete your old certificate, run the following command, specifying the old thumbprint. Hit Enter to confirm.
Note: I would recommend delaying the deletion of the old certificate for a few days just in case you need to roll back your changes.
 C:\> Remove-ExchangeCertificate -Server EX19-01 -Thumbprint B26C3C9B30A2A7371767275043816466CB921738
Confirm
Are you sure you want to perform this action?
Remove certificate with thumbprint B26C3C9B30A2A7371767275043816466CB921738 from the computer's certificate store?
[Y] Yes [A] Yes to All [N] No [L] No to All [?] Help (default is "Y"):
The old certificate will be removed. To confirm removal, rerun the Get-ExchangeCertificate cmdlet above.
Blocked from deleting the certificate?
If you are blocked from deleting the certificate because it is still bound to a connector, you can try a couple of things.
If the Hybrid Configuration Wizard created the connector, I would recommend rerunning the Hybrid Configuration Wizard and selecting the new certificate. Then, try to delete your certificate.
If the connector was not created with the Hybrid Configuration Wizard, or rerunning the Hybrid Configuration Wizard does not solve your problem, you can run the following commands.
First, we’ll need to capture the thumbprint from our new certificate. To do this, we will need to run the Get-ExchangeCertficate command. Using our previous example, the thumbprint highlighted in yellow, with the NotAfter date of 7/15/2024, is our new certificate.
 C:\> Get-ExchangeCertificate | Format-Table Subject, Thumbprint, NotAfter

Subject                          Thumbprint                               NotAfter
-------                          ----------                               --------
CN=mail.exchangeservergeek.com   BD09E758DF572307128D878697D3A766BDBEBF35 7/15/2024
CN=mail.exchangeservergeek.com   B26C3C9B30A2A7371767275043816466CB921738 7/15/2023
With the thumbprint identified, we store our certificate in a variable with the following command.
C:\> $tlscert = Get-ExchangeCertificate -Thumbprint BD09E758DF572307128D878697D3A766BDBEBF35We then need to grab two smaller pieces of data from that variable and store those two pieces in a new variable. In our example below, we capture the Issuer and Subject fields stored in the $tlscert variable, stitch them together, and store them in the $tlscertname variable.
C:\> $tlscertname = ('<I>'+$tlscert.issuer+'<S>'+$tlscert.subject)You can type $tlscertname if you are curious about what that variable now contains.
Now that we have everything we need, we can reconfigure the connector with the old certificate attached. If you are unsure which connector the certificate is bound to, try deleting the certificate again, and the error will identify the connector using the certificate.
In the example below, we reconfigured our “Outbound to Office 365” send connector with the new certificate using the Set-SendConnector command.
C:\> Set-SendConnector -Identity "Outbound to Office 365" -TLSCertificateName $tlscertname
Repeat the final command on any additional send connectors.
If this still does not work, or if when running Set-SendConnector, it reports that no changes were made, null out the certificate from the send connector, delete the old certificate, and rerun the command above.
To null out the certificate, issue the following command:
C:\> Set-SendConnector -Identity "Outbound to Office 365" -TLSCertificateName $null
If you need to change this on a receive connector, you will use the Set-ReceiveConnector cmdlet instead.
Further Reading
Here are some articles I thought you might like.
- Generate a Certificate Request for Exchange 2016 and Exchange 2019
- Complete a Certificate Request for 2016 and Exchange 2019
- Assign Services to a Certificate for Exchange 2016 and Exchange 2019
- Import & Export SSL Certificates in Exchange 2016 and Exchange 2019
- Generate a Certificate Request for Exchange 2013
- Complete a Certificate Request in Exchange 2013
- Assign Services to a Certificate in Exchange 2013
- Import & Export a Certificate in Exchange 2013
- Renew a Certificate in Exchange 2013

Great guide.
Also after Set-SendConntector command, can also run command :
Set-HybridConfiguration -TlsCertificateName $TLSCertName
This will update the HybridConfiguration info and prevent errors when doing checks.
Great guide. Much appreciated. Worked well.
Looks like a great guide, but I stumble with this in the start, any suggestions?
[PS] C:\Windows\system32>$certrequest = Get-ExchangeCertificate -Thumbprint xxxxxxxxxxxxxxxxxxxxxxxxxx | New-ExchangeCertificate -GenerateRequest -PrivateKeyExportable:$true
The input object cannot be bound to any parameters for the command either because the command does not take pipeline in
put or the input and its properties do not match any of the parameters that take pipeline input.
+ CategoryInfo : InvalidArgument: ([Subject]
CN…xxxxxxxxxxxxxxxxxx
:PSObject) [New-ExchangeCertificate], ParameterBindingException
+ FullyQualifiedErrorId : InputObjectNotBound,New-ExchangeCertificate
+ PSComputerName : xxxxxxxxxxxxxxxxxxxxxxxxxxxx
Late to the party, but for future reference you need to run EMS elevated.
If you wanted to add additional domains, would you also generate a new CSR or renew the existing cert and add the new domains on digicert after copy and pasting the csr?
I’d recommend creating a new CSR if you need to add domains.
Great guide Gareth. Before I stumbled onto your article, I tried other article/guides that kept erroring out. Really appreciate your step by step write up on this as it just works.
Seconded!
When I try to import license file I got below error :
Exception calling “ReadAllBytes” with “1” argument(s): “Could not find file ‘\\exchange\f$\2025Certificate\filename.cert’.”
At line:1 char:1
+ Import-ExchangeCertificate -FriendlyName 2024 -FileData ([System.IO.F …
+ ~~~~~~~~~~~~~~~~~~~~~~~~~~~~~~~~~~~~~~~~~~~~~~~~~~~~~~~~~~~~~~~~~~~~~
+ CategoryInfo : NotSpecified: (:) [], MethodInvocationException
+ FullyQualifiedErrorId : FileNotFoundException
Hi Wael,
Seems like it has problems finding the certificate at the path. Or it is possible the Exchange Trusted Subsystem does not have permissions to that path or file.
Great write-up, my second time using it as a quick reference. Thank you
Good instructions. How would you remove SAN names from the certificate before sending the CSR to the 3rd party CA?
In that case you would want to create a CSR for a brand-new certificate, rather than renewing the existing one. https://supertekboy.com/2023/07/06/generate-a-certificate-request-for-exchange-2016-and-2019/
I have installed my new certificates and enabled them using the thumbprint command but when I check on the ecp web page I still see the old one.
I need to delete the old certificate (which is still valid) for the new to work?
Thank you
Hi cgher,
The certificate will be active as soon as you assign services to them. If you have Exchange hybrid with Exchange Online, I suggest rerunning the Hybrid Configuration Wizard and pick the new certificate. If you have a load balancer you may also need to replace your certificate there as well. Once all this is done, you should be able to delete your old certificate.
I assigned services to the new certificate. I also run the hybrid config wizard and put the new certificate. I will also do the load balancer and see if anything changes
I still see the old certificate event though both are present and made all the changes. is there a way to default to the new one without deleting the old? Because I am worried that if I delete the old and something goes wrong I wont have time to resolve it.
Hi cgher,
I wonder if your load balancer is still presenting the old certificate. What certificate do you see if you go direct to each of your servers? You need to make sure you repeat the assignment of services on every server. For example, https://servername/owa or if you are RDP’d to the server you can do https://localhost/owa. If the correct certificate is presented from those URLs, then the issue is with the load balancer, and you need to make sure the certificate is bound to the Exchange VIP in your load balancer. If it is the wrong certificate from those two URLs then double check that certificate is bound to IIS on each of your servers (and any additional services, your old certificate was bound to).
Awesome mate thanks heaps. Your steps made this easy.
Your instructions and examples are very detailed. Greatly appreciated.