In the fourth part of our Exchange lab series we:
- Discussed the importance of a correctly configured namespace
- Configured URLs via Exchange Admin Center (EAC)
- Configured URLs via PowerShell
- Configured split DNS
In the fifth part of our Exchange lab series we:
- Generate a certificate request
- Process a certificate request
- Complete a certificate request
- Assign services to a certificate
- Check our work
Let’s get started.
Generate a Certificate Request
In the last part of our series, we got our namespace configured. Now we need to make sure we have a certificate for that namespace.
Note: Adding a certificate to your lab is optional. Whether you choose to go with a certificate really depends on how close to a production experience you want to be. You can always purchase a certificate for your lab and import it into production later on. If a certificate is not critical for your lab experience you may still wish to review this section in preparation for production.
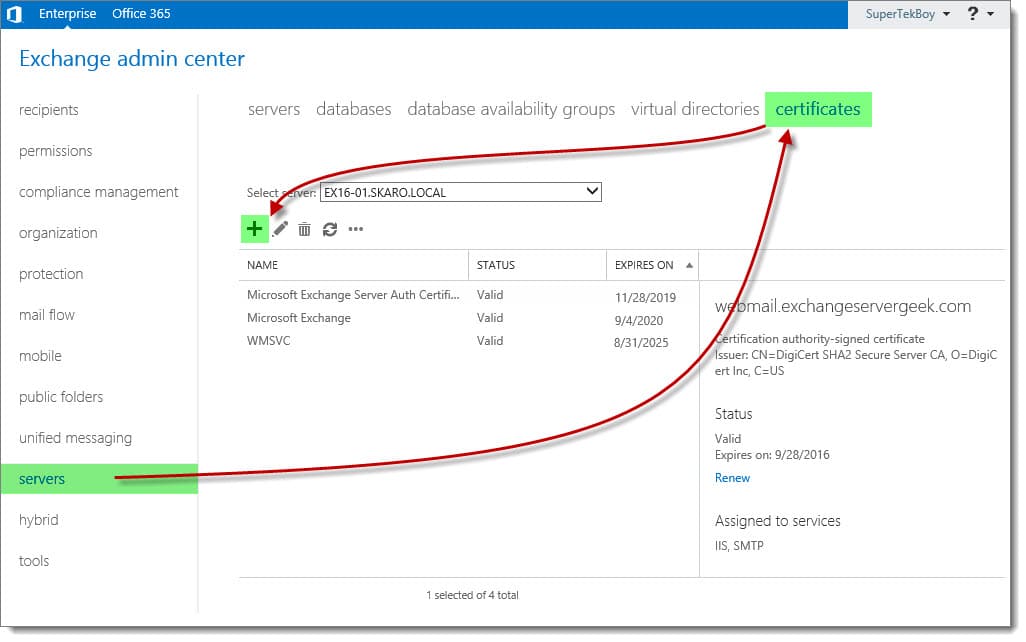
Log in to the Exchange Admin Center (EAC). Select the Servers tab and Certificates sub-tab.
This page displays all currently installed Exchange certificates. These three self-signed certificates are installed with Exchange out of the box. The self-signed certificate titled “Microsoft Exchange” is the one that Exchange is currently using for all of its web services. That’s the one that we will replace with a trusted 3rd party certificate.
Like its predecessor, Exchange 2016 maintains the Certificate Request Wizard. This wizard takes all the guesswork out of generating a certificate request.
To launch the wizard click the New (![]() ) button.
) button.
In the New Exchange Certificate wizard select Create a request for a certificate from a certification authority. Click Next.
[Read more…] about Install Exchange 2016 in your lab (Part 5)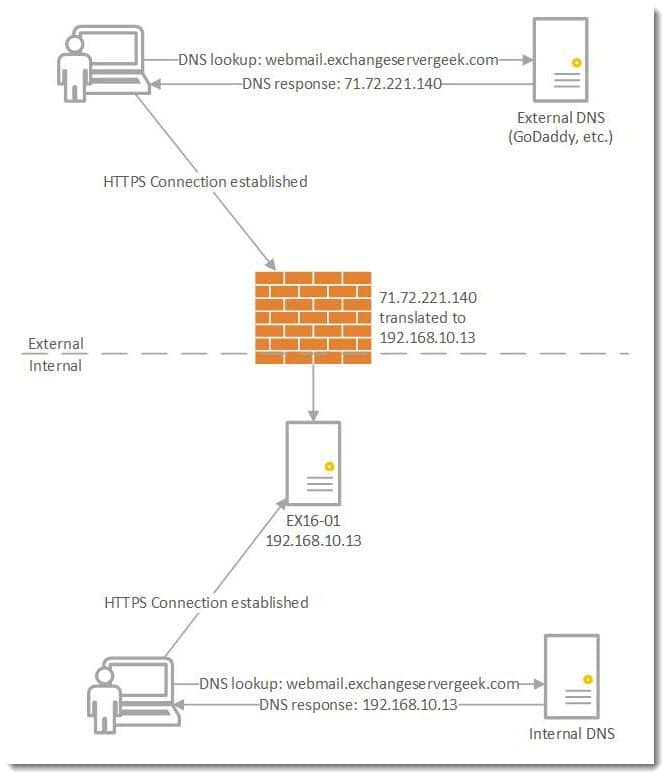


