How to renew a certificate in Exchange
In this article, we explore the process of renewing a certificate in Exchange. We demonstrate how to accomplish this using the Exchange Admin Center and PowerShell. The high-level steps include:
- Create a new certificate signing request
- Upload the certificate signing request to your certificate provider
- Download the processed certificate from your certificate provider
- Install the certificate on Exchange
- Export the new certificate to a PFX file
- Import the certificate to all other Exchange servers
- Assign Exchange services to the new certificate on each server
- Delete the old certificate
Let’s get started!
Note: These steps are identical for Exchange 2013, Exchange 2016 CU22 and earlier, and Exchange 2019 CU11 and earlier. If you are using Exchange 2016 CU23 or greater or Exchange 2019 CU12 or greater, you must renew your certificate with all new PowerShell commands covered in the following article.
Renew a Certificate with Exchange Admin Center
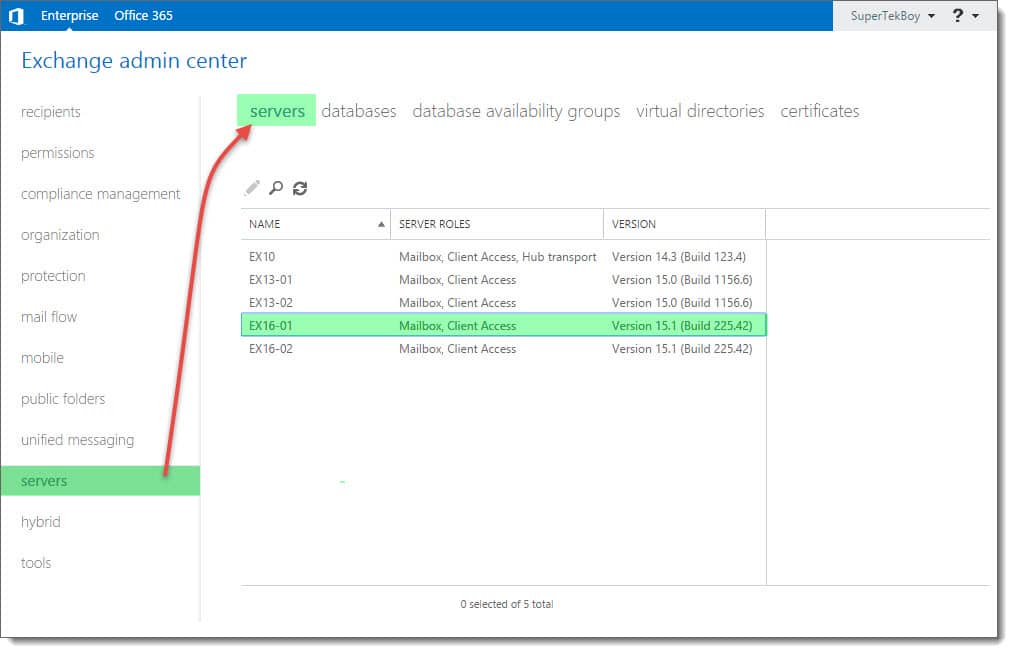
Log in to the Exchange Admin Center (EAC). Select the Servers tab and Certificates sub-tab.
This page displays all currently installed Exchange certificates. In our example, we see four self-signed certificates. We also see the certificate that we acquired from a trusted certificate authority (affiliate). This certificate is named webmail.exchangeservergeek.com. This is the certificate we will be renewing.
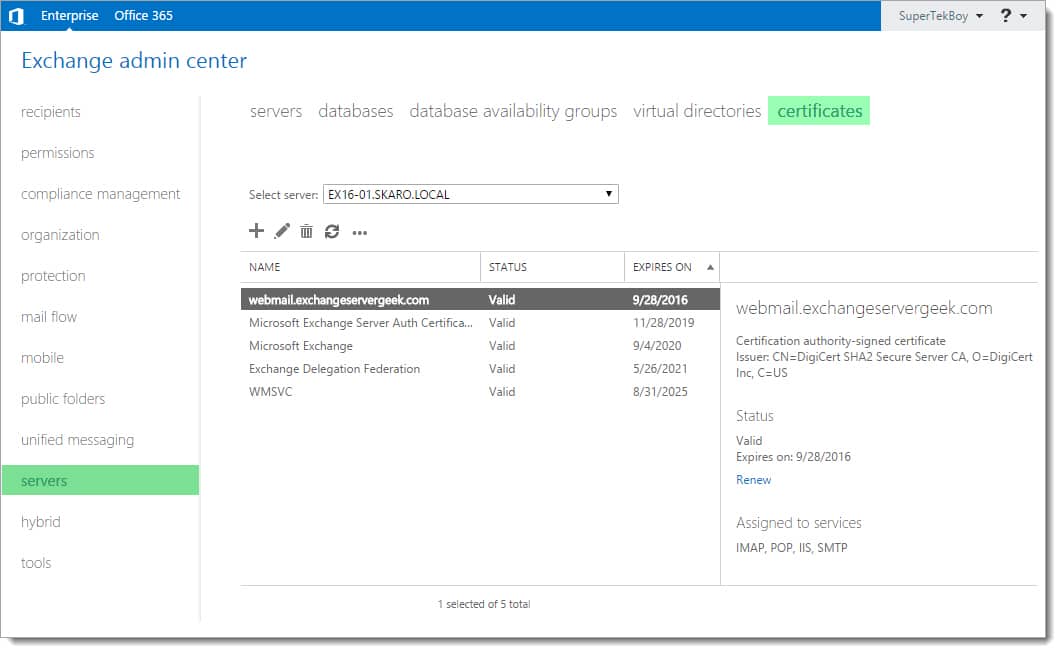
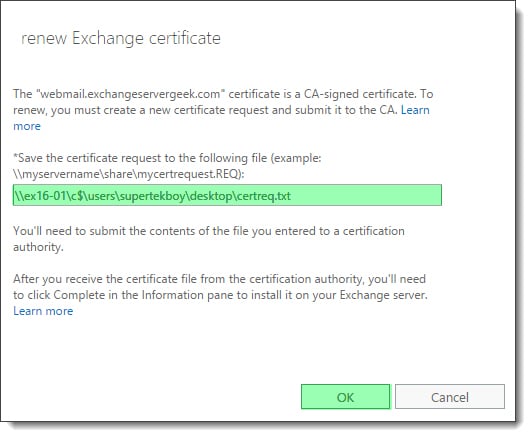
Select the certificate to be renewed (in our case webmail.exchangeservergeek.com) and click the Renew link in the task pane to the right.

The renewal process will create a new certificate request to submit to our certificate authority. Specify a location to save this certificate request. This location must be in the form of a UNC path. In our example, we specify a file called certreq.txt at the path \\ex16-01\c$\users\supertekboy\desktop\. This will create a text file on our server’s desktop. Click Ok.